Scope/Description
- This article will cover creating and managing NFS shares in Houston UI
Prerequisites
- Access to Houston UI
- Cockpit File Sharing Module and Packages Installed
- NFS Packages Installed
- NFS Services Running and Enabled
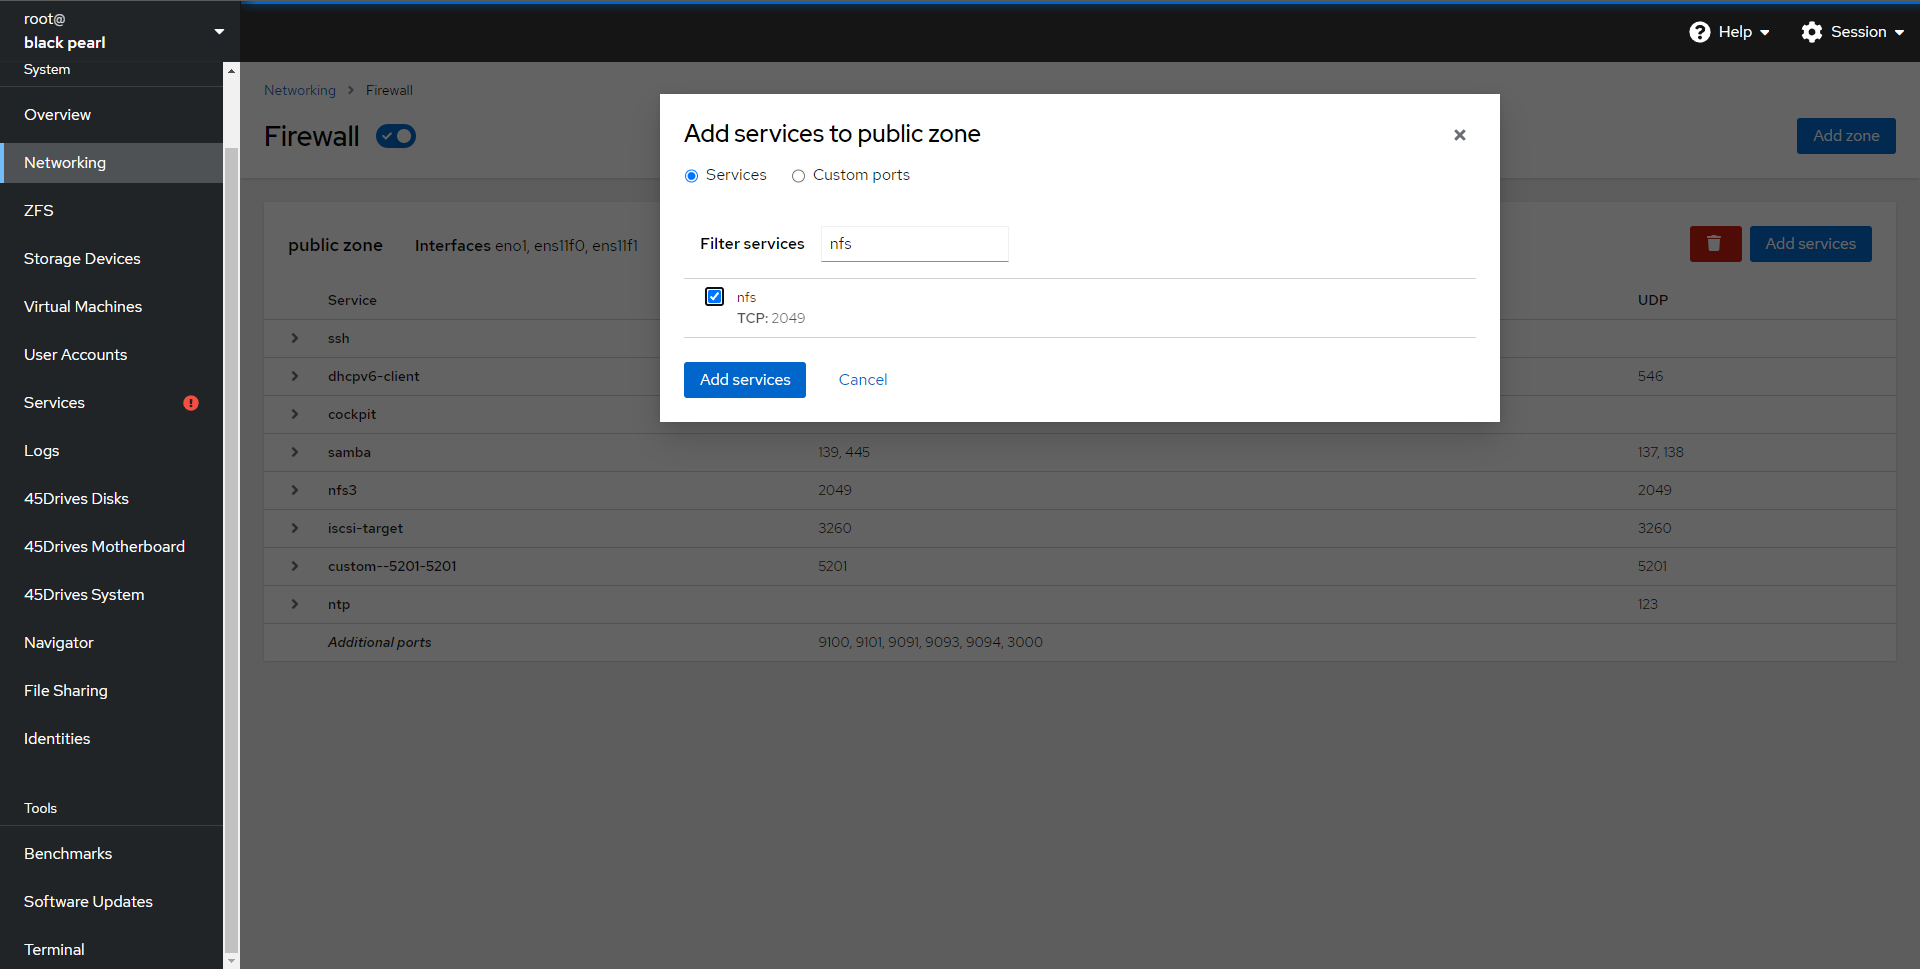
- NFS Ports Open on Firewall (111/tcp, 111/udp, 20048/tcp, 20048/udp, [2049/tcp, and 2049/udp if NFSv3])
Steps
- In Houston UI, navigate to the File Sharing tab.
- Once here, we can select the NFS Tab to begin configuring our NFS shares.
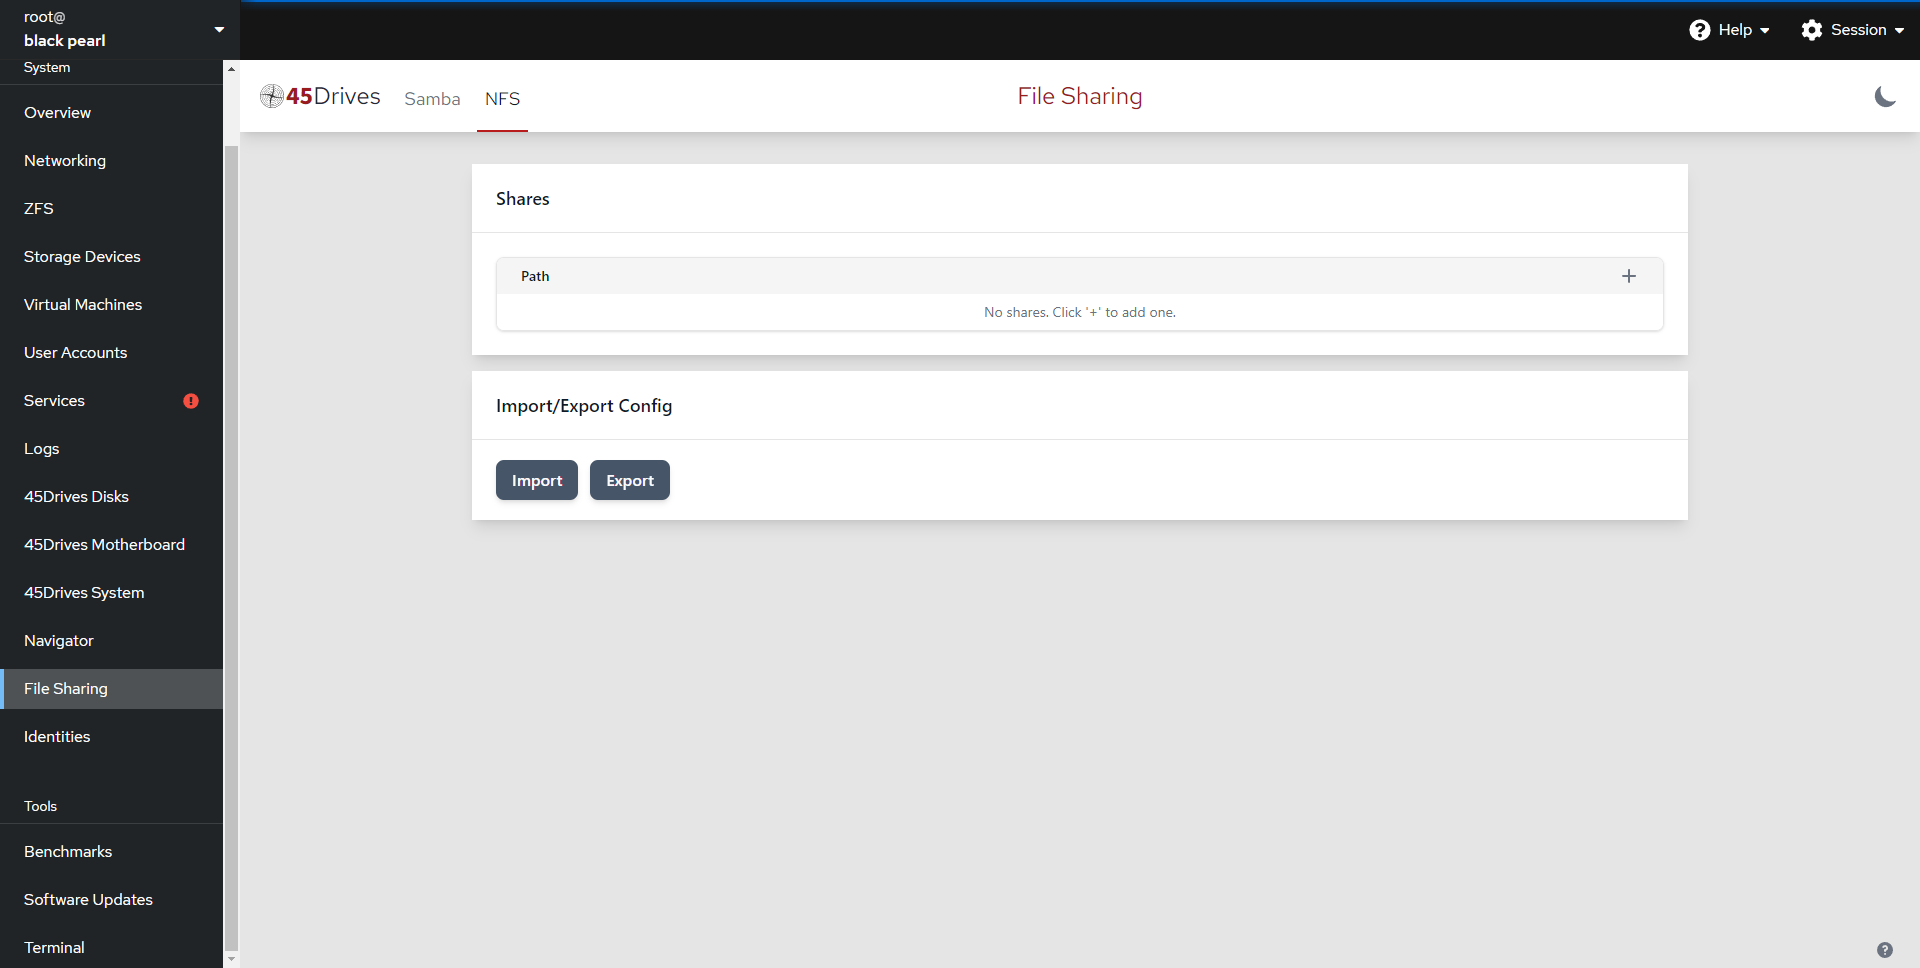
- We first begin to create our NFS export by selecting the Plus Icon on the right.
- We can define the path to be shared out, select the range of IPs for client access, and add any additional NFS options to our share. If we leave Client IP empty, it will default to everyone, and if we leave Options empty, it will default to ‘rw,sync,no_subtree_check’.
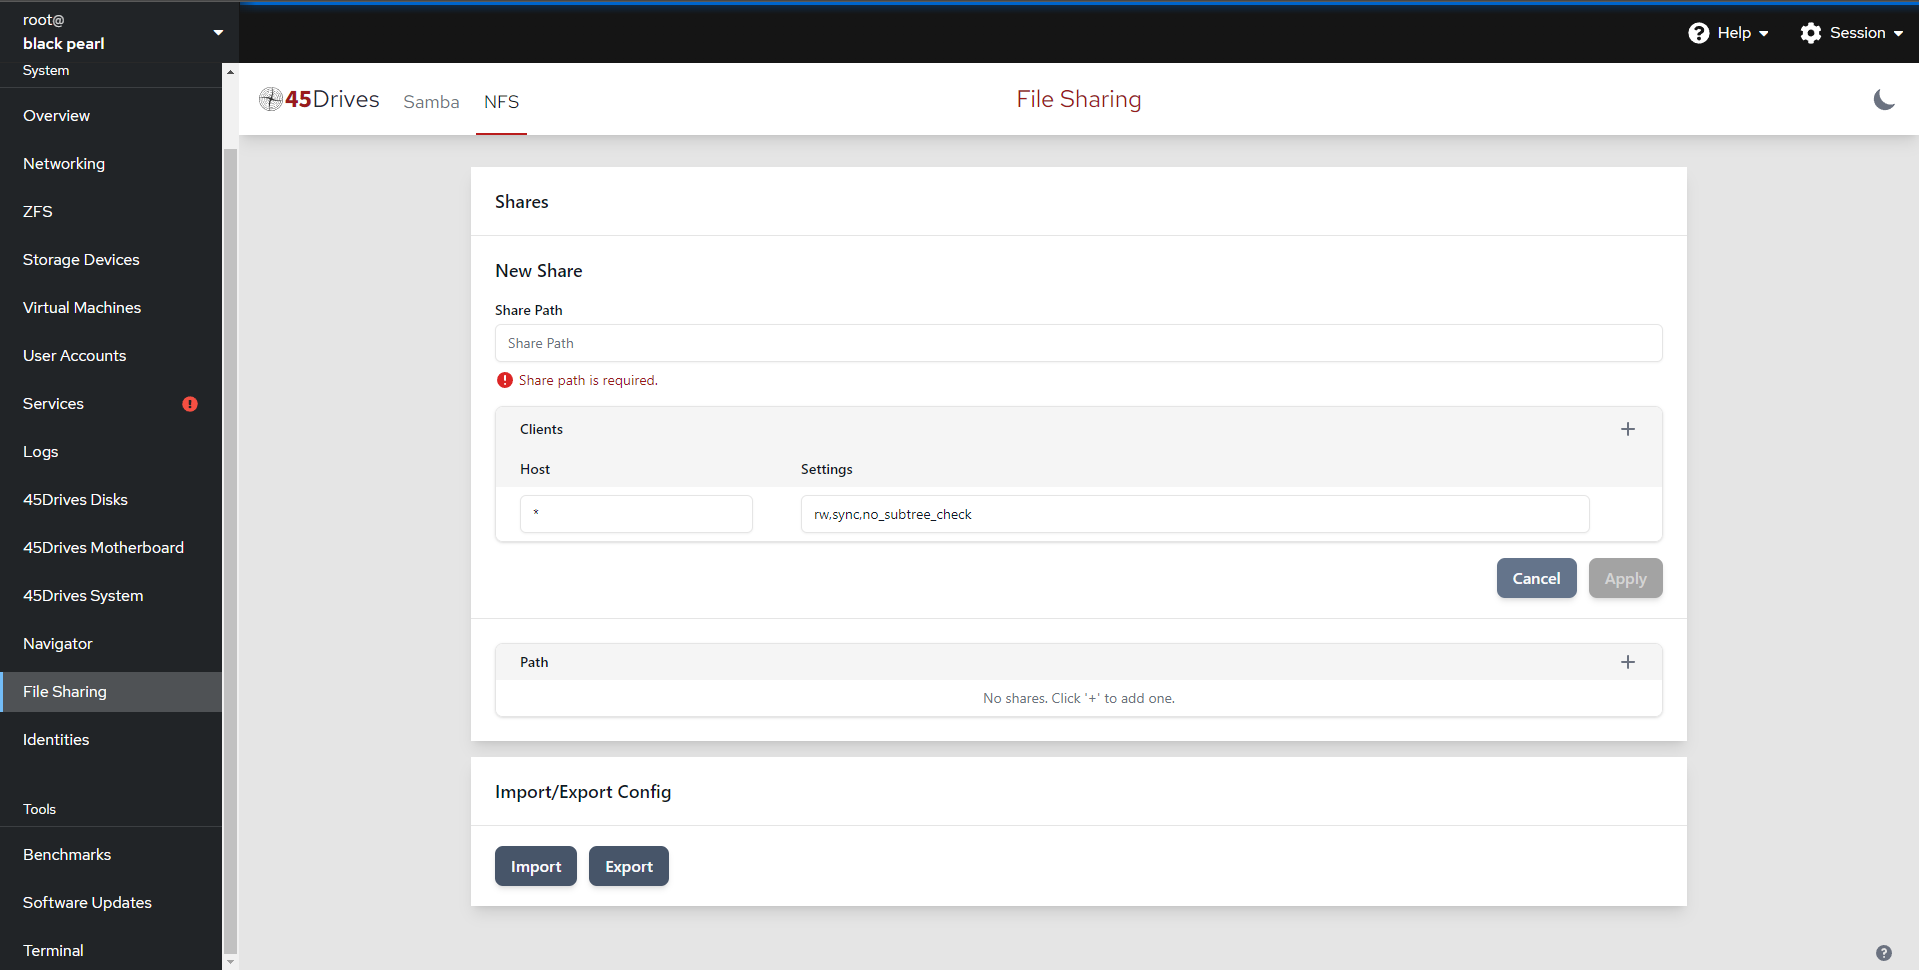
- Here we create an NFS share, with a path to our NFS dataset at /tank/nfsfs. We have set the Client IP to be available to 192.168.*.*. For Options we set “rw,sync,no_subtree_check,no_root_squash“


- Open firewall port for NFS
Verification
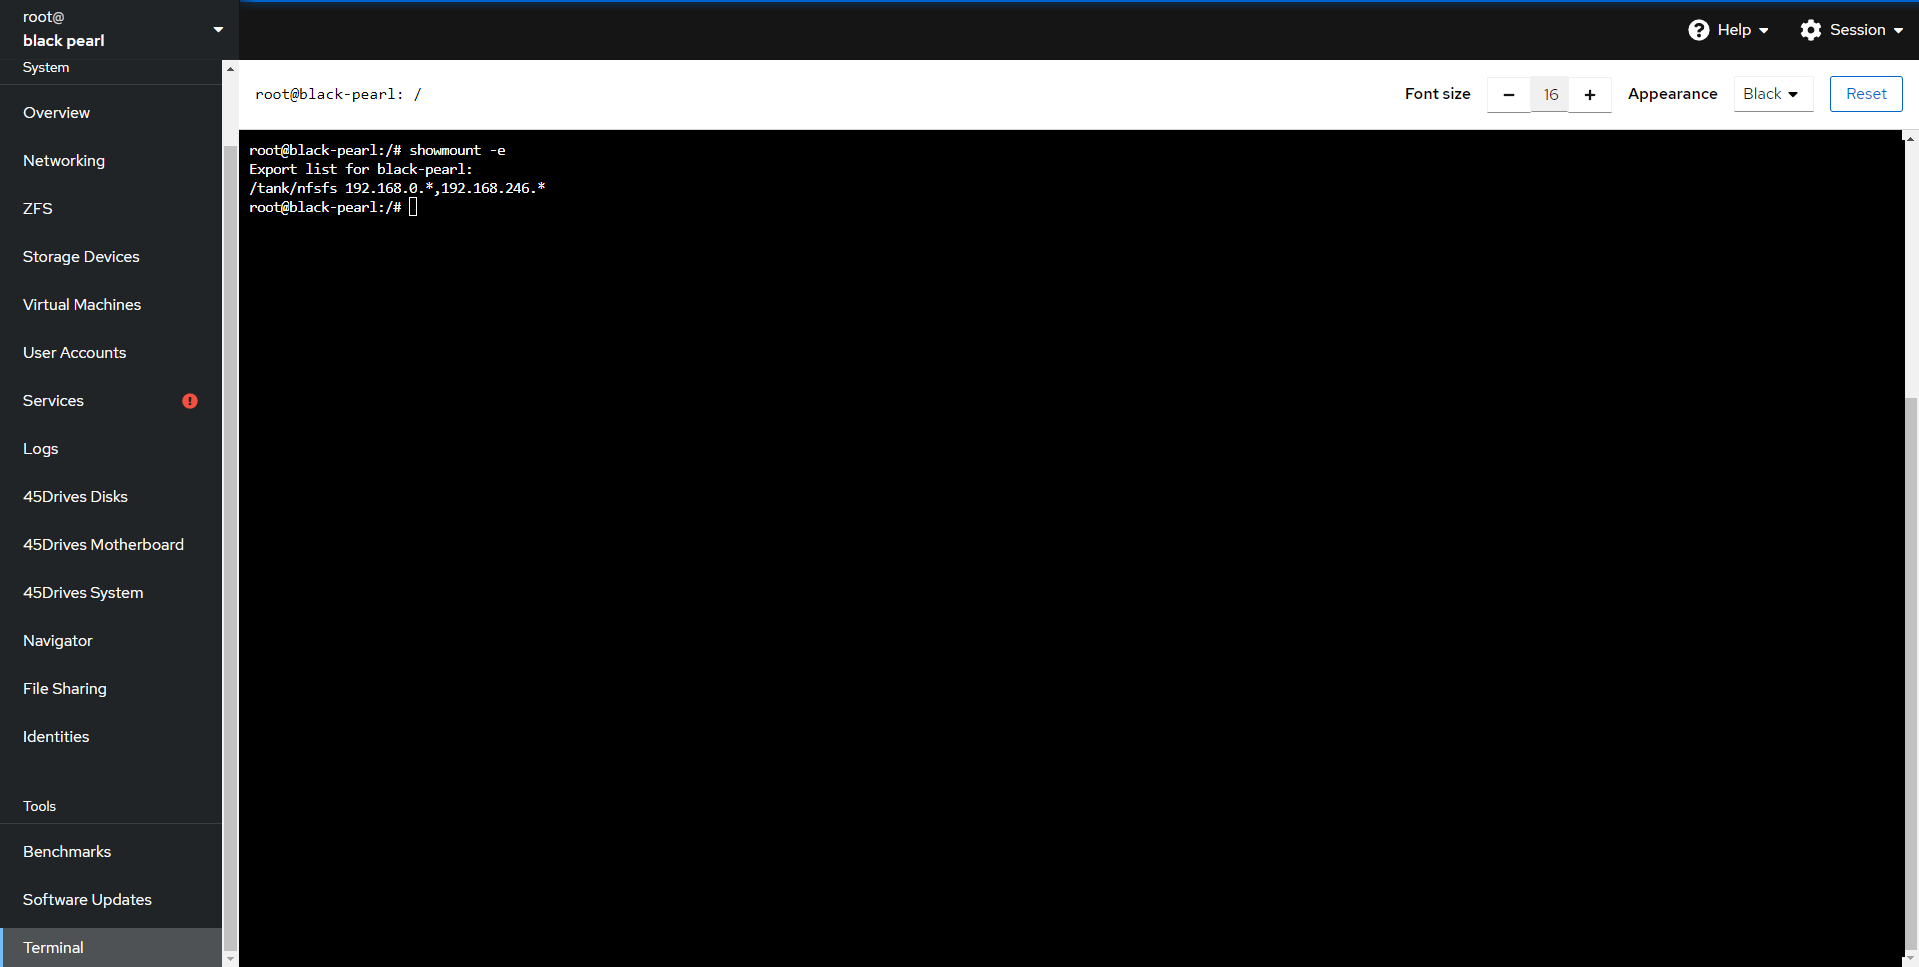
- Verify that the shares is active with “showmount -e”
- Mount share on another server to ensure access
Troubleshooting
- The NFS section of File Manger uses the file /etc/exports.d/cockpit-file-sharing.exports to add exports to the NFS-server. In order for the UI portion to work there needs to be a certain syntax to the exports file.
# Name: Name of Export
# Clients: Client 1 Name, Client 2 Name
"/path/to/export" client-1-ip(client,1,permissions) client-2-ip(client,2,permissions)
- If any export does not follow this syntax, the UI will throw an error,
- Ensure you have configured the Firewall correctly.
- Ensure you have the nfs-kernel-server/nfs-server service running and enabled.
- Ensure you have the correct hostname set in /etc/hosts for the 127.0.1.1 address.
- If trying to mount on Mac and connection fails add insecure to the NFS Options and make sure the following service is running “rpc-statd.service“.
- We’ll also have to add an option to the /etc/default/nfs-kernel-server file.
vim /etc/default/nfs-kernel-server
- Find the RPCMOUNTDOPTS line, and change it to:
# Number of servers to start up
RPCNFSDCOUNT=8

# Runtime priority of server (see nice(1))
RPCNFSDPRIORITY=0

# Options for rpc.mountd.
# If you have a port-based firewall, you might want to set up
# a fixed port here using the --port option. For more information,
# see rpc.mountd(8) or http://wiki.debian.org/SecuringNFS
# To disable NFSv4 on the server, specify '--no-nfs-version 4' here
RPCMOUNTDOPTS="--manage-gids --port=XXXXX"

# Do you want to start the svcgssd daemon? It is only required for Kerberos
# exports. Valid alternatives are "yes" and "no"; the default is "no".
NEED_SVCGSSD=""

# Options for rpc.svcgssd.
RPCSVCGSSDOPTS=""
- Where XXXXX is a number of your choosing. Now add a custom port for port XXXXX in the firewall, and restart the nfs-kernel-server service.
Further Reading
Views: 3840