Scope/Description
- This article will demonstrate how to use batches in Killdisk to clone / image hard drives from a source drive.
Prerequisites
- Killdisk Application Installed.
- Hard Drive Pre-Imaged with OS / Filesystem of your choosing.
Steps
First, you will want to insert the clone source drive into the system and confirm it is being detected in the Killdisk software.

Second, to set the drive as a Clone Source, you will want to go to the top bar in Killdisk and select Tools > Preference > Clone Sources.
In this section of the Preferences’ window, you will all drives that are currently being detected by Killdisk. Select the slot in which the drive you place that you wish to be the Clone Source for your Batch(es).
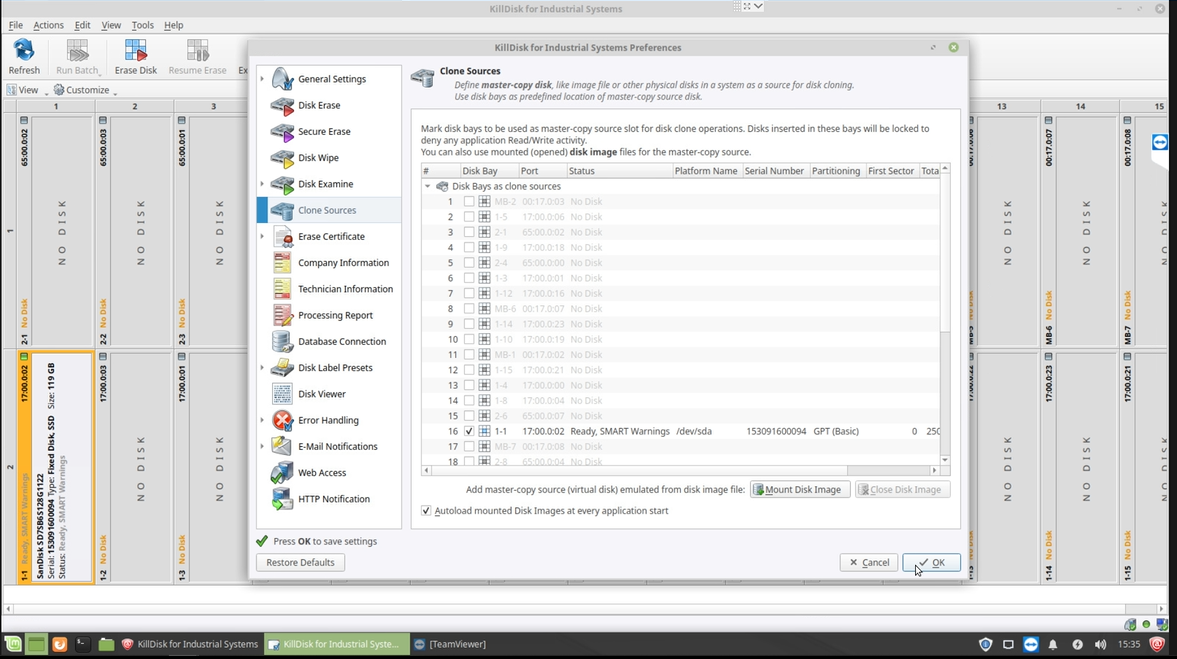
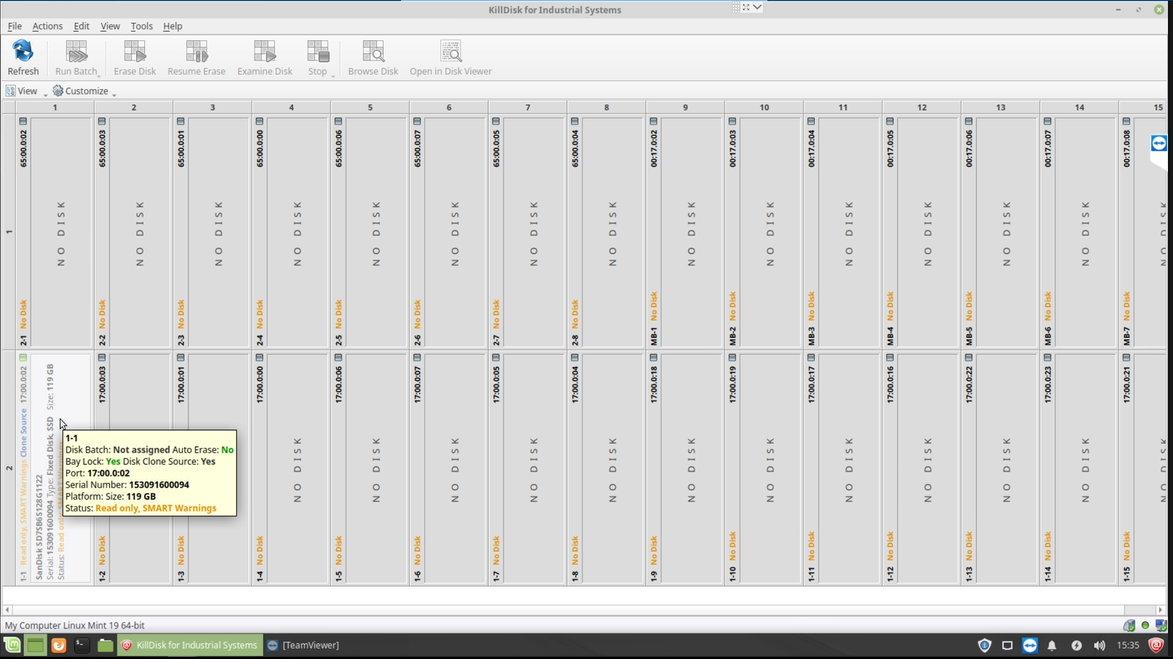
This is will the drive bay in Killdisk to lock and be marked as a Clone Source.
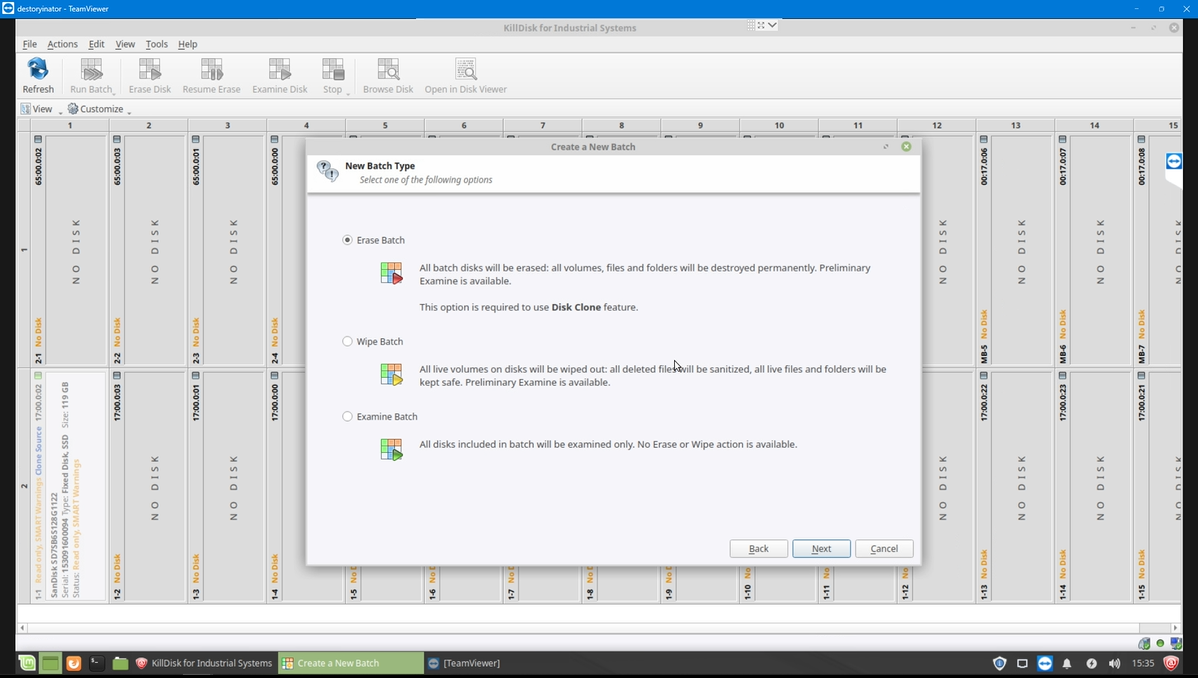
Next, you will want to create a new batch if you don’t already have one created. Please refer to our guide on this process here: https://knowledgebase.45drives.com/kb/kb450409-creating-batches-in-killdisk/
You can also use this clone source in a pre-existing Batch by editing the Preferences of the batch before running it.
During the creation of a new batch, you will want to select Erase Batch as that is the only type that allows Disk Cloning
During the creatation of the batch, when you get the Disk Clone section, you will be able to select only the pre-defined Clone Source drives detected in Killdisk.
You also have the ability to mount an .iso image to clone drives as well.

Once the batch is created, you can add additional drives to the system and add them to your newly created Batch. In this example below, I created a batch called “Windows Imaging Batch” and assigned slots 1-8 and 1-9 to the batch.
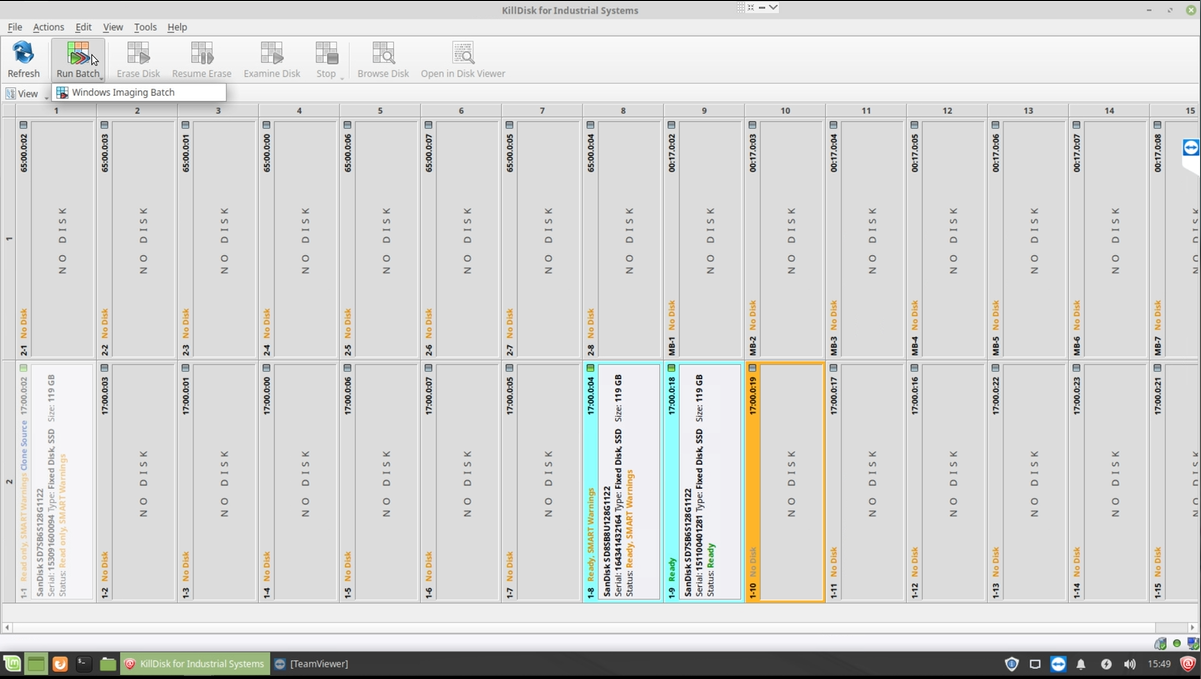
When you go to run the batch, and the Batch Preference window opens up, it should have the Clone source drive bay listed and drive bays you assigned to the batch.
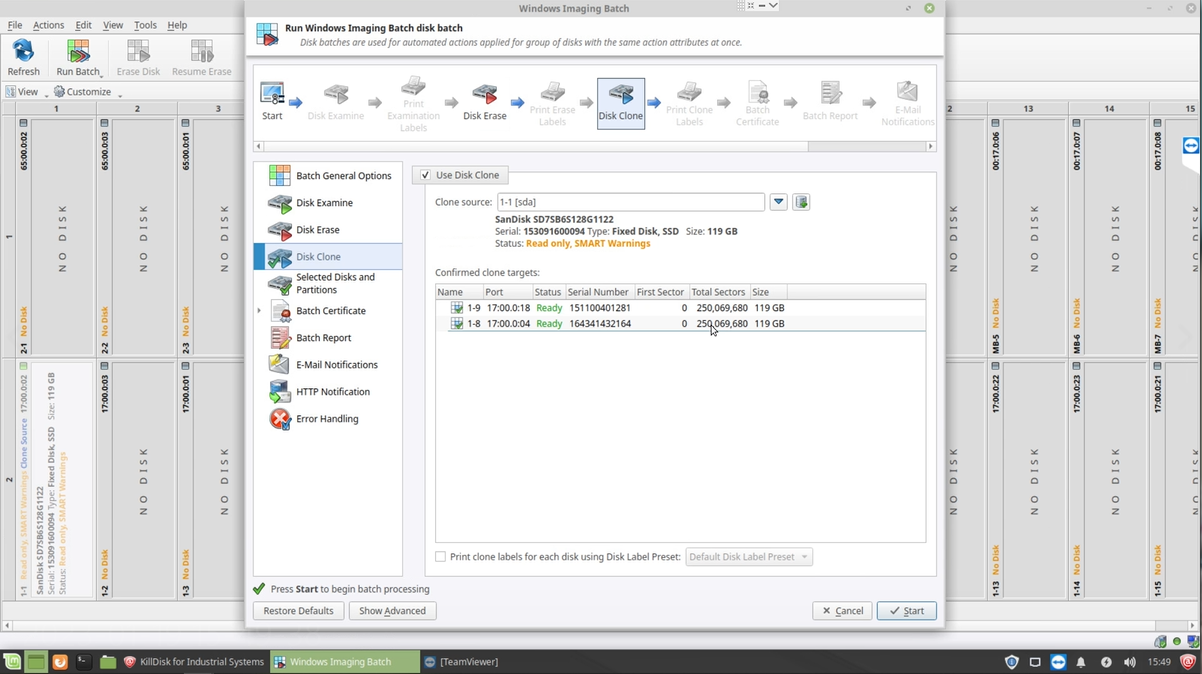
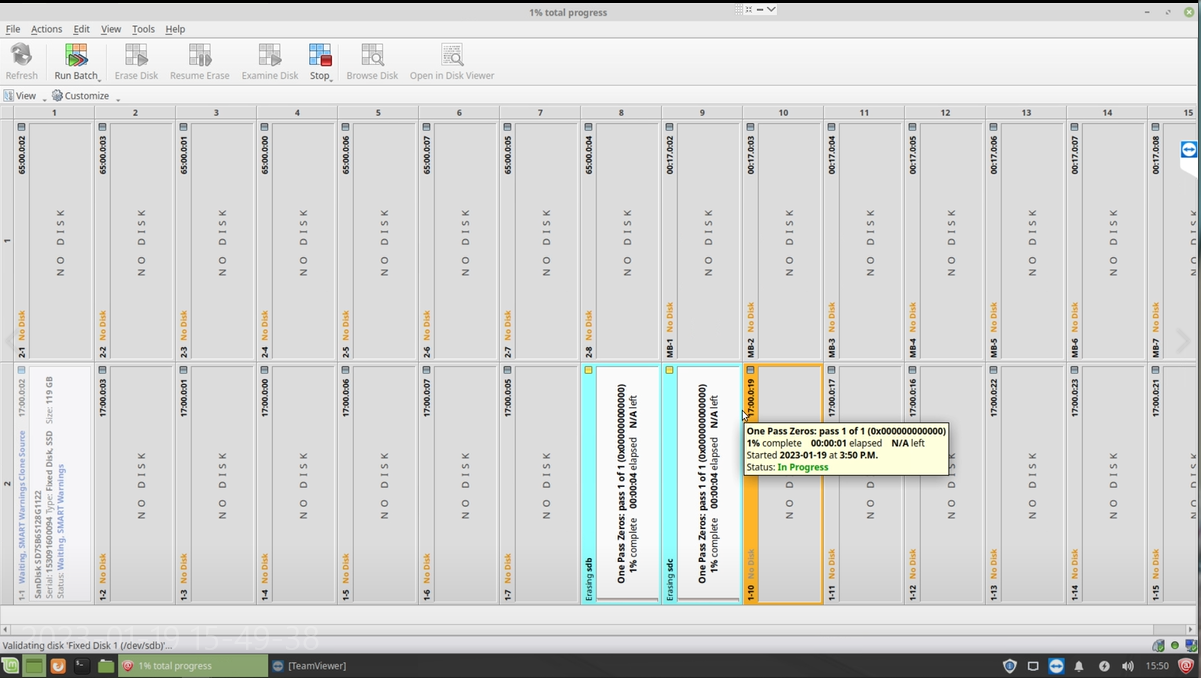
Once you click Start, and type in the pass-phrase, the Batch will begin with wiping the drives first before cloning from the source drive.