Table of Contents
Scope/Description
- This article will detail the process of creating a hardware raid in the Megaraid BIOS Configuration Utility.
Prerequisites
- Storage Server with LSI hardware raid HBA’s.
- Physical console access to use the BIOS config, or IPMI configured. IPMI Configuration Guide
Steps
- When the server is booting, click [CTRL + R], until you access the MegaRaid BIOS Configuration Utility. See image below.
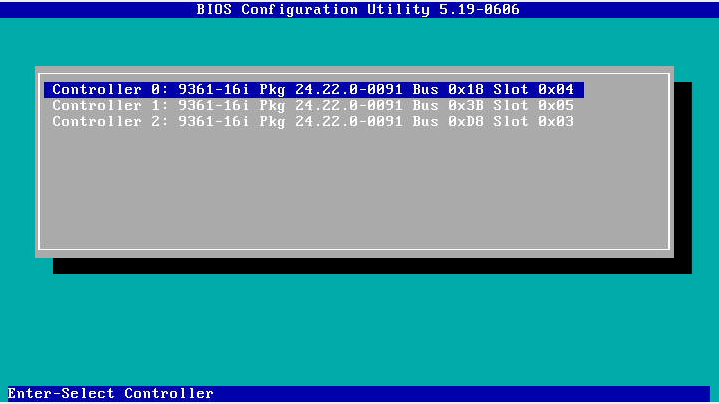
- As these are hardware raid cards, each card will need to have a separate Raid configured. Select the controller you wish to configure a Raid device on. In this example, I have 6 drives in Row 3, corresponding to Controller 2. Highlight the card you wish to configure, then click ‘Enter’. For a 45Drives Storinator Unit, the row will correspond to the identifier plus 1. For example Controller 0 -> Row 1, Controller 1 -> Row 2.

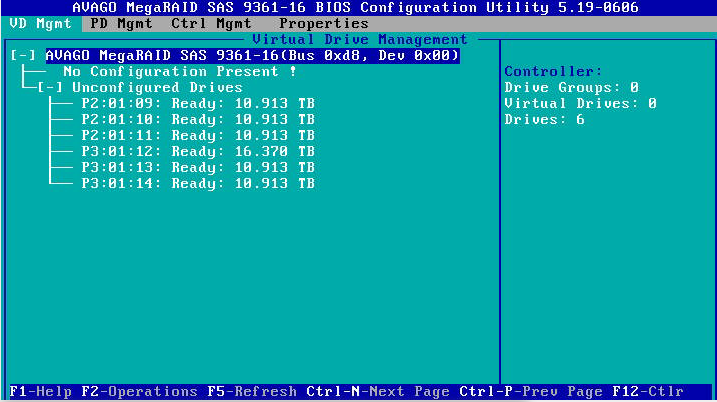
- Confirm your drives are showing up, and the expected amount is present. In this example, I have 6 drives on this HBA device. In the image below, the drives are labelled with identifier P2:01:XX. If you have a 45Drives Storinator, the last octet plus 1 will identify which slot it is in. For example, drive P2:01:09 is in Slot 10, 10 -> Slot 11, 11 -> Slot 12, etc.

- Using the arrow keys, select the AVAGO MegaRAID SAS line, then click enter. A prompt will open to create a new Virtual Device (VD).
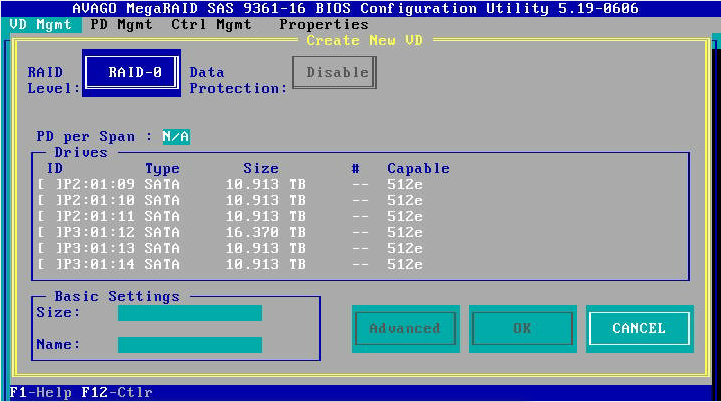
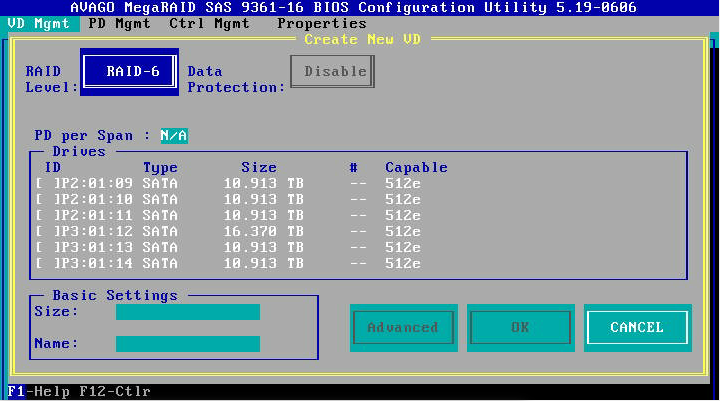
- Here you can select the Raid you wish to create. In this example, I will choose Raid 6. Select your Raid level.
- Now you can select the disks you wish to add to the Virtual Drive. In this example, I chose all 6 drives present on the HBA. Highlight a drive, then either click “Enter” or “Space Bar” to select, an “X” will populate when a drive has been selected. See image below.
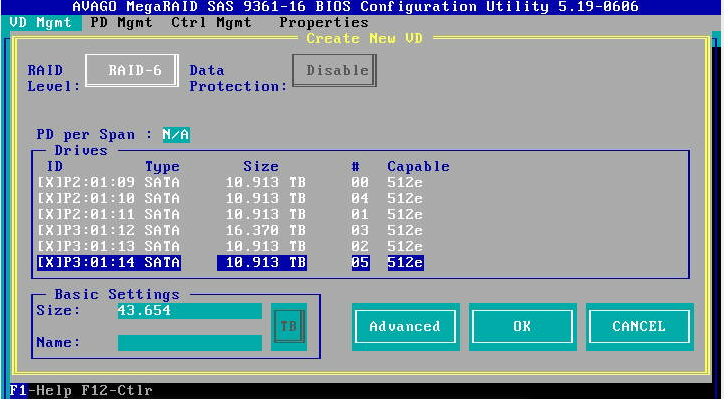
- Input a name for the Virtual device.
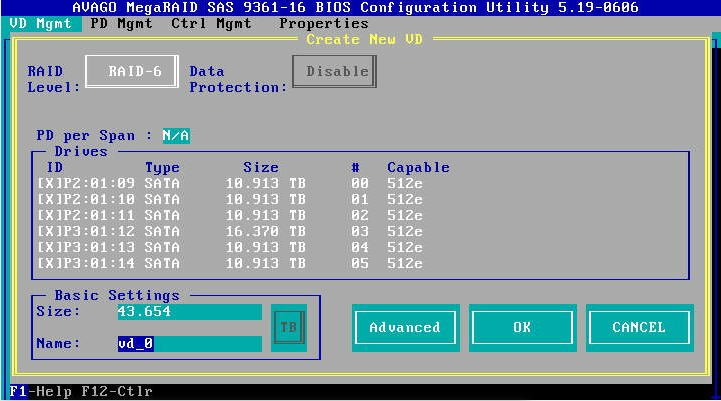
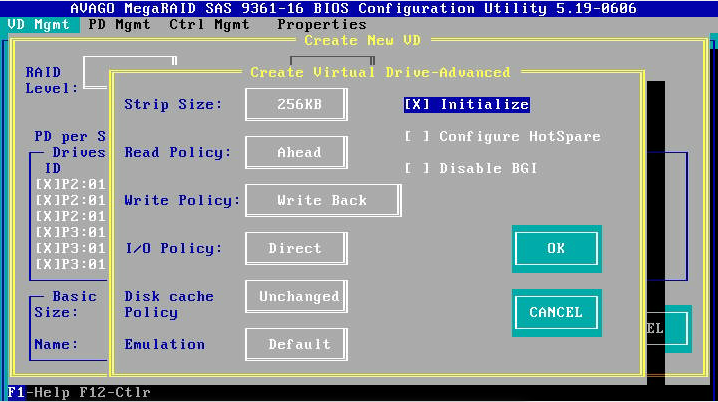
- Navigate to Advanced and click “Enter”. For a new array we are going to want to initialize the Virtual Device. Then select “OK”
Initializing will destroy any data on the drives. Ensure you select the correct drives, if the system has drives in use.
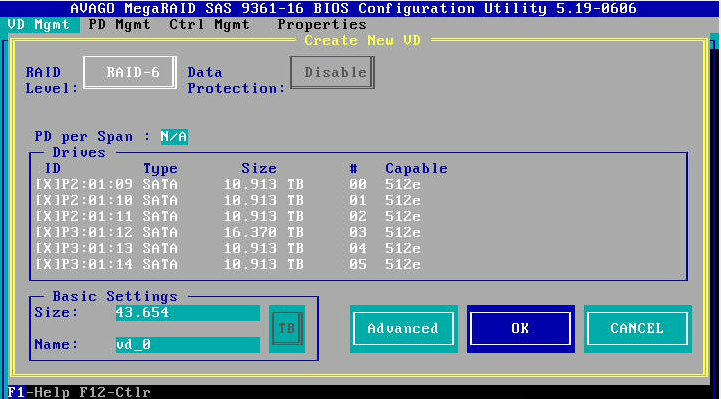
- After confirming all is correct, you can now select “OK” to start the raid creation.
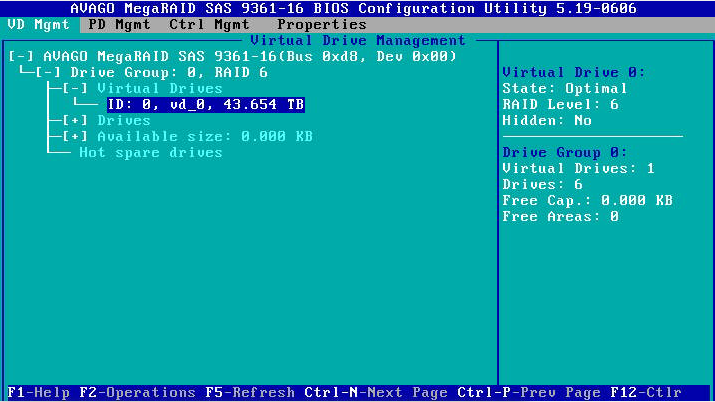
- Now you should see your newly created Virtual Device.
- Depending on your configuration, you can either create more Virtual Devices on this HBA, following the same steps as above. Or click “ESC” to go back to the controller selection to configure another HBA in your server.
Verification
- Now you should see your newly created Virtual Device.
Views: 4109