Table of Contents
- Scope/Description
- Prerequisites
- Steps
- Install necessary packages for iSCSI
- Create a ZFS dataset to store iSCSI images
- Configuring iSCSI Target
- Create Block Backstores for iSCSI LUNs
- Create an iSCSI Target
- Create iSCSI LUNs
- Configure ACL (Initiator IQN)
- Configure Authentication
- Exit and Save the Configuration
- Open Firewall for iSCSI and enable the iSCSI service
- Verification
- Troubleshooting
Scope/Description
In this article, we’ll cover setting up iSCSI targets on Rocky Linux.
(We don’t recommend using bonds with iSCSI, we recommend using Multi-path instead)
Prerequisites
- A ZFS storage array configured
Steps
Install necessary packages for iSCSI
dnf -y install targetcli
Create a ZFS dataset to store iSCSI images
- Create a ZFS dataset with your naming scheme of choice, in this case we’ll use “images”
- Multiple iSCSI LUNs can be stored in this singular dataset or new datasets can be created for each iSCSI LUN.


Configuring iSCSI Target
Create Block Backstores for iSCSI LUNs
- Before using targetcli, we’ll need to create a sparse image file. Creating large files in targetcli can be a very time consuming process.
cd /tank/images
dd if=/dev/zero of=lun0 bs=1 count=0 seek=1T
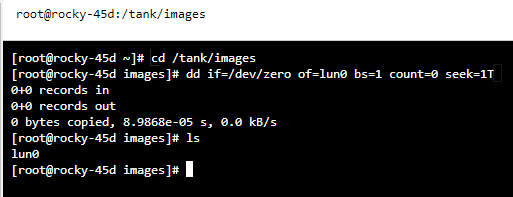
- The above will create a 1 TB sparse image file named “lun0”
- Now we’ll launch targetcli and create a fileio backstore with the sparse image we’ve created
targetcli
cd backstores/fileio
create lun0 /tank/images/lun0
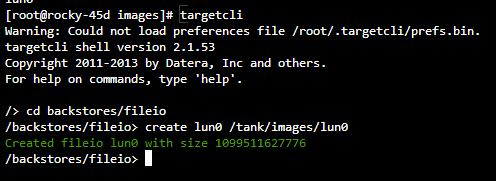
- Verify the block device has been created in targetcli

Create an iSCSI Target
- Create the iSCSI target by selecting a name
- Naming scheme: iqn.YYYY-MM.REVERSE.DOMAIN.NAME:unique
- For this example, we’ll be using “iqn.2021-11.fourfive.lab:test.environment”
cd /iscsi
create iqn.2021-11.fourfive.lab:test.environment

Create iSCSI LUNs
cd iqn.2021-11.fourfive.lab:test.environment/tpg1/luns
create /backstores/fileio/lun0

Configure ACL (Initiator IQN)
- When creating the ACL, it needs to be the name of the initiator IQN name of the client that will be connecting to the LUN.
- In this example, the IQN name of the client will be “iqn.2019-05.com.archie:client”

Configure Authentication
- We’ll need to configure the userid and password when connecting to the LUN from the client. This step is optional.
- Choose any name and password for userid and password
set auth userid=username
set auth password=password

Exit and Save the Configuration

Open Firewall for iSCSI and enable the iSCSI service
- In the Houston UI, navigate to Networking > Firewall > Edit Zones and Rules
- Add “iscsi-target” to the services
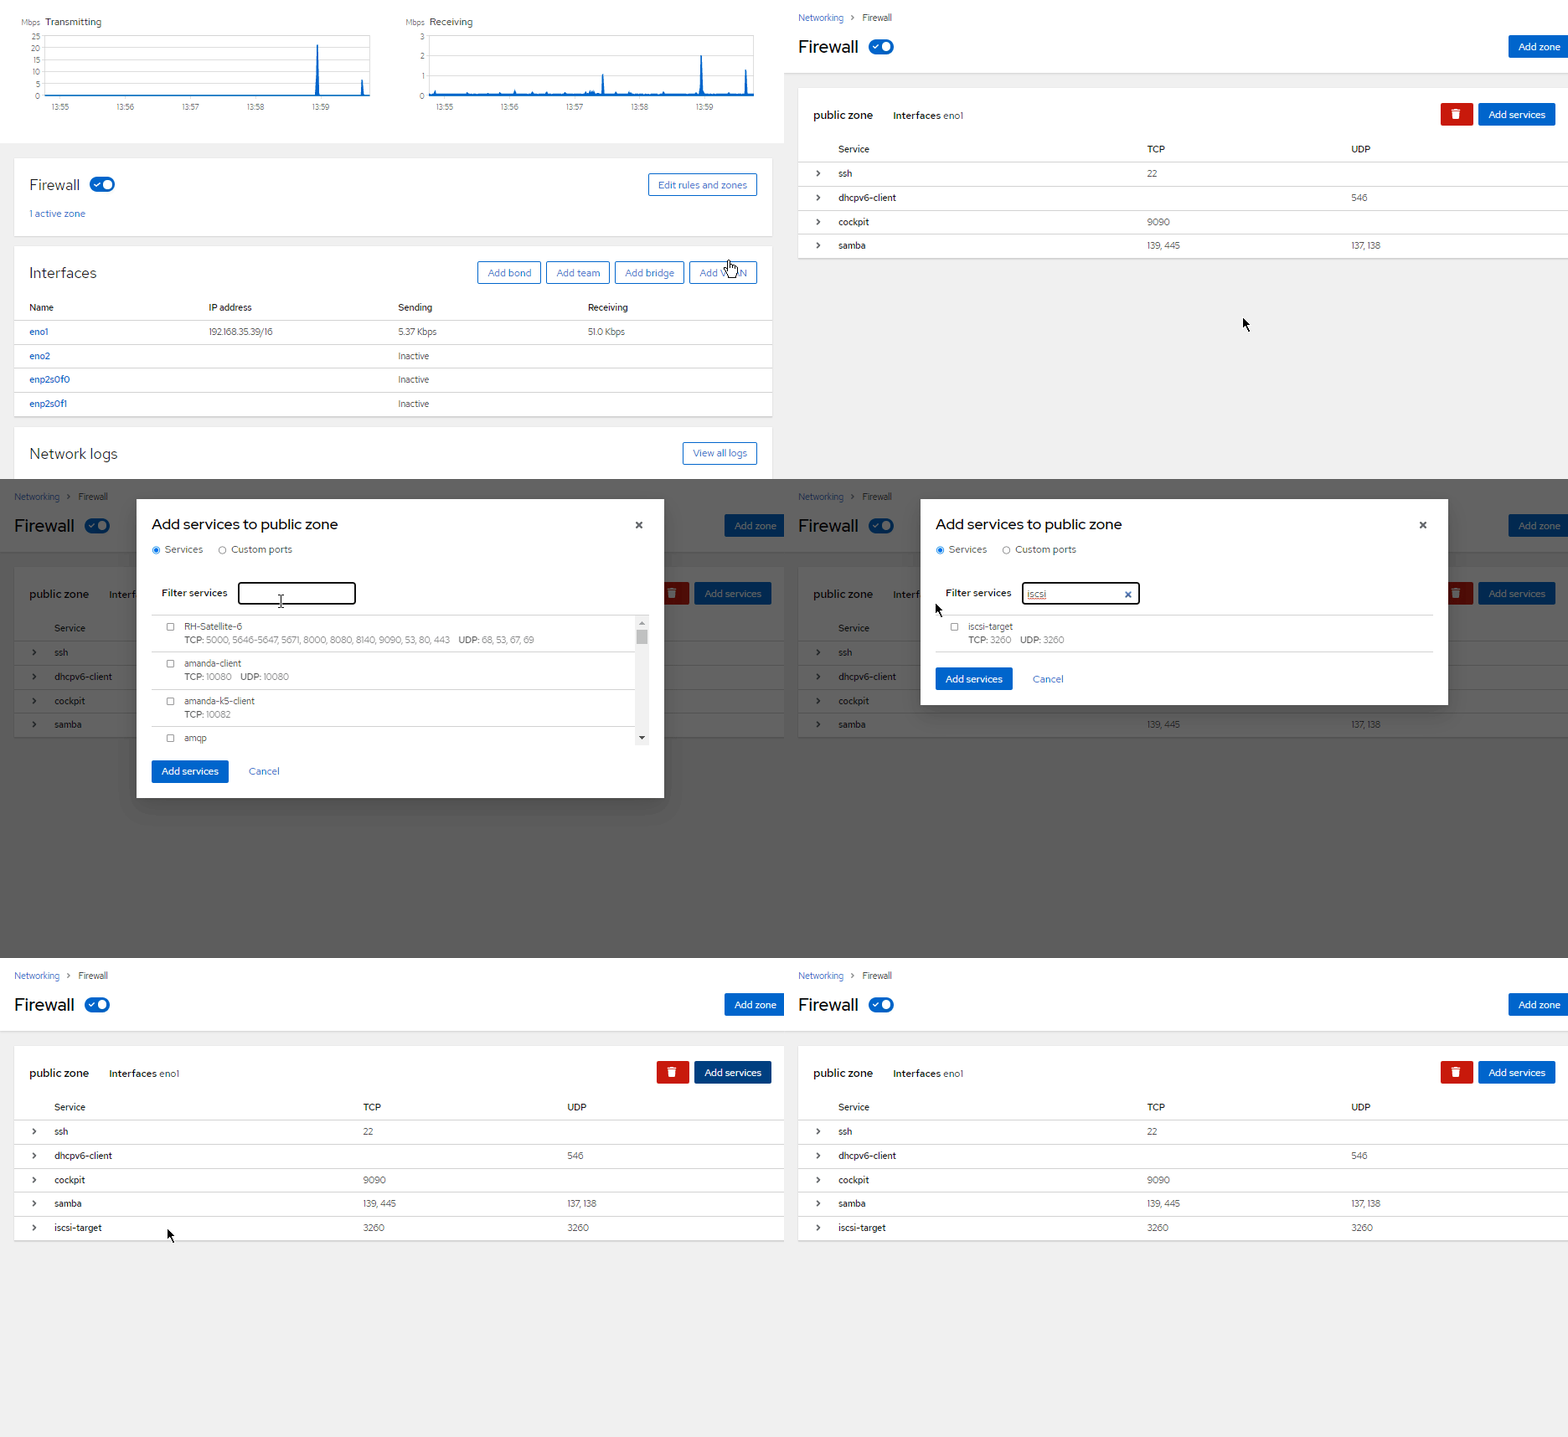
- In the Houston service tab, search for “target” and enable the Targetcli daemon
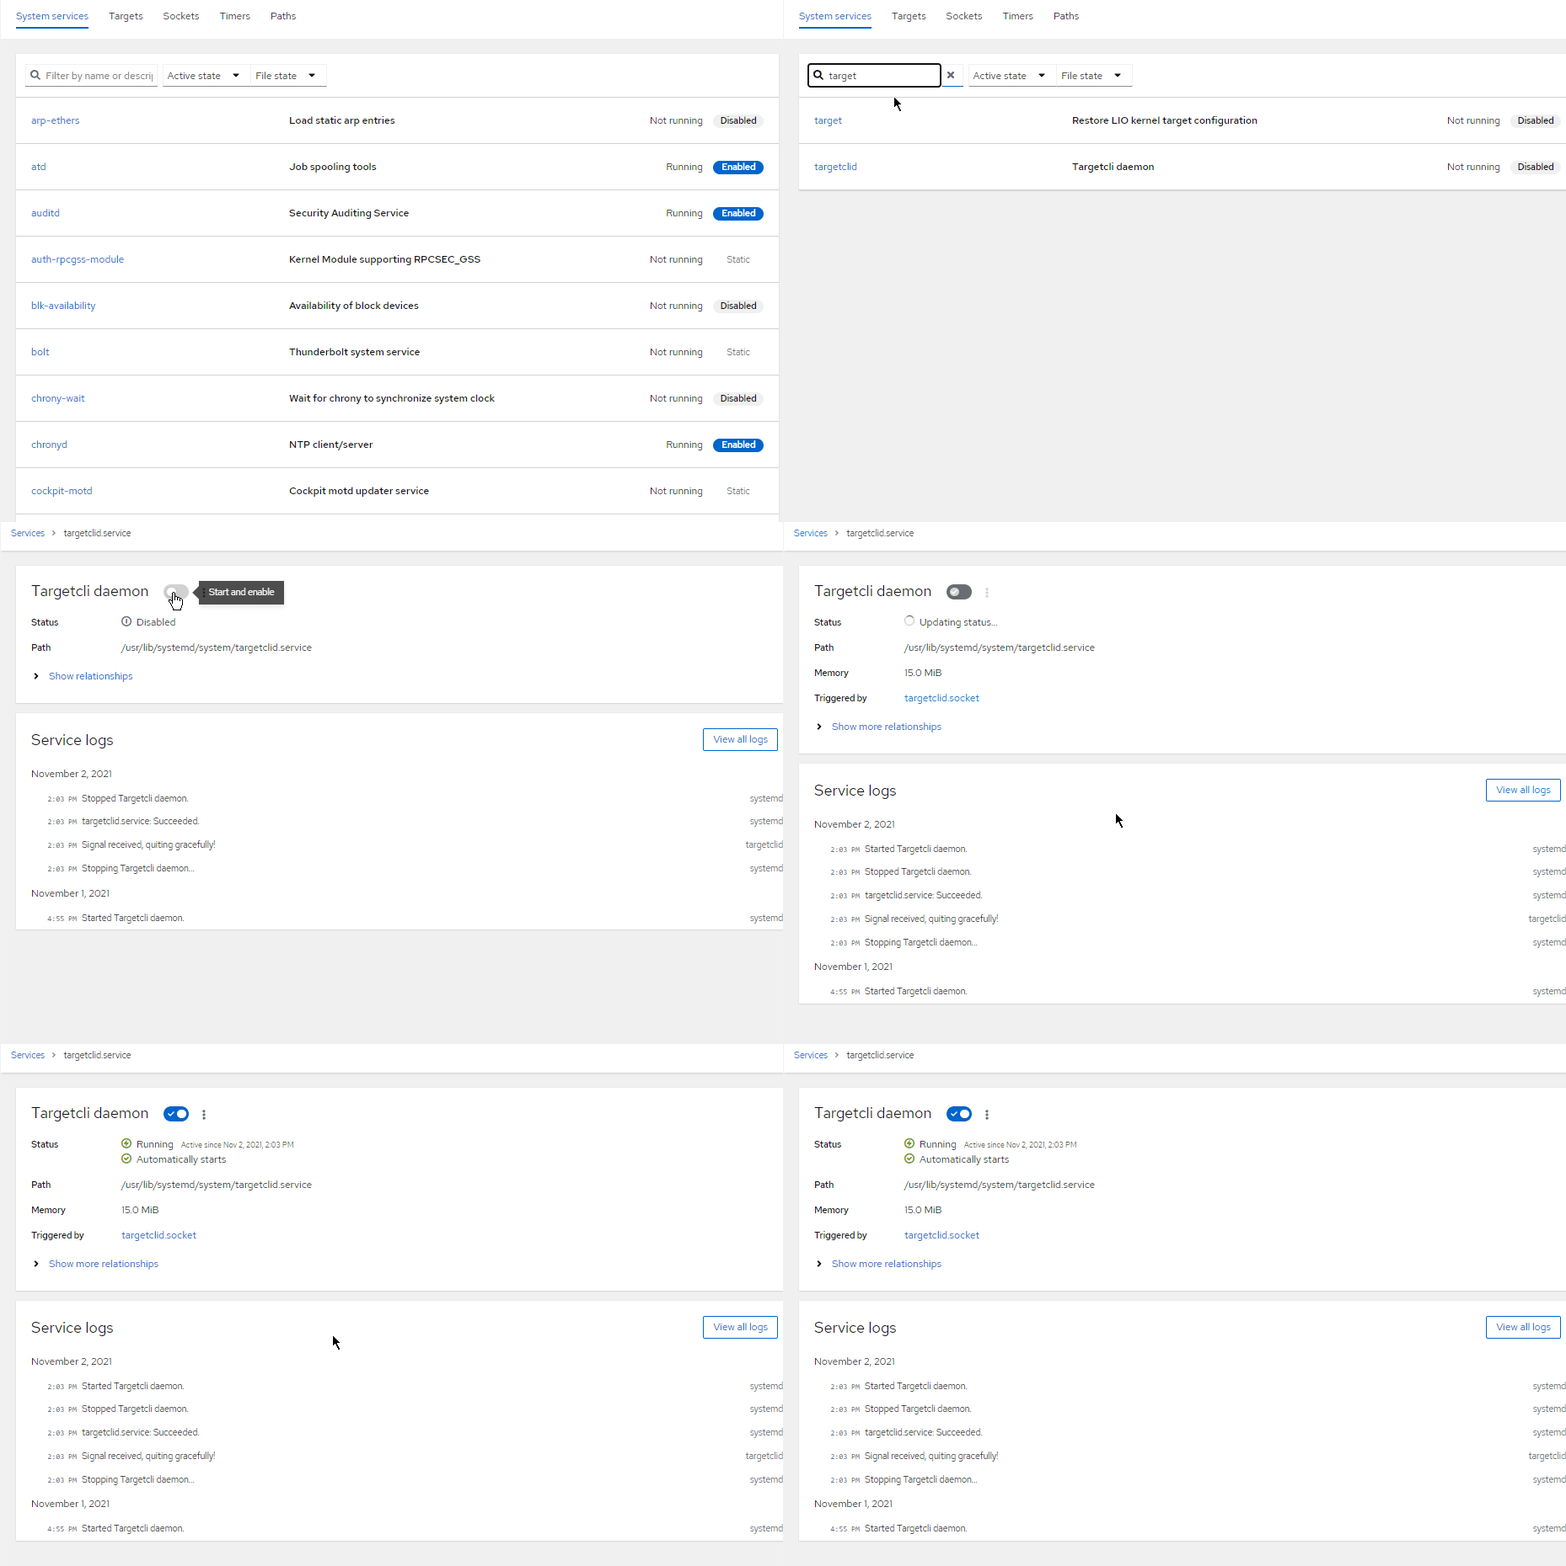
Verification
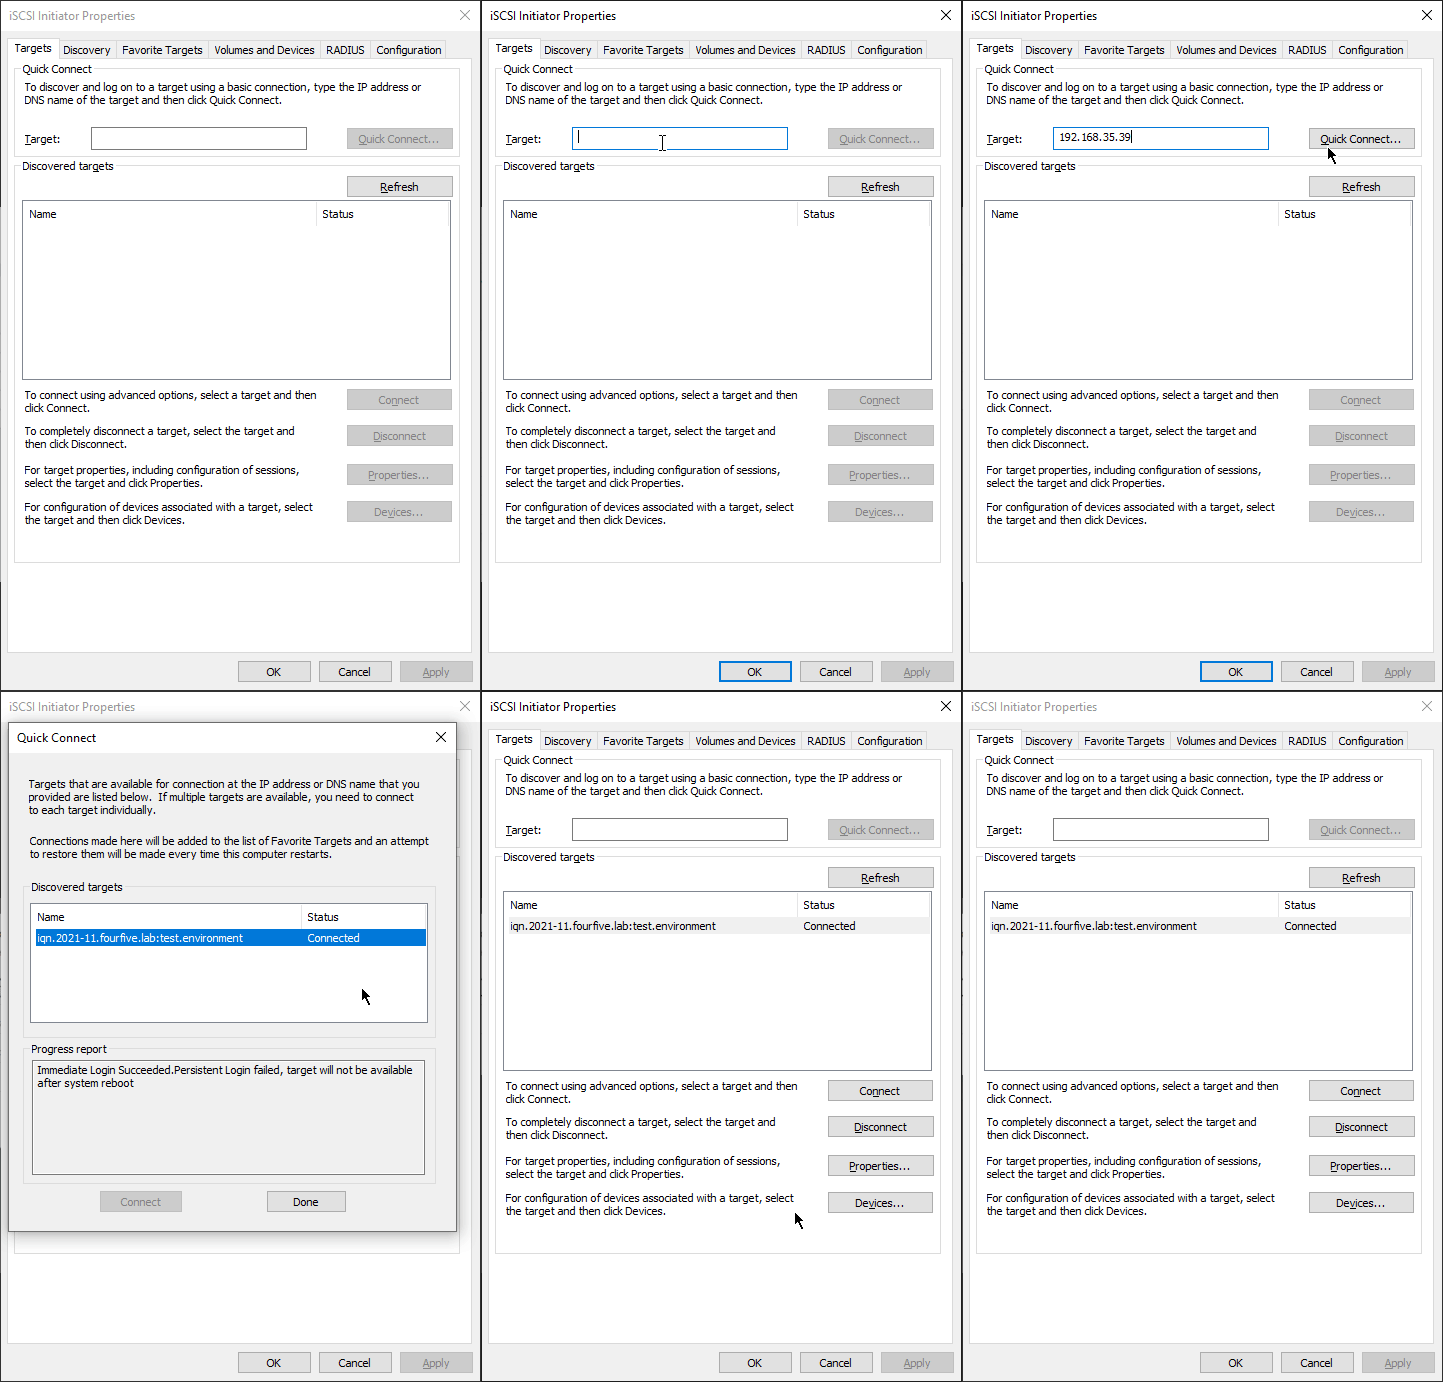
- On a Windows client, open “iSCSI Initiator”
- Enter the target IP address into the ‘target’ field
- Click ‘quick connect’
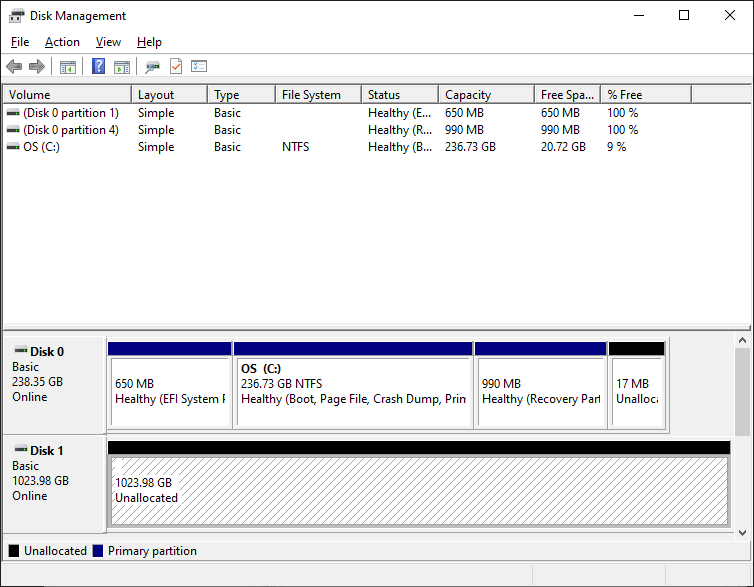
- In Disk Management, there should now be a new disk that is unallocated and ready for formating
Troubleshooting
- When trying to delete an iSCSI filesystem there will be errors preventing the removal, in order to destroy it you will have to remove the iqn file and the lun0 file.
- in the targetcli cd into the iscsi directory
cd iscsi
- Then use the delete command to remove the iqn file
/iscsi> delete iqn.2021-04.com.45lab:ubuntu.iscsi0
Deleted Target iqn.2021-04.com.45lab:ubuntu.iscsi0.
- The cd into /backstores/fileio/
cd /backstores/fileio/
- Use the delete command again to remove lun0
/backstores/fileio> delete lun0
Deleted storage object lun0.
Views: 7864