Table of Contents
Scope/Description
- This article covers installing 2FA to your Houston UI login page.
Prerequisites
- Ubuntu or Rocky OS server with Houston UI
- Access to the servers terminal
Steps
Installing 2FA for Houston
- First, start by logging into your Houston UI and proceeding to the terminal tab at the bottom
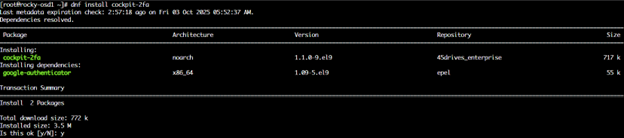
- From there, depending on your OS, run the below command, which will pull the 2FA package we will need
dnf install cockpit-2fa
apt install cockpit-2fa
- From there, it will ask you to confirm the download. Type “y”
- Once the package is finished downloading, simply refresh your web page, and a new “45Drives 2FA” tab will appear
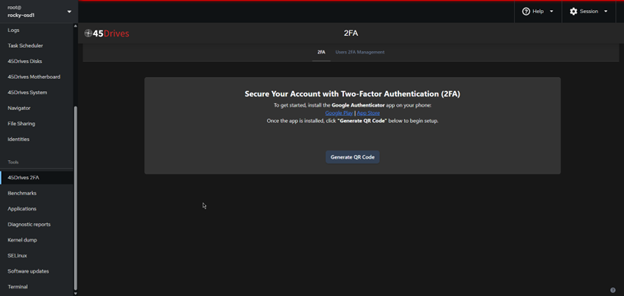
- From here, just follow the on screen steps to set up the 2FA as if you would with any other 2FA setup
Verification
- To verify a successful installation attempt to login to Houston UI. After the username and password prompt you should be shown the below authenticator box.
- Once you provide your verification code you will be allowed into Houston UI.

Troubleshooting
Views: 575