Table of Contents
Scope/Description
- This guide covers setting up a self signed SSL certificate on Nextcloud.
Prerequisites
- A working ubuntu 20.04 install with 45 drives packages and scripts
- Nextcloud and Ngnix proxy manager installed (following this guide)
Steps
- We will be using openssl to generate a cert and key file, install openssl with the following commands:
sudo apt install openssl
- Once openssl is installed we can create our certificate with the below command:
openssl req -newkey rsa:4096 \
            -x509 \
            -sha256 \
            -days 3650 \
            -nodes \
            -out example.crt \
            -keyout example.key
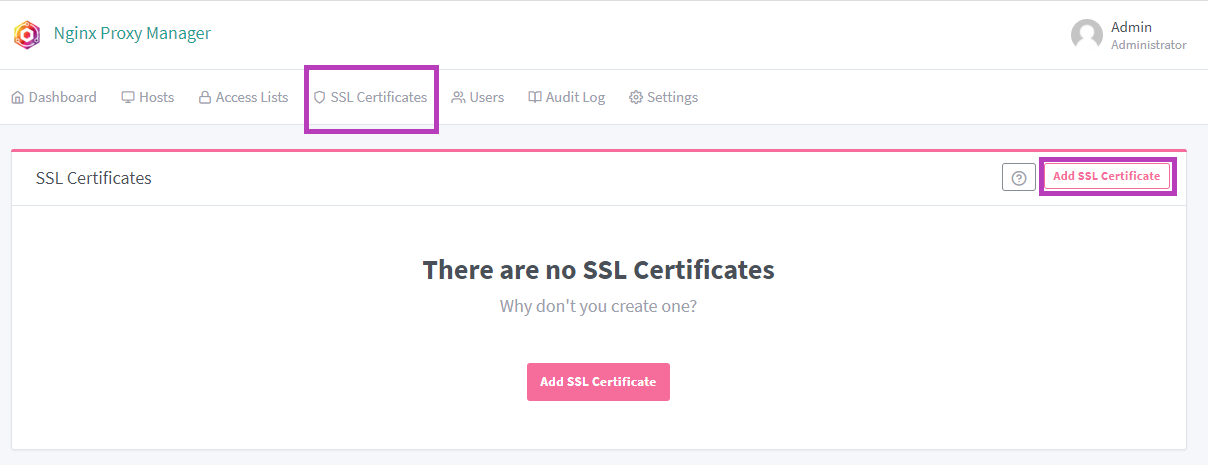
- Once the key and cert are generated you will need to transfer them to the workstation you are working on, this can be done with a simple sftp command on windows or linux. Once the files are on your workstation navigate to your ngnix proxy manager UI and go to the SSL tab, select Add SSL Certificate

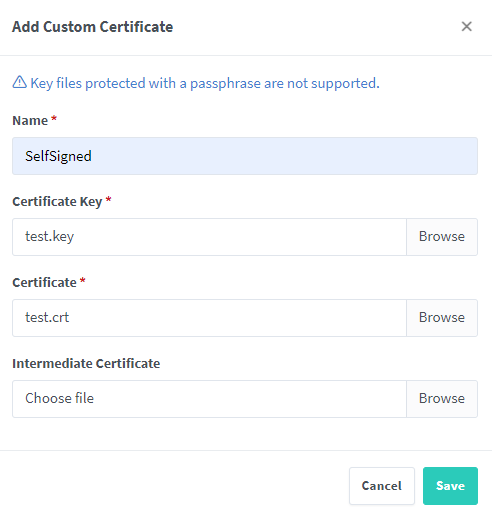
- Select Custom on the drop down, give the certificate a name and navigate to both the .cert and .key files saved to your workstation. Then click Save.

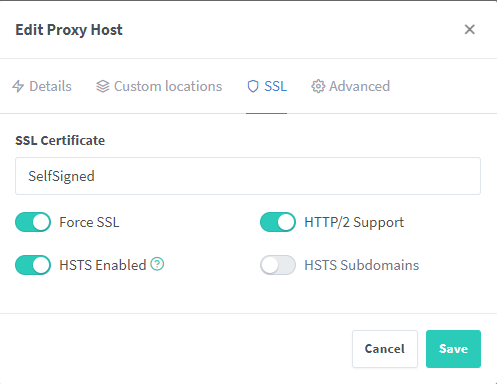
- Navigate to your Proxy Hosts (setup in previous guide), select edit and go to your SSL tab, here you can select your self signed certificate and force SSL and HTTPS

- Your self signed certificate is now setup, you can navigate to your nextcloud instance to confirm
Verification:
- In nextcloud you should now be able to use https rather than http, keep in mind it will still appear insecure as it is a self signed certificate
Troubleshooting:
- The main point of trouble for this guide will be the certificate itself, if you run into any errors rerun your certificate command and make sure to provide correct information
Views: 15215