Table of Contents
Scope/Description
This guide will run through the steps to import the AWS Data Sync KVM image into Houston to deploy for Amazon to facilitate cloud backups.
Prerequisites
- Have a 45Drives Storinator shipped from us with our Ubuntu 20.04LTS image installed on it OR run our Ubuntu pre-config script that brings your image to parity with a freshly installed 45Drives Ubuntu image. You can find that script here.
Steps
- From the terminal, cd to /var/lib/libvirt/images. Amazon shipped units should have an image in this directory called datasync-20210211-x86_64.qcow2
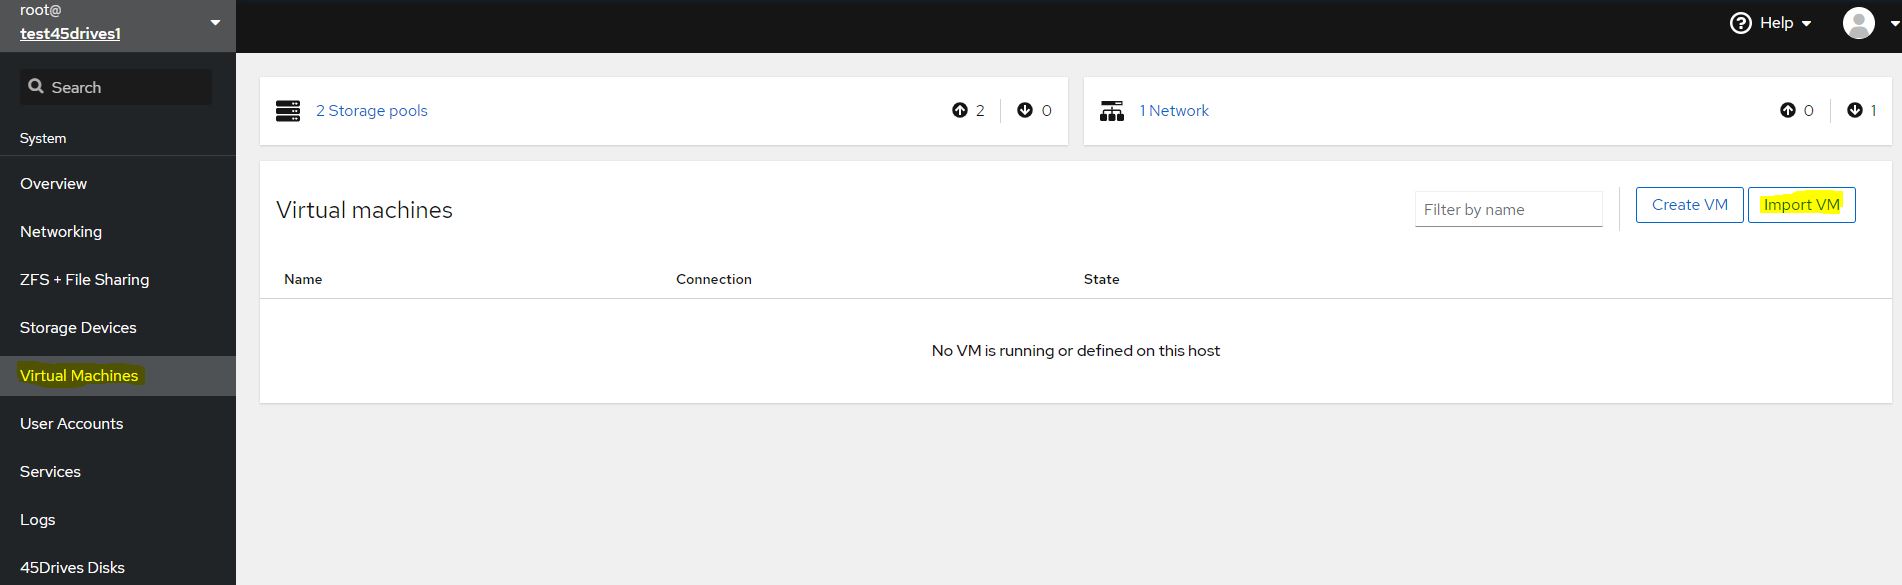
- From the Houston UI, navigate to the “Virtual Machines” tab. Click Import VM.
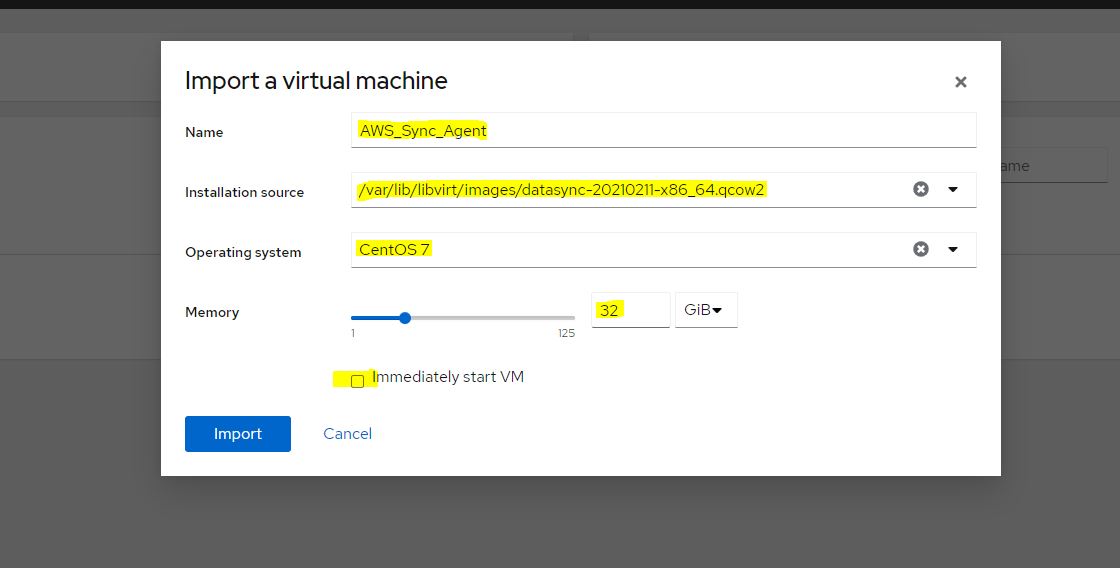
- Give the VM a unique name such as “AWS Sync Agent” then for the installation source, choose the image at /var/lib/libvirt/images/datasync-20210211-x86_64.qcow2 . For OS choice, select CentOS 7, and make sure to select 32 GiB of RAM. Also, uncheck “immediately start VM”. then click Import.
- Click on the name of the VM in blue under your virtual machines tab.
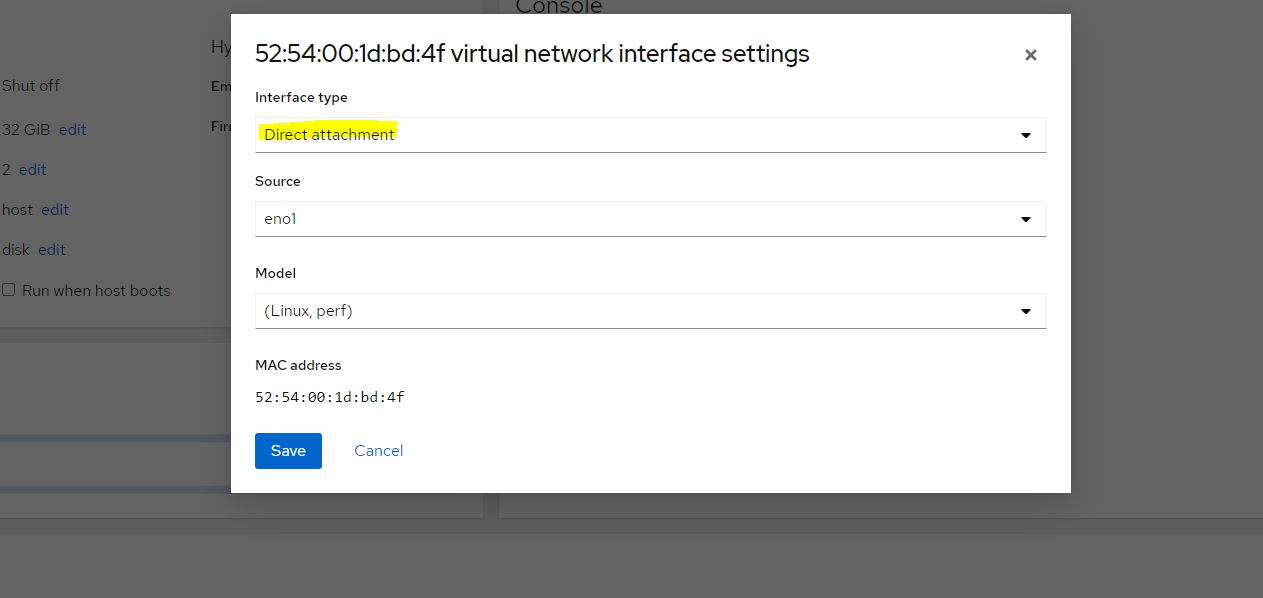
- Under Networks, click edit, and change the interface type to “Direct attachment” and make sure the source interface is one that has access to the internet, then click save.
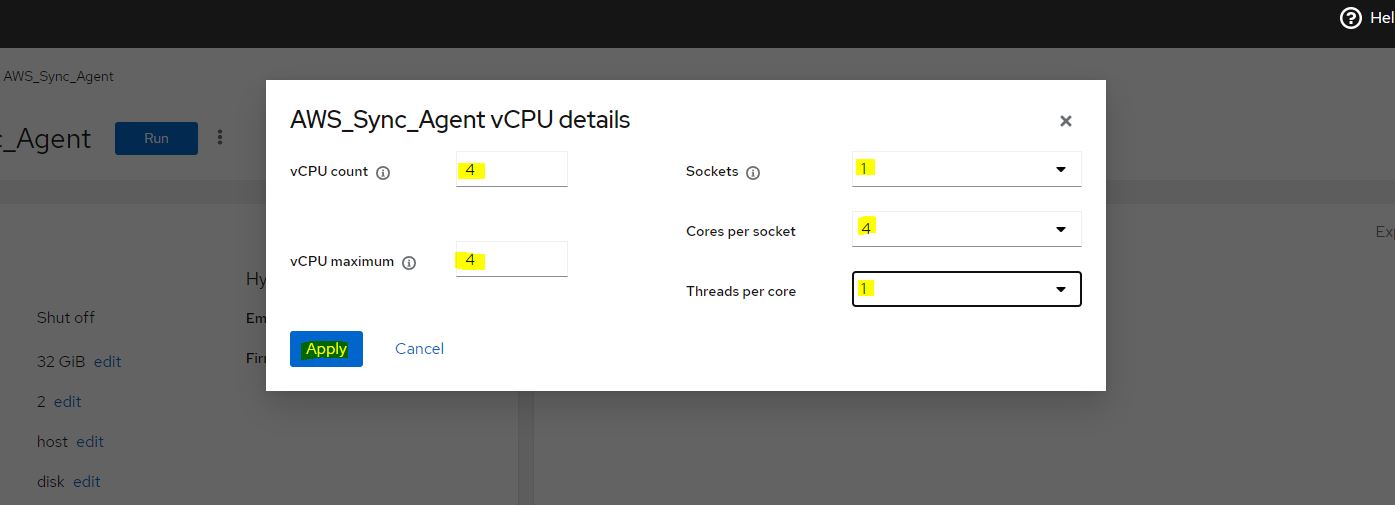
- • Under Virtual Machines, click on the name of the newly created VM. This will bring you into the settings for this VM.
• Set the vCPUs number to 4.
- The VM is now ready to be started. Click Run.
- The VM will start with a console on the right side of the screen. Once the username prompt shows up enter the default credentials. User: admin Password: password
- The UI should show an IP address under “Currently connected network adapters” If it doesn’t, press 1 to move into Network Configuration. Once in that menu, press 2 to Configure DHCP or 3 to set a static IP. Choose the eth0 adapter, and then exit back to the main menu.
- The system is now ready to test the network. press 2 from the main menu to test the network connection to ensure it is working as intended.
- The system is now ready to get an activation key for the end-user to set up in their AWS dashboard. Press 0 to get an activation key
- Set the region to us-west-2
- Set the service endpoint to Public endpoints
- Copy the activation key and give it to the customer so they can begin configuration.
Verification
Troubleshooting
- If the VM won’t start, it is most likely in the wrong directory. You need to have it in a directory and that libvirt has executable access, which is /var/lib/libvirt/images
Views: 576