Scope/Description
- This article will help you create a ZFS pool and datasets in Houston UI using the ZFS module.
Prerequisites
- Access to Houston UI
- ZFS Module and Packages Installed
- Disk Aliasing Setup with “dmap” if using Device Alias for Disk Identifier
Steps
Accessing the ZFS Tab
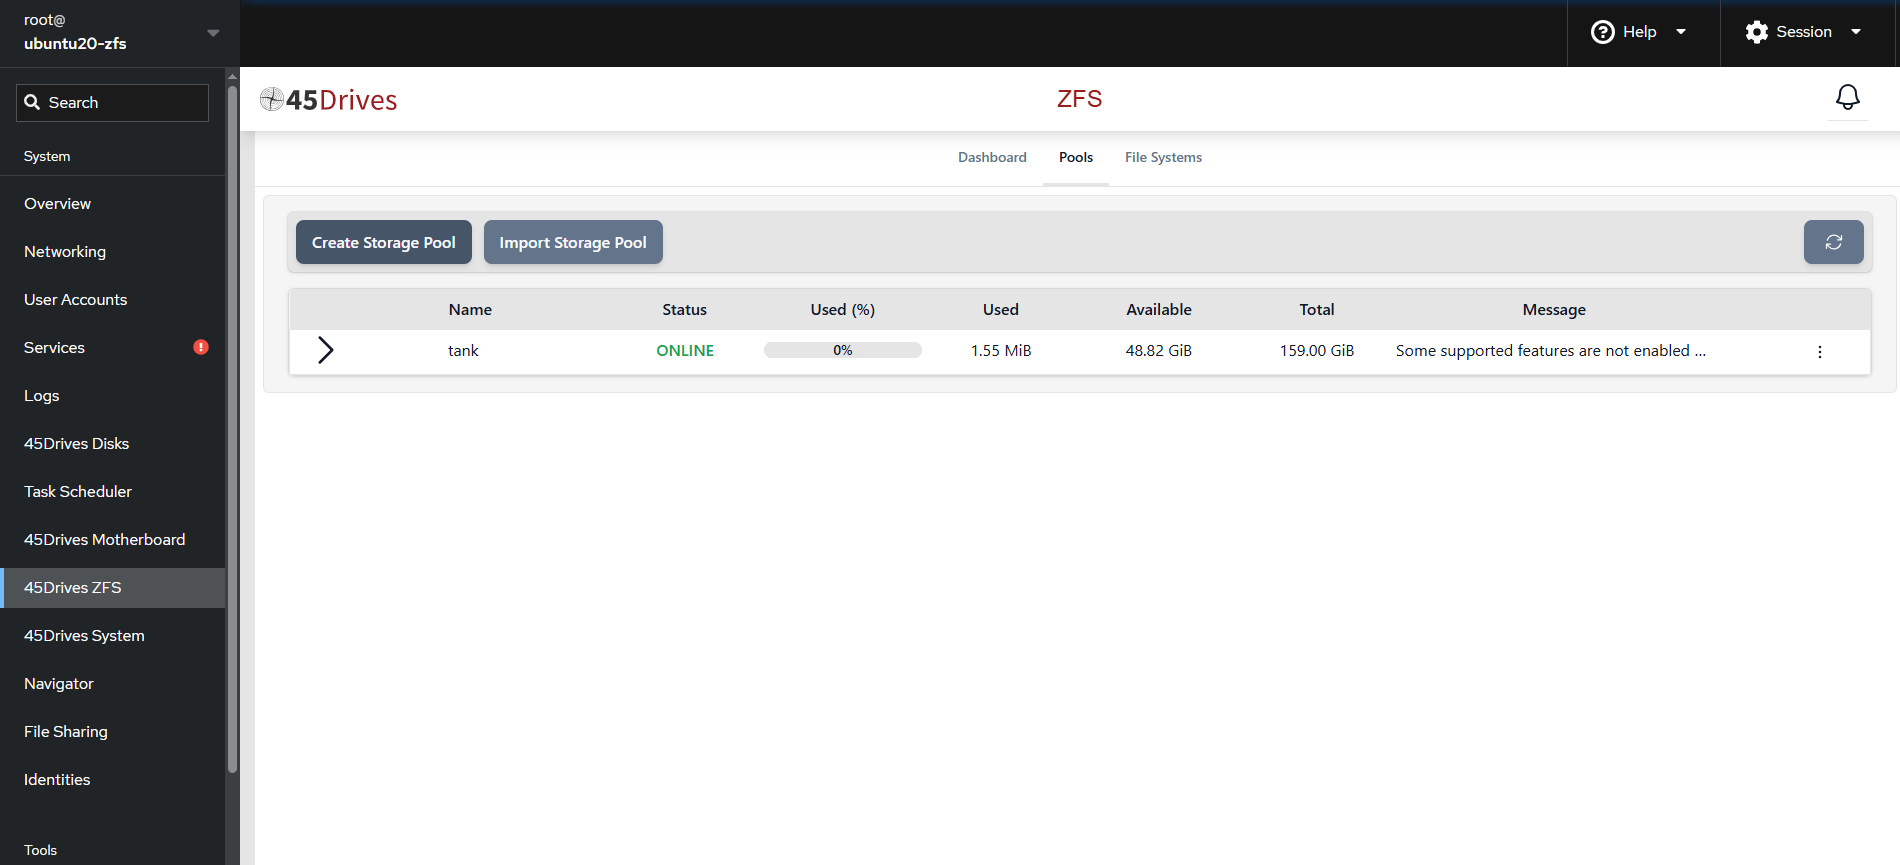
- Once logged in to Houston, you should see a list of modules down the left-hand side of the page. In the bottom half of this menu, locate the 45Drives ZFS tab. Click on this to open the ZFS Module.
Creating the ZFS Pool
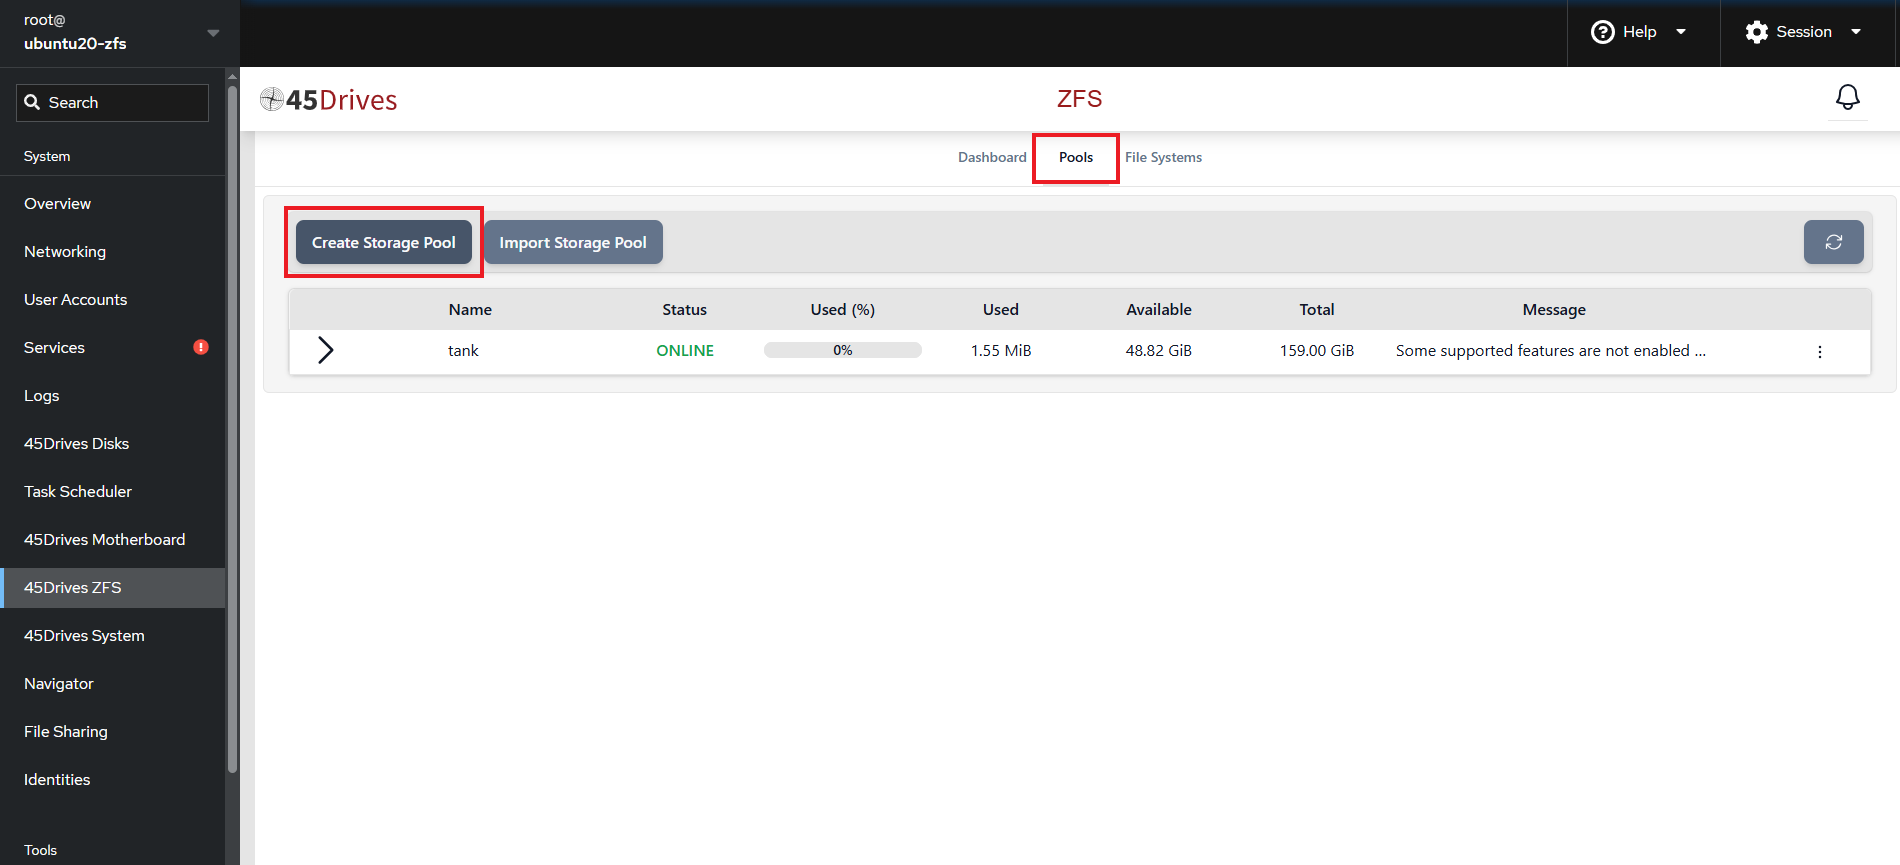
- On the top of the ZFS page, you will a centered menu with “Dashboard“, “Pools“, and “File System“. Click “Pools”, and then select “Create Storage Pool” to launch the storage pool creation menu.
- When the menu opens, you will first provide a name for your new pool. In this example, the pool is named “test”. We recommend using all lowercase and no spaces.
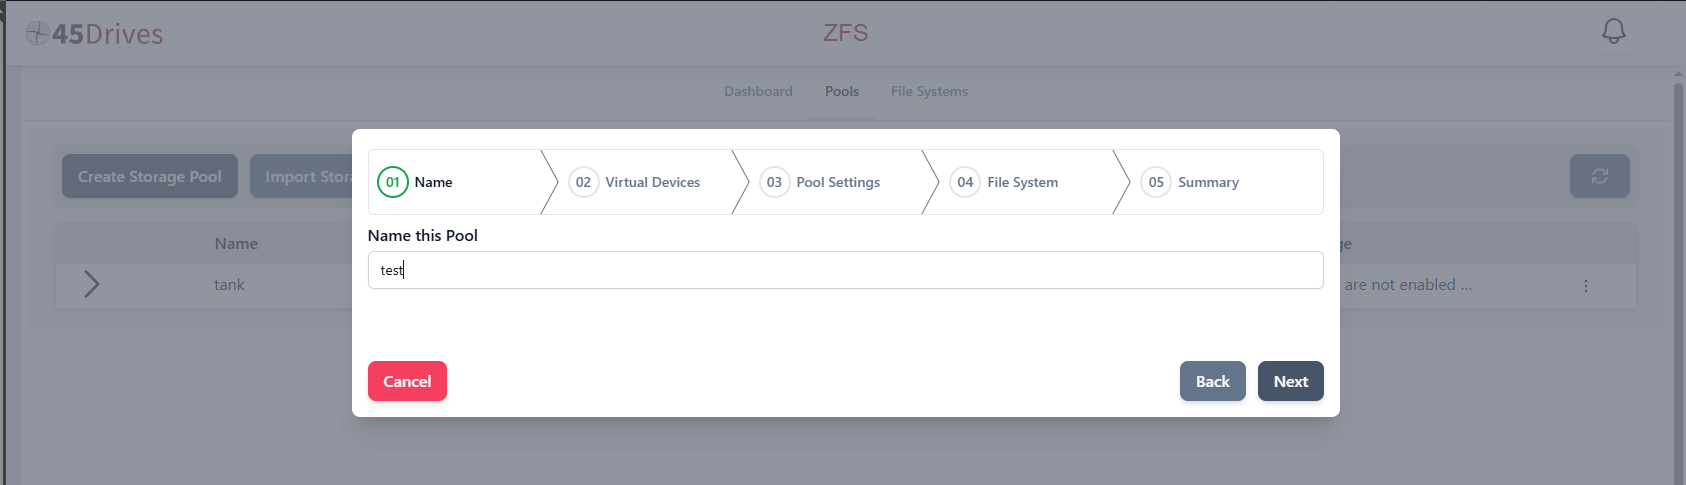
- Click “Next” to move forward to the “Virtual Device” stage of the storage pool creation menu.
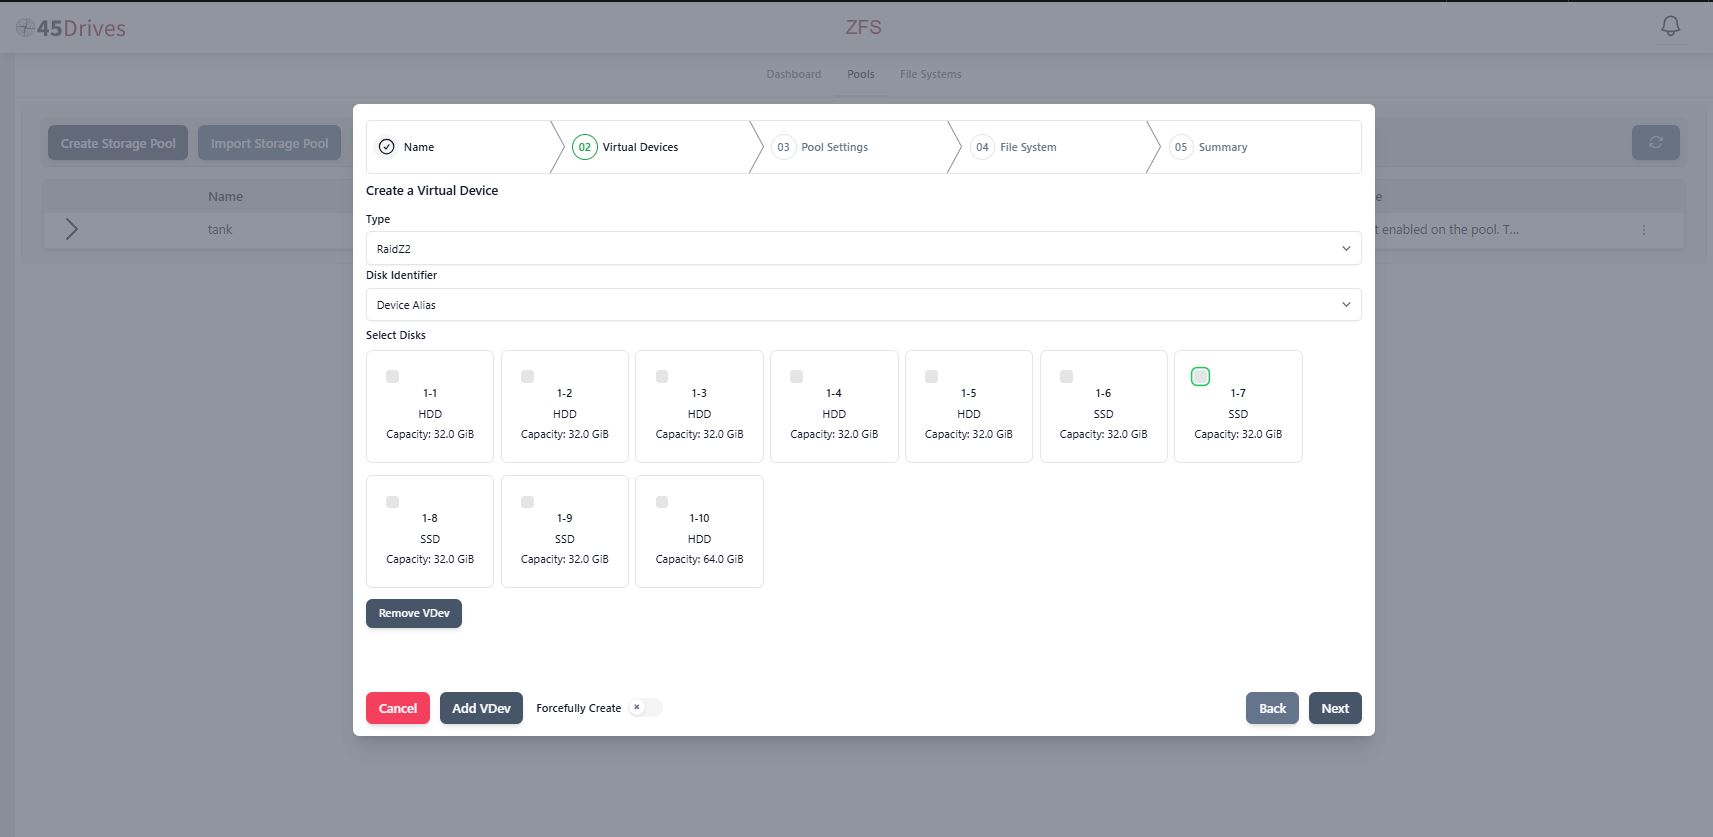
- First, select the type of Vdev required from the “Type” drop down menu.
- Options are: disk, mirror, RaidZ1, RaidZ2, or RaidZ3
- RaidZ2 is the recommended Vdev for most cases, as it allows 2 drives to fail per Vdev before losing data.
- If you have trouble on deciding on which raid to use, you can view information about the following here.
- The second dropdown menu holds the “Disk Identifier”.
- Options are: Block device, hardware path, and Device Alias
- It is recommended to select Device Alias – this alias’s the virtual devices to the numbered slots in the server (1-1, 1-2, 1-3, etc).
- The third menu requires the user to select the desired Disks: Select the disks you want to add to the first vdev. After that you can click “add Vdev” to add additional Vdevs to the pool
- In this example, 2 Vdevs will be created, that are RaidZ2, and 5 wide (3 drives of storage and 2 drives of parity)
- It is recommended to use the same amount of drives for each Vdev, so, if the first one you create is 5 disks make sure each other vdev in the pool is 5 as well.
- We recommend no more than 15 drives in a single vdev.
- The drives should also be of the same capacity (in the example above, drive slot 1-10 is a 64GB drive, where the remainder are 32GB – this goes against best practice and requires the use of the “Forcefully Create” toggle at the bottom of the menu, next to the “Add VDev” button.
- Select the number of disks required, according to the Vdev that will be created (in this example: 5 drives are selected):
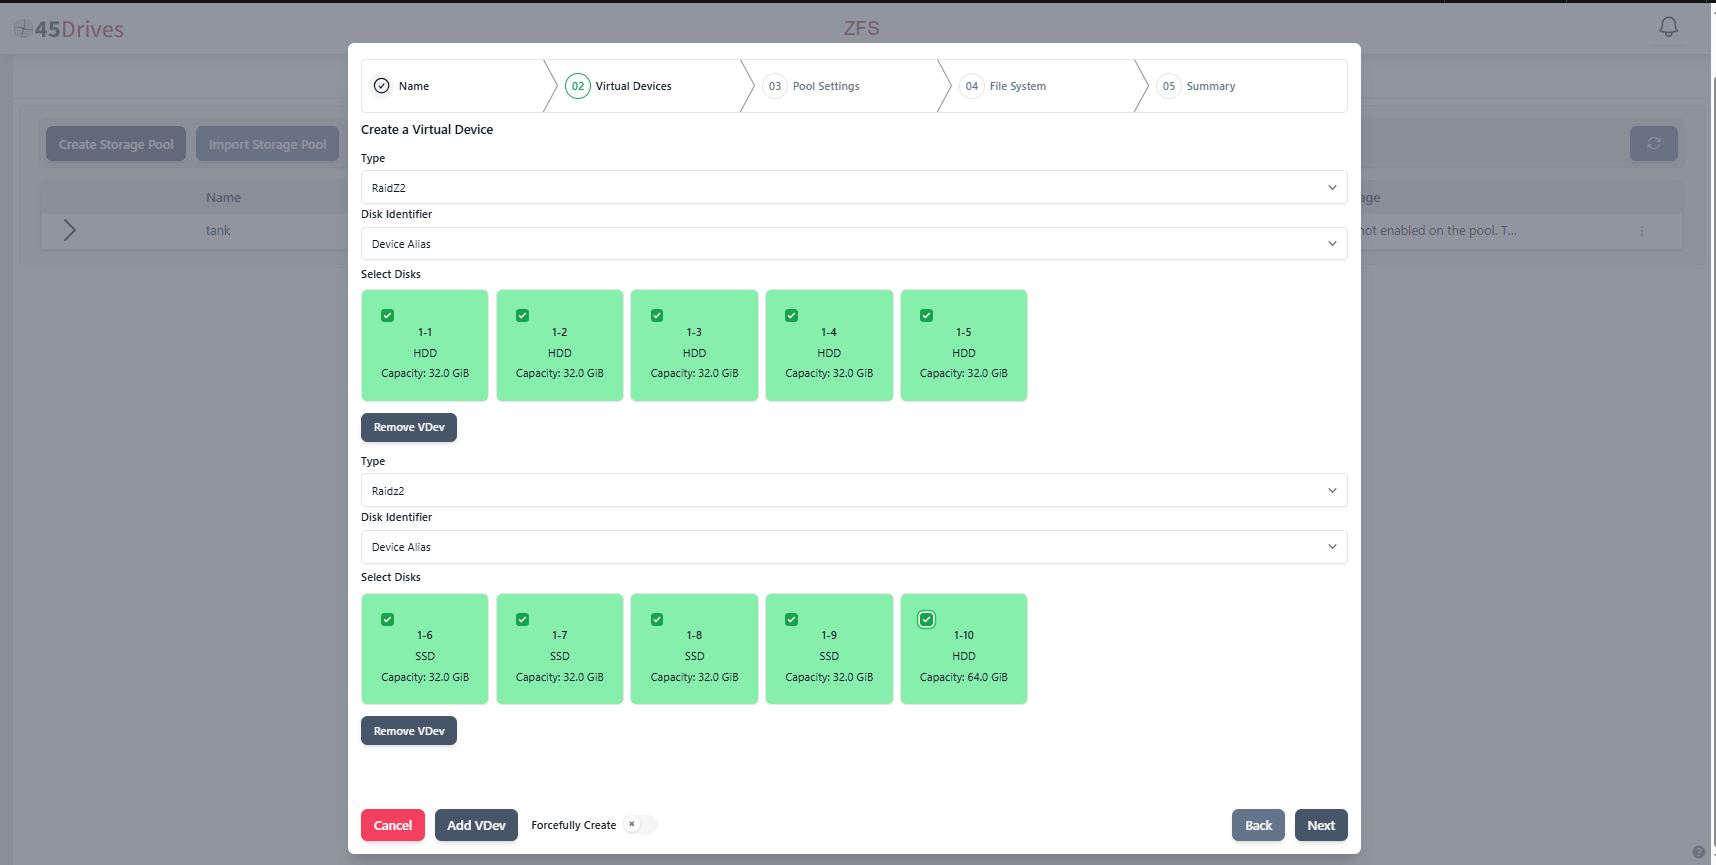
- If a second vdev is required/desired at this time, click “Add Vdev” after the required number of disks has been selected. This will then add a second VDev, in which the same number of drives must be selected.
- When all required vdevs are created, click “Next” to move forward to the “Pool Settings” stage in the Pool Creation Menu, where the user can select “Sector Size“, “Record Size“, and view/modify the “Advanced Settings”.
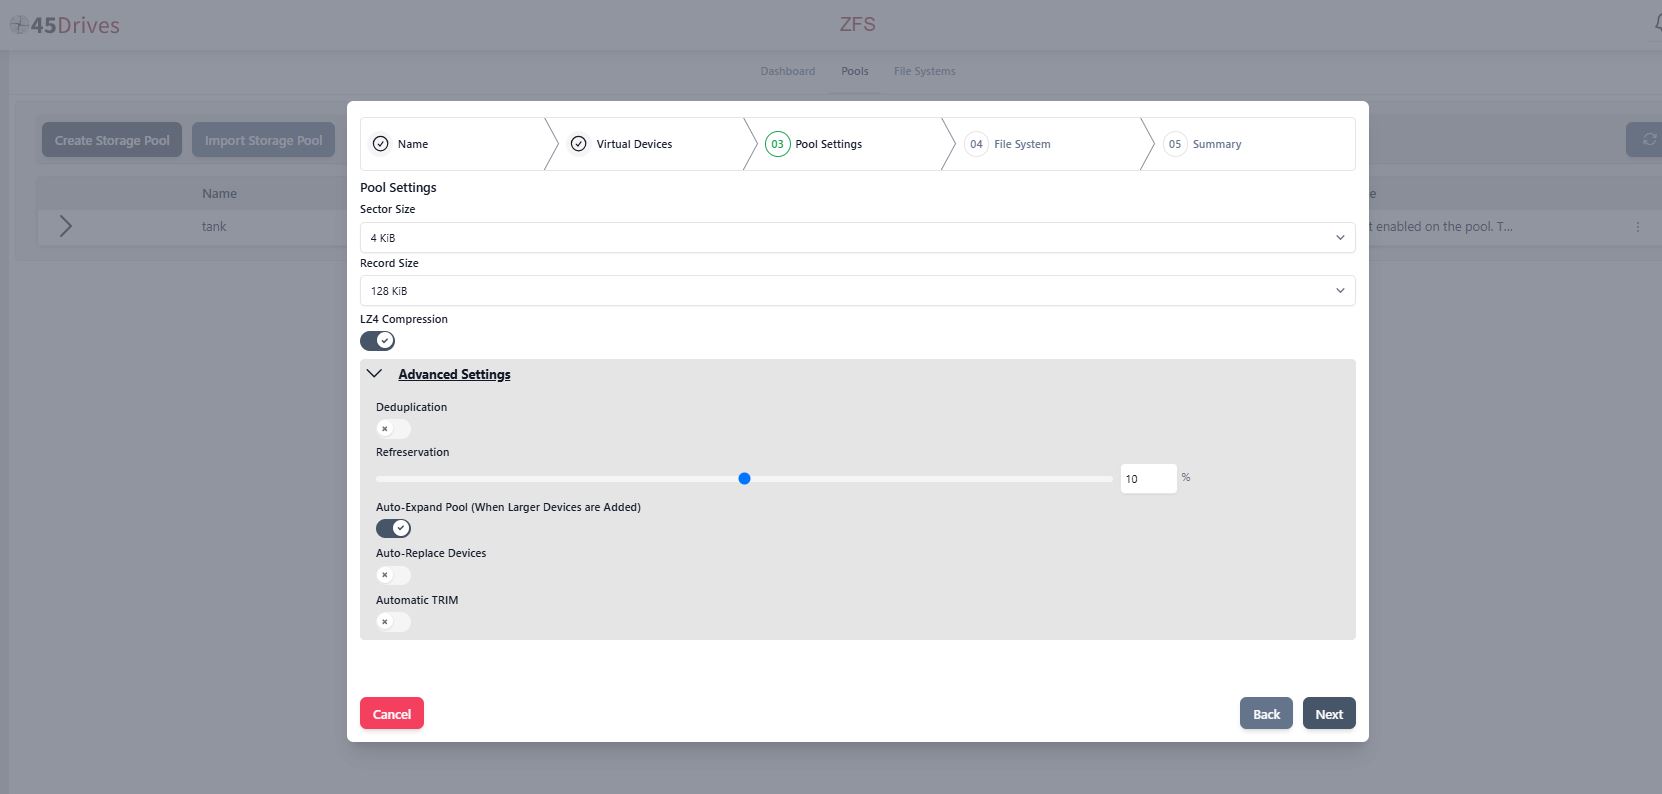
- Sector Size: Depends on use case. In this case, 4
- Record Size: Depends on use case. In this case, 128KiB
- Deduplication: Turn on deduplication under “Advanced Settings”, if desired.
- Refreservation: This is the amount of data that is set aside for ZFS that is not accessible.
We do not recommend setting “refreservation” below 10%. With this disabled we can write to the ZFS Pool/Dataset and fill it entirely, at which point the pool may be unusable and data could be lost.
When we create a pool with ZFS, we select the drives we want to be part of the first virtual device. We recommend splitting the pool up into multiple vdevs of 15 drives or less for better performance and redundancy. Ideally, the vdevs would be the same amount of drives and the same capacity drives.
- Once you have your pool created with 1 vdev, follow these steps to add additional vdevs.
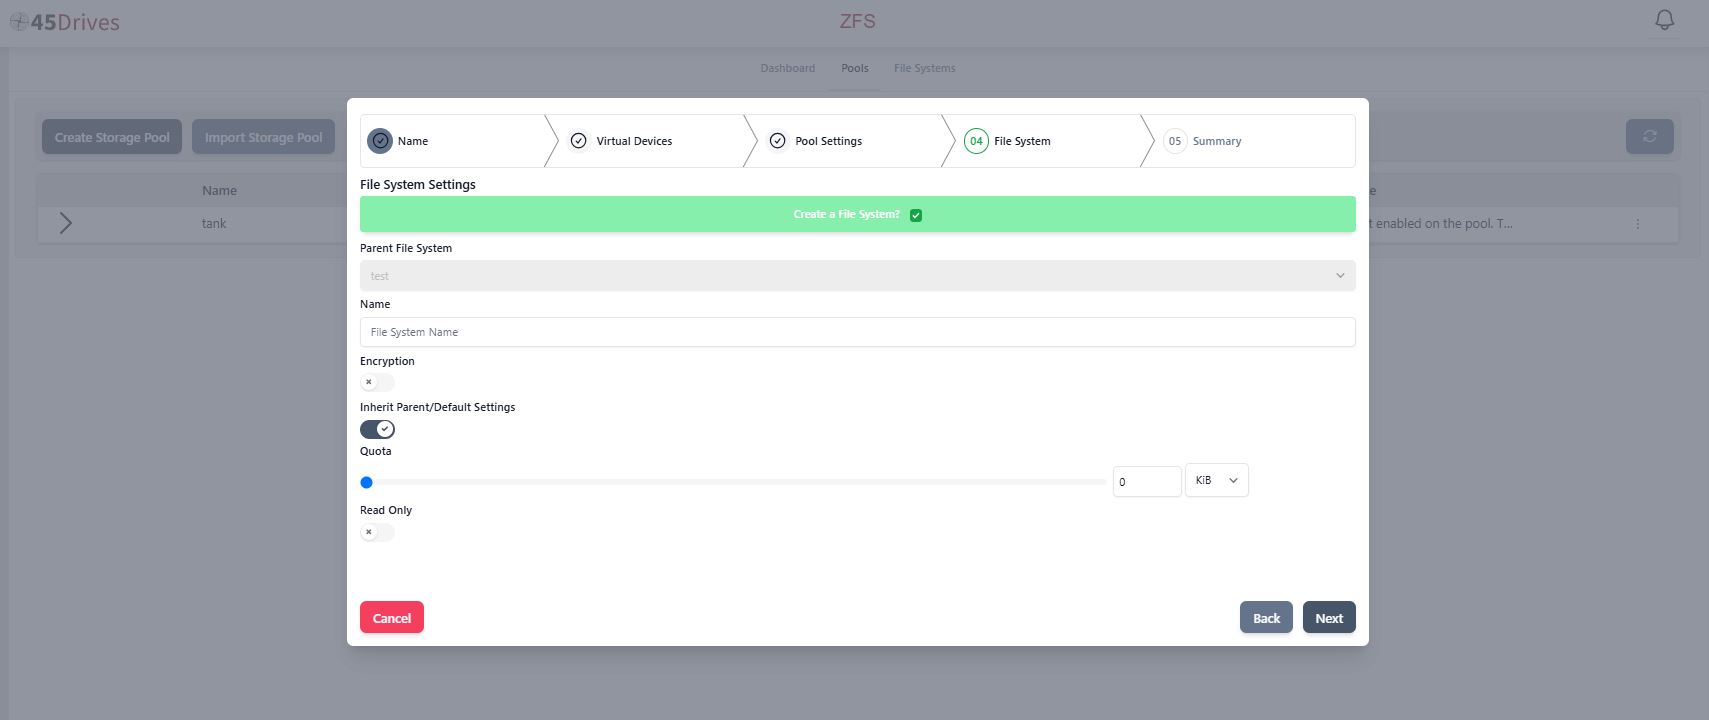
- Once the desired settings are selected, click “Next”. This brings the user to the “File System” tab, with “Create a File System” automatically selected. If a File System is not desired, at this time, deselect the option and proceed to “Summary” by clicking “Next”.
- The “Summary” tab will show a full review of the pool configuration, with the option to view the Advanced settings, and Virtual Devices created:
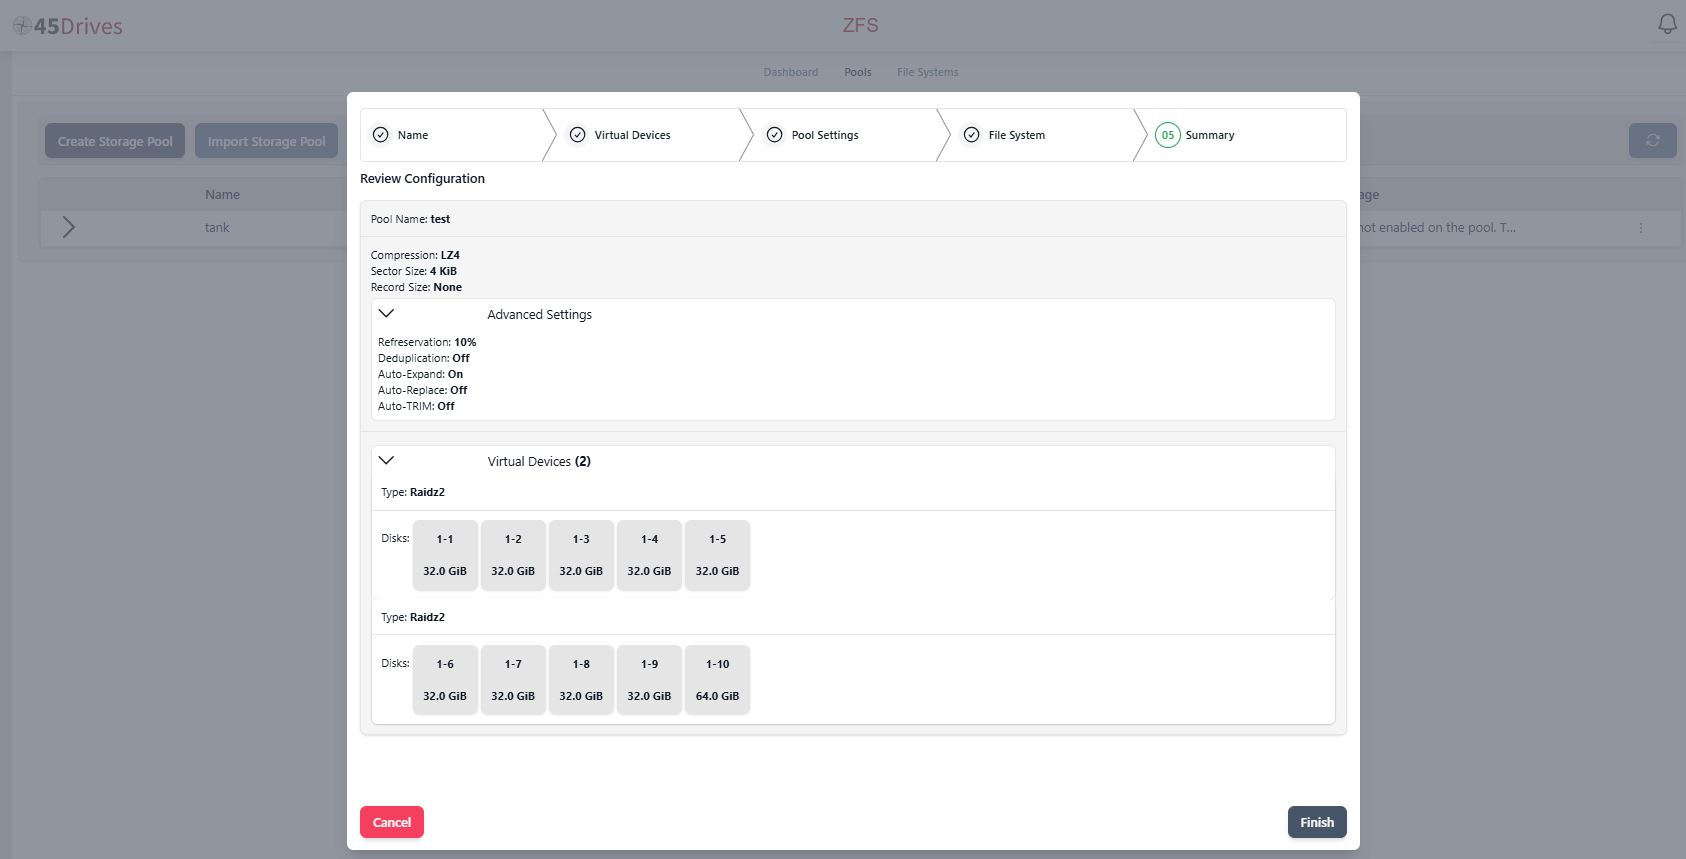
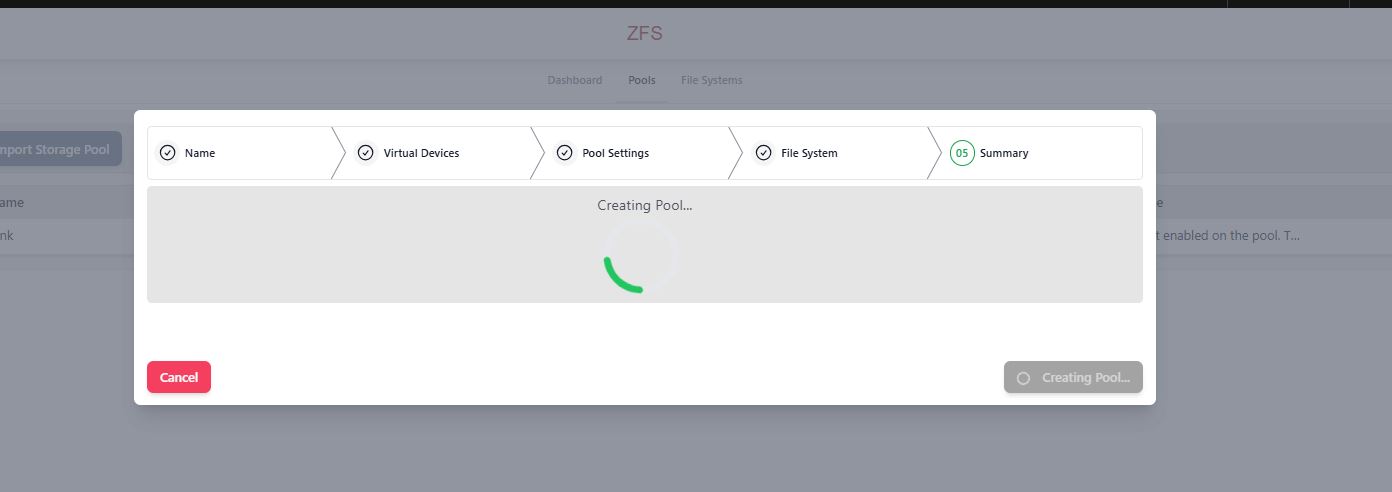
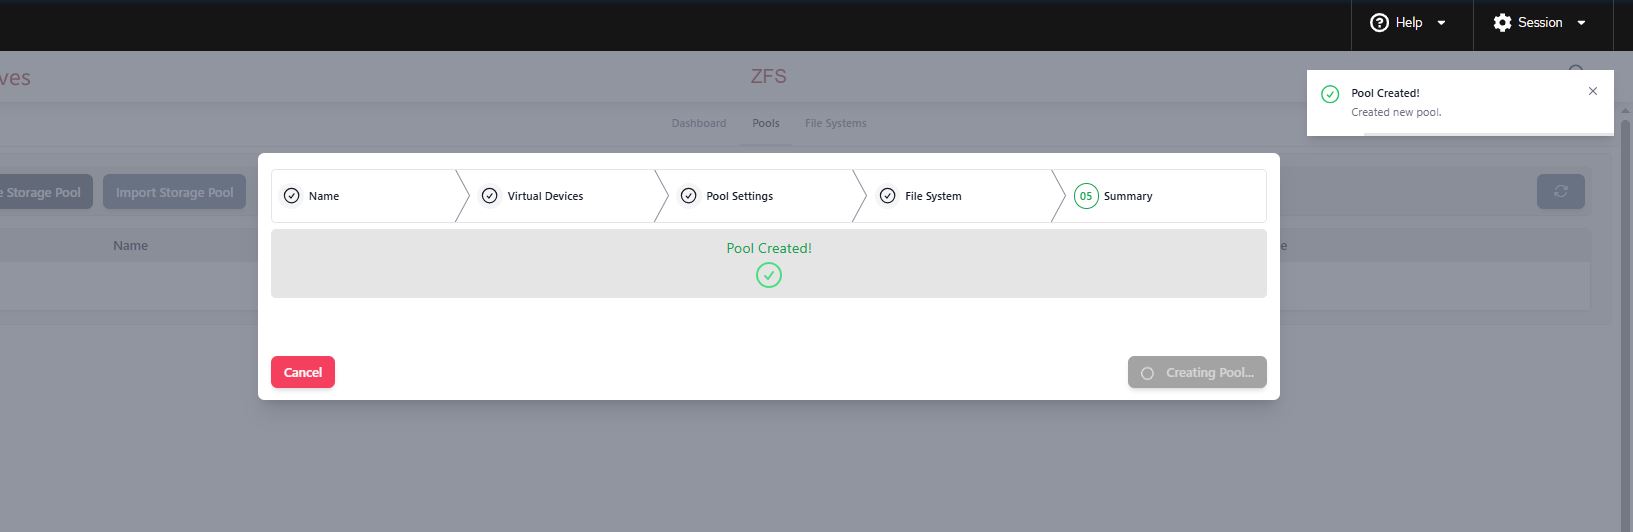
- Click “Finish” to create the pool. The following pop-up box will appear, with a spinning green wheel until the pool creation is complete:
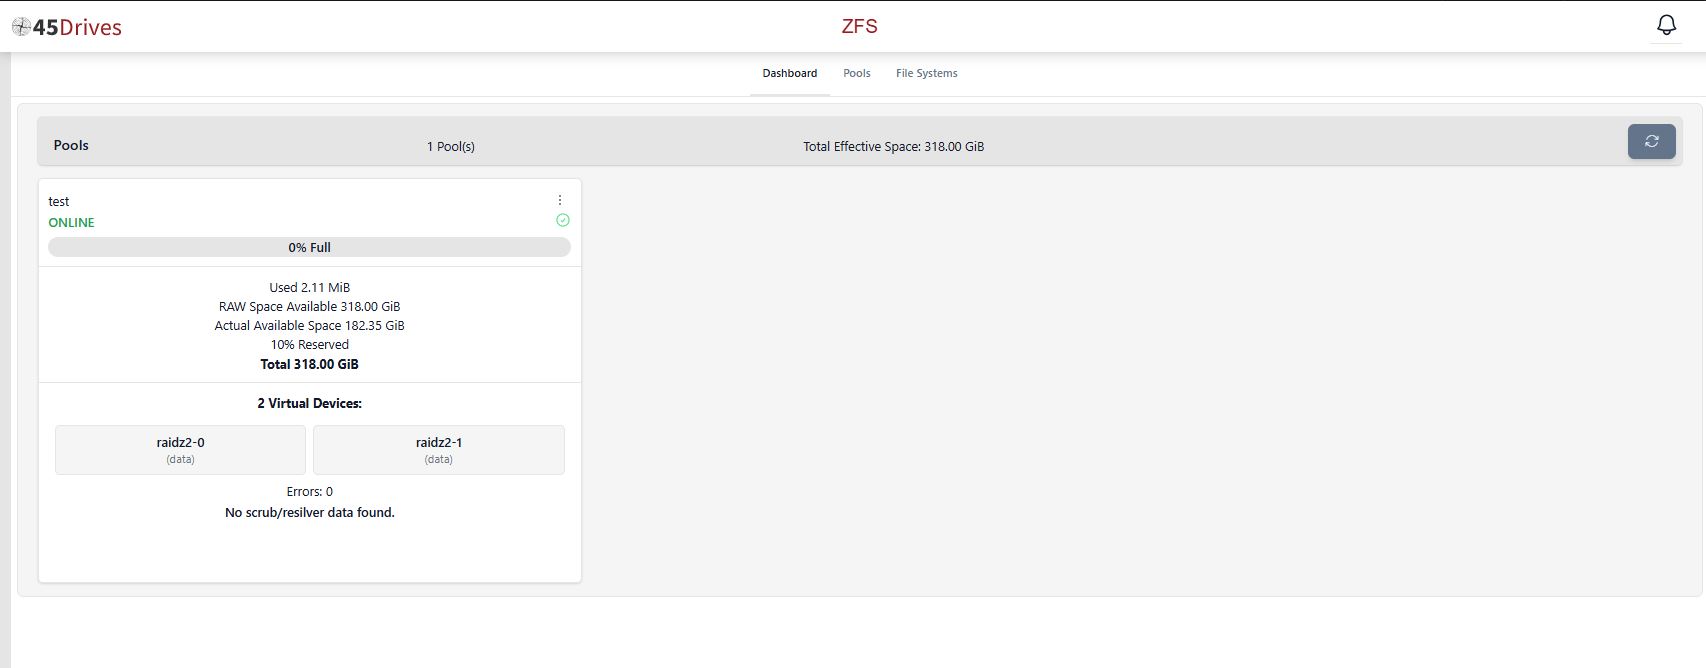
- The user is then taken to the “Pools” summary screen, where the list of all pools can be viewed and reviewed. If the user clicks the arrow to the left of a given pool, it will expand the pool to show the Vdevs within it, as well as information regarding the disks, online status, temperature and capacity:
- Click on “Dashboard” to return to the ZFS dashboard screen:
Creating ZFS Filesystem/Dataset
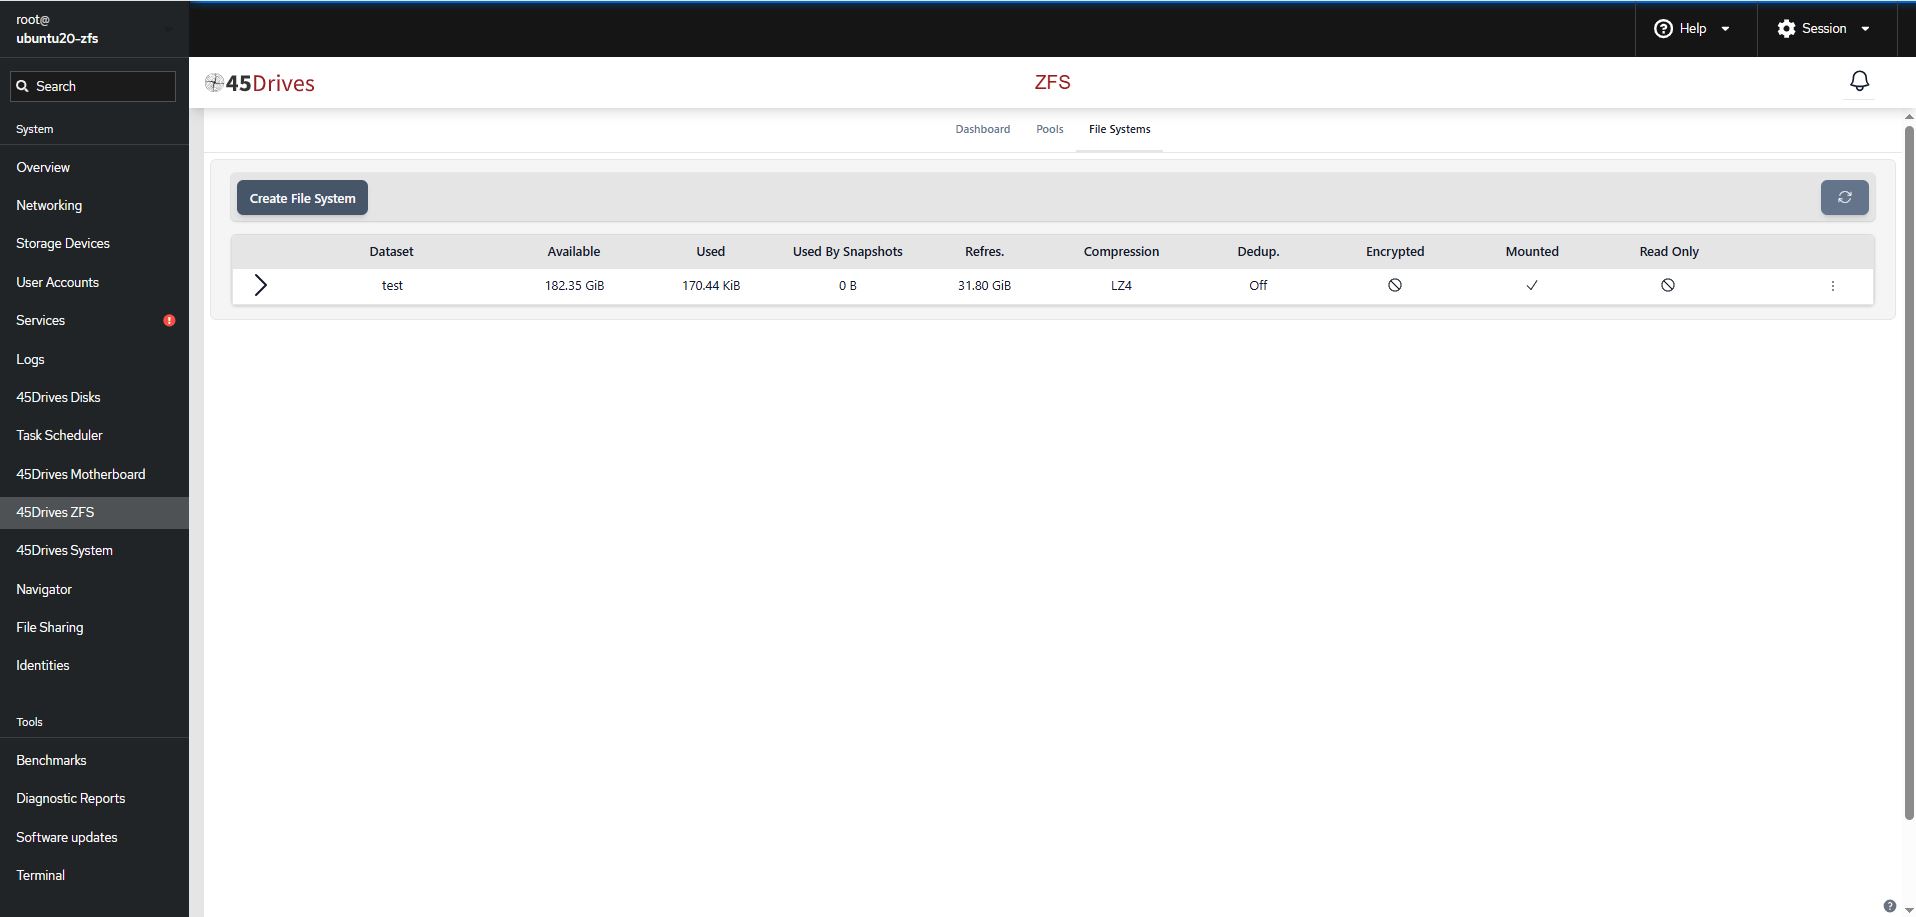
- With your new storage pool created, we can now create some datasets to share out. Start by clicking on the “45Drives ZFS” module, and select the “File Systems” menu, and click “Create File System”. This will launch a popup box for you to input the information about your file system.
- In the pop-up box, you will select the “Parent File System” from the dropdown menu of existing storage pools. Next, add a Name for your File System that is representative of what it’s purpose will be. In this example, we have used “samba” because it will be used for a samba share.
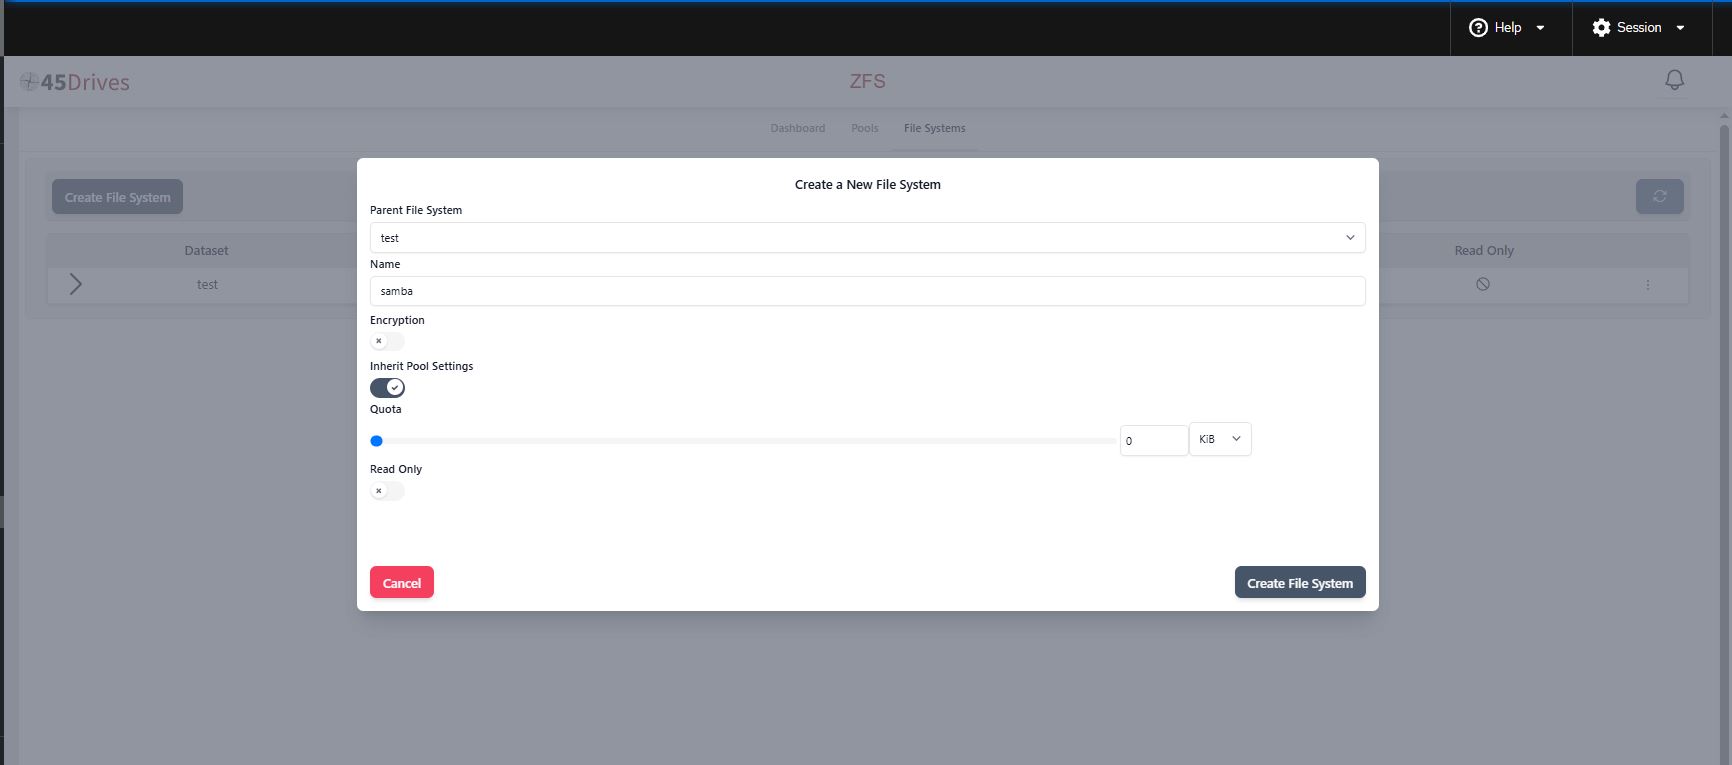
- You will then decide if you would like to apply encryption (toggle on, if so), and determine which settings will be “inherited”.
- “Quota” refers to how much data will be reserved for the new file system, if required. For example, if a certain amount of data needs to be set aside for the samba share, it would be selected here.
- Click “Create File System” when all required settings have been chosen.
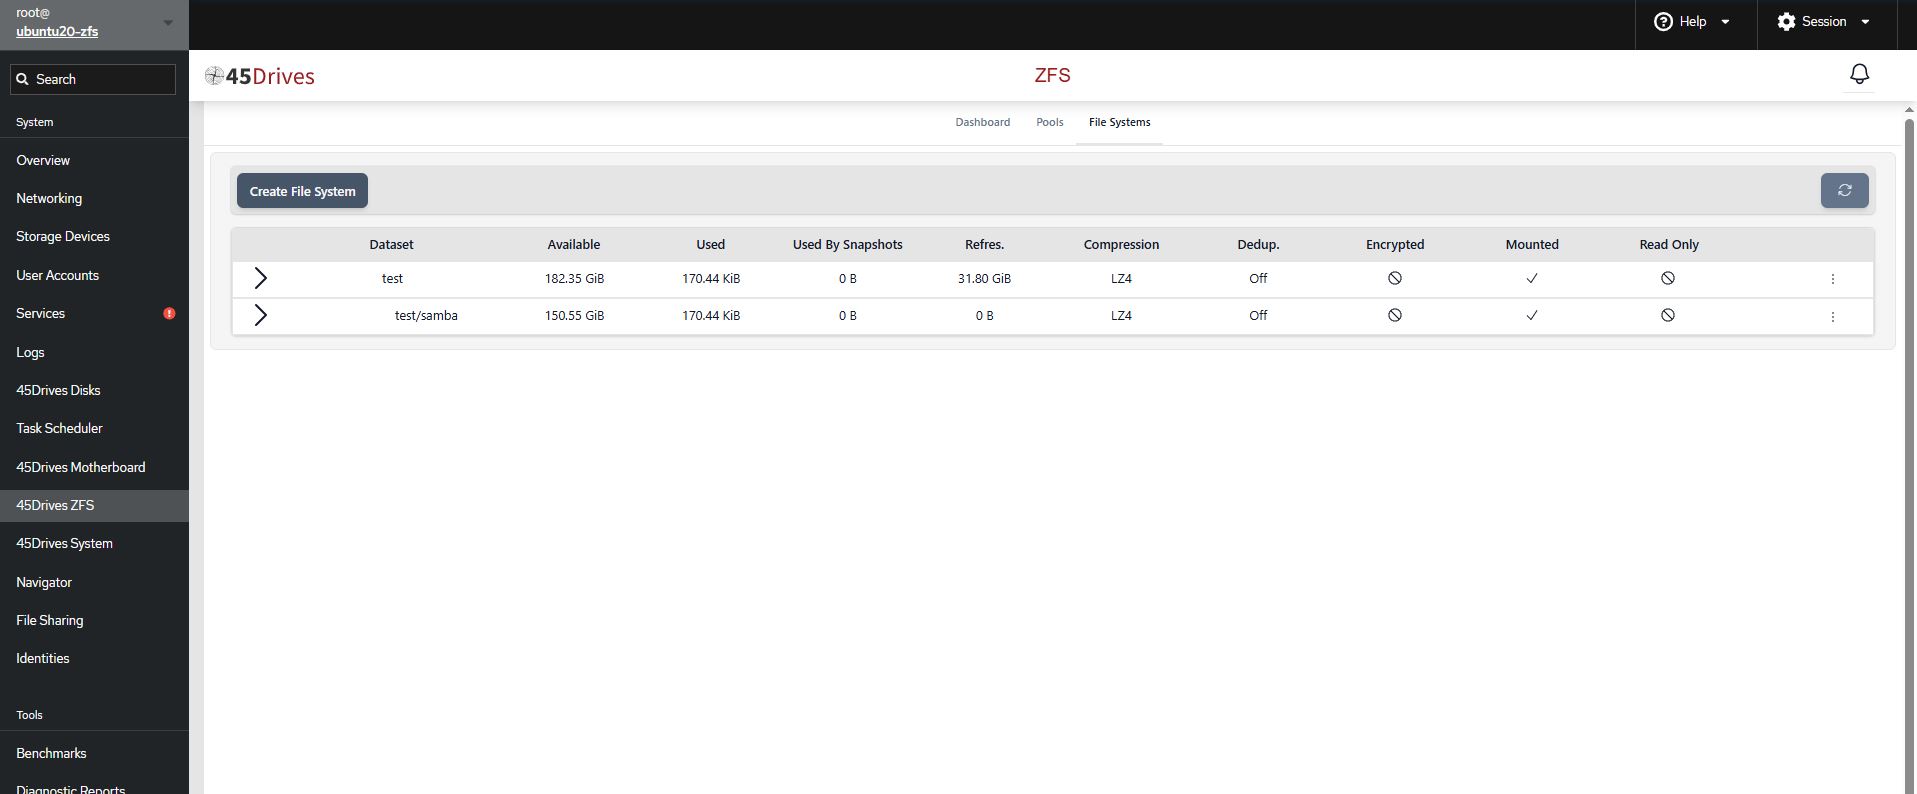
This will return you to the “File Systems” menu of the “45Drives ZFS” module, where your new file System will be visible under the Storage Pool.
Verification
- You are able to see your ZFS pool, datasets, and drives within the Dashboard, Pools, and File Systems tabs within the 45Drives ZFS module.
- If you are to run zpool status command within the Terminal you should see the output of the ZFS Pool, it’s VDEVs, and Disks.
Troubleshooting
- If you are unable to create the pool, ensure the drives you are using are free of any partitions.
- Ensure the disks you are using to create the pool are of the same size.
Further Reading
Views: 4197