Scope/Description
- This article will show you how to add a new VDEV to an existing ZFS Pool in Houston UI using the ZFS module.
Prerequisites
- Access to Houston UI
- ZFS Module and Packages Installed
- Existing ZFS Pool
Steps
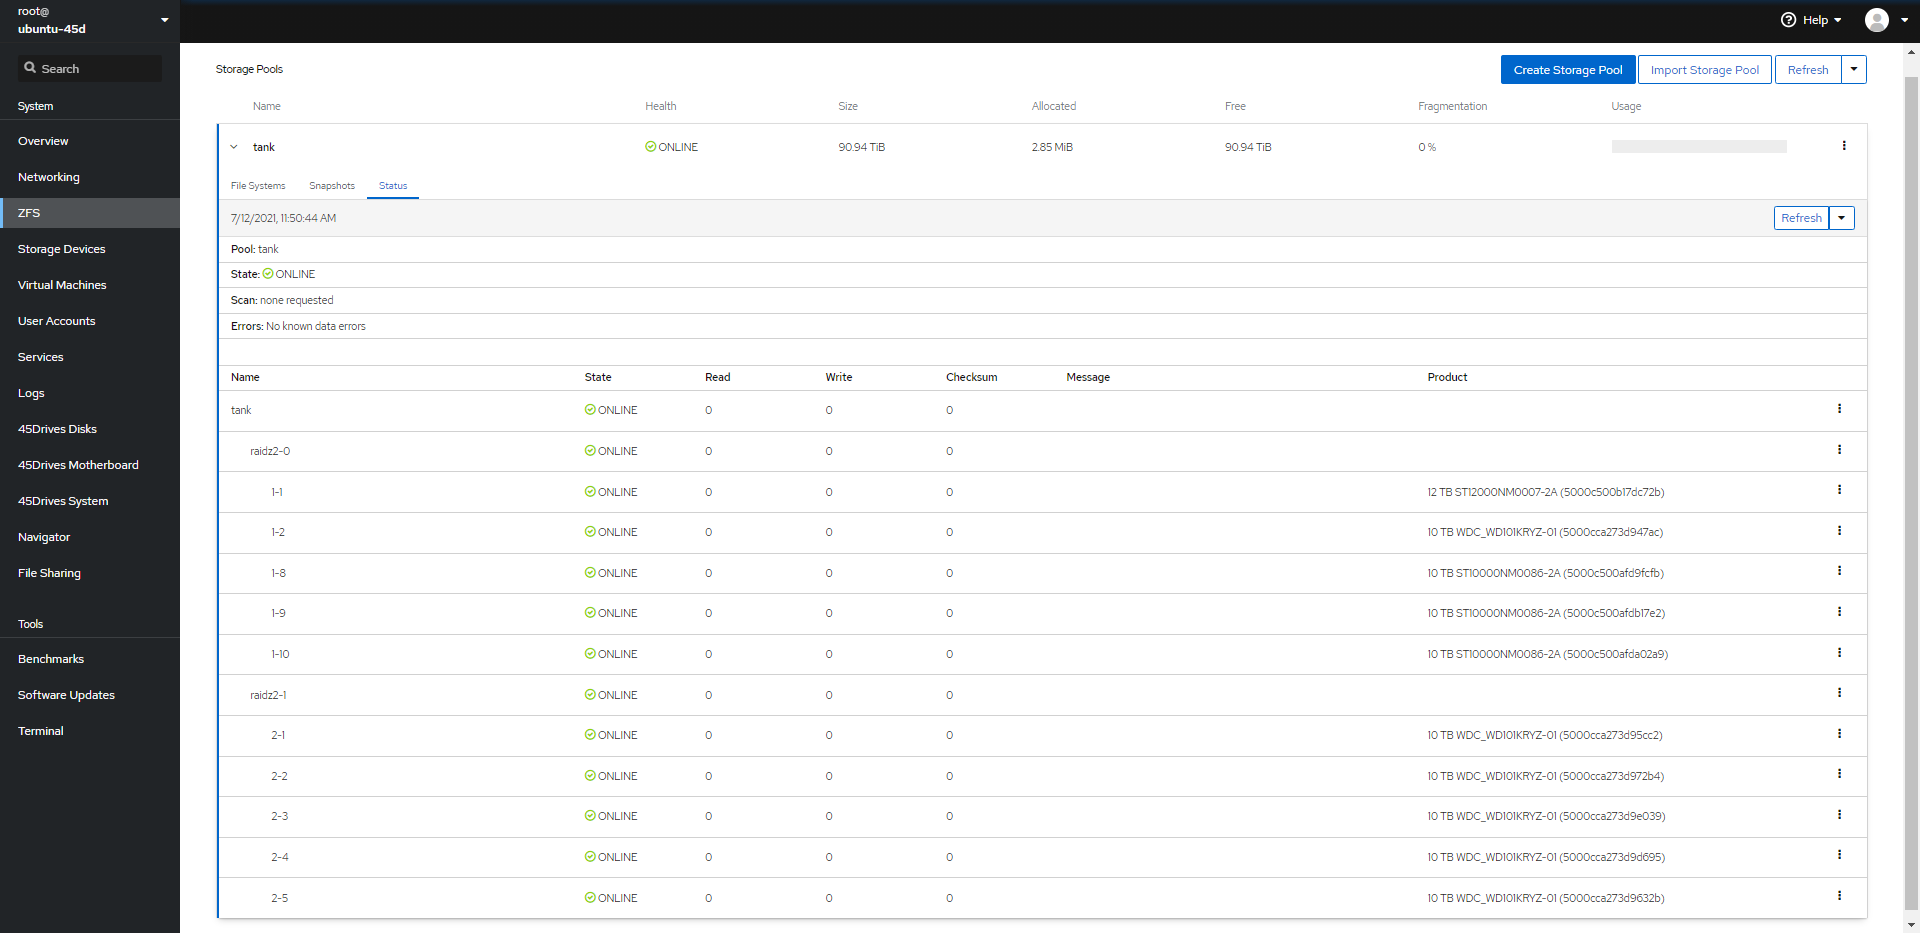
Accessing the ZFS Tab
- We begin by going to our ZFS tab to view our storage pool.
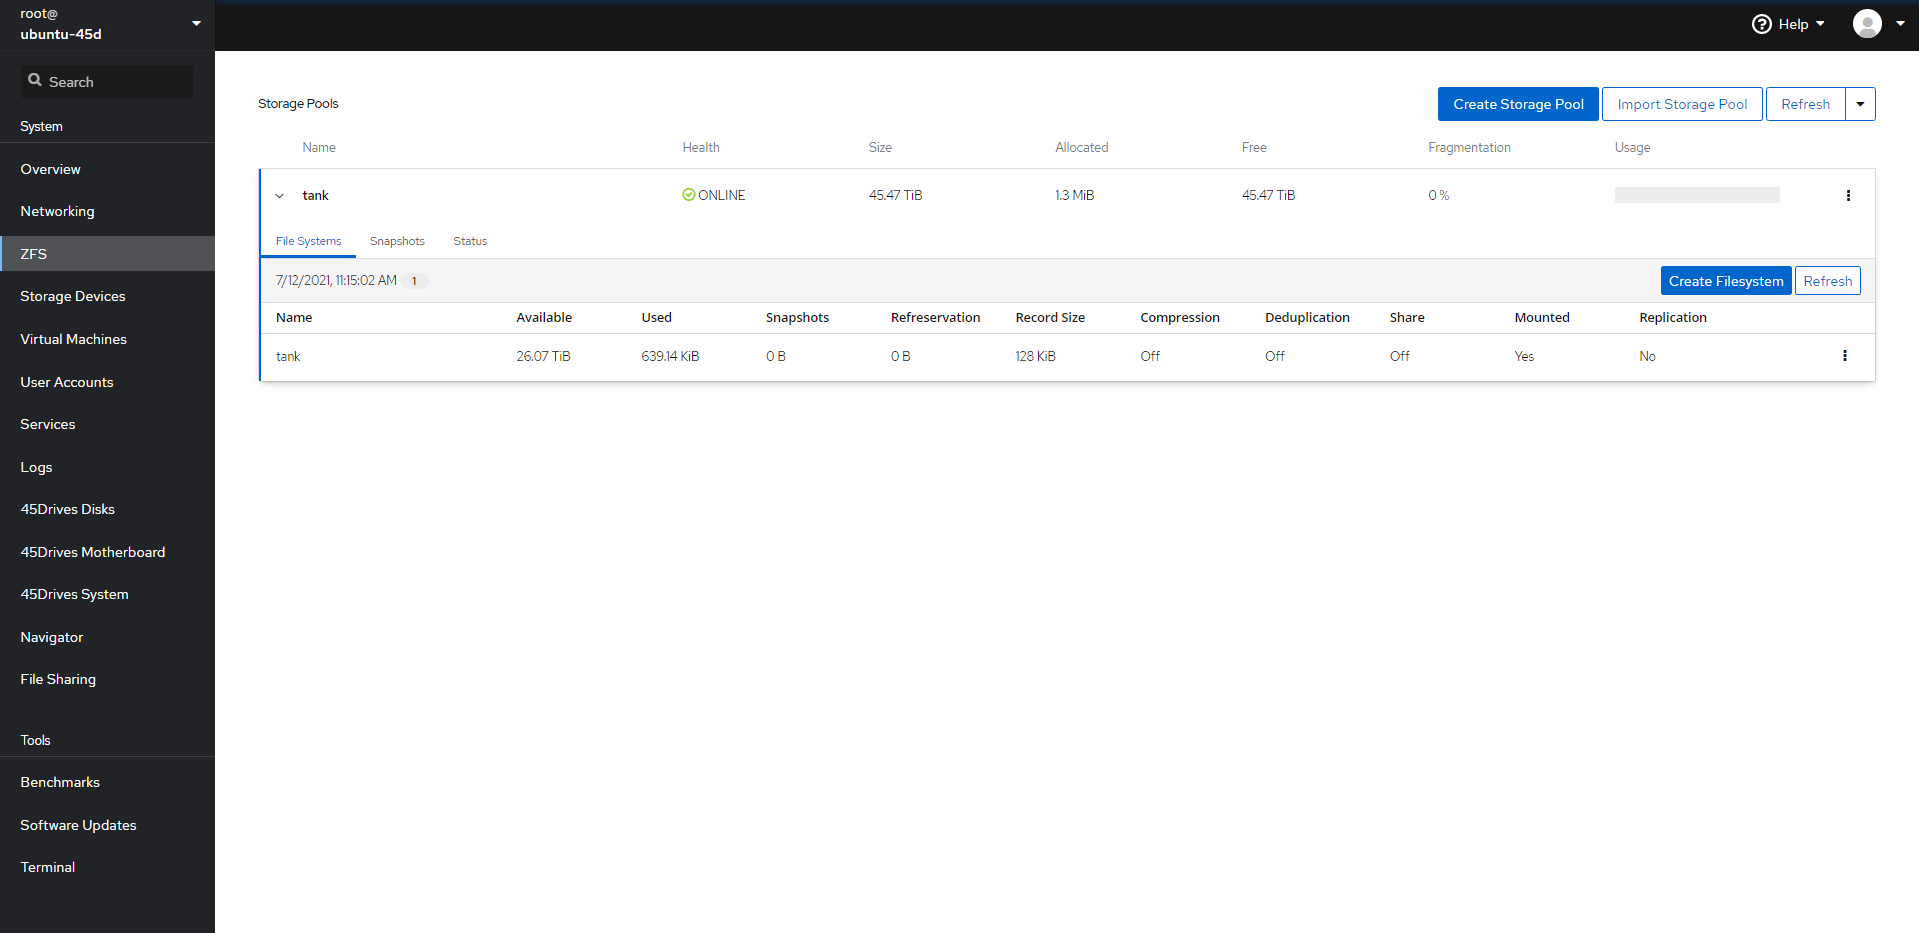
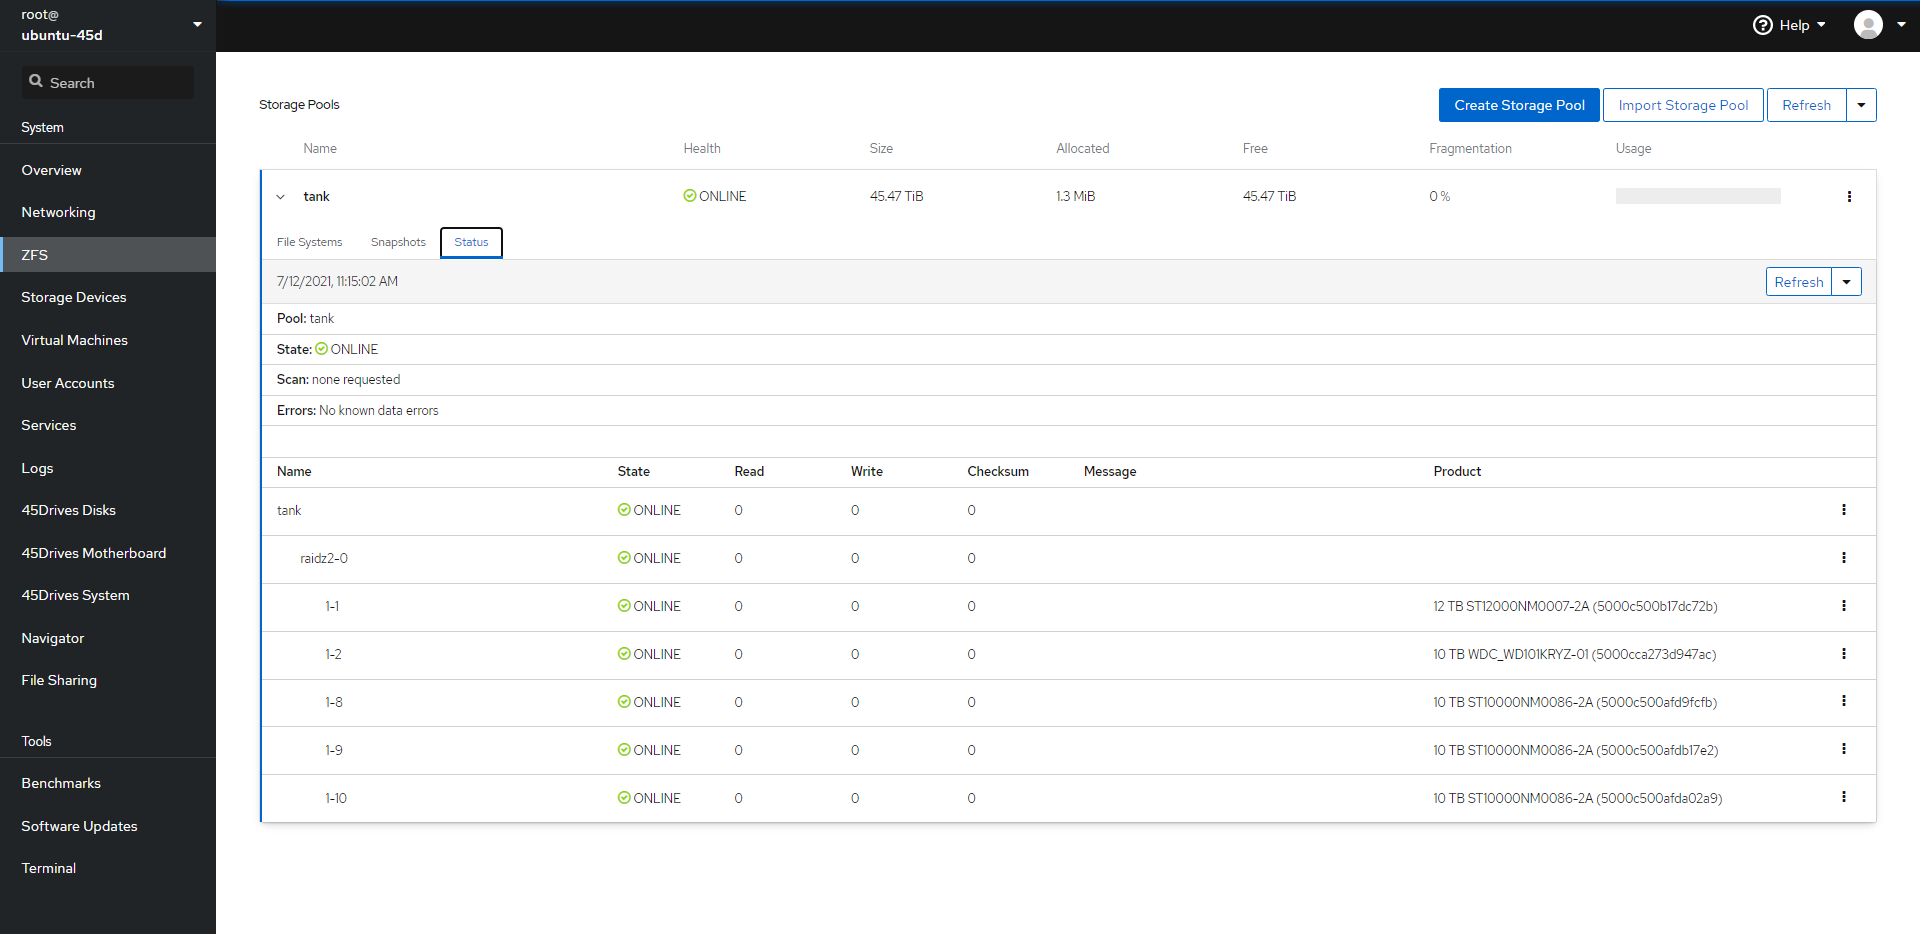
- Once here, click on Status to expand your pool and see your first VDEV created.
Expanding ZFS Pool
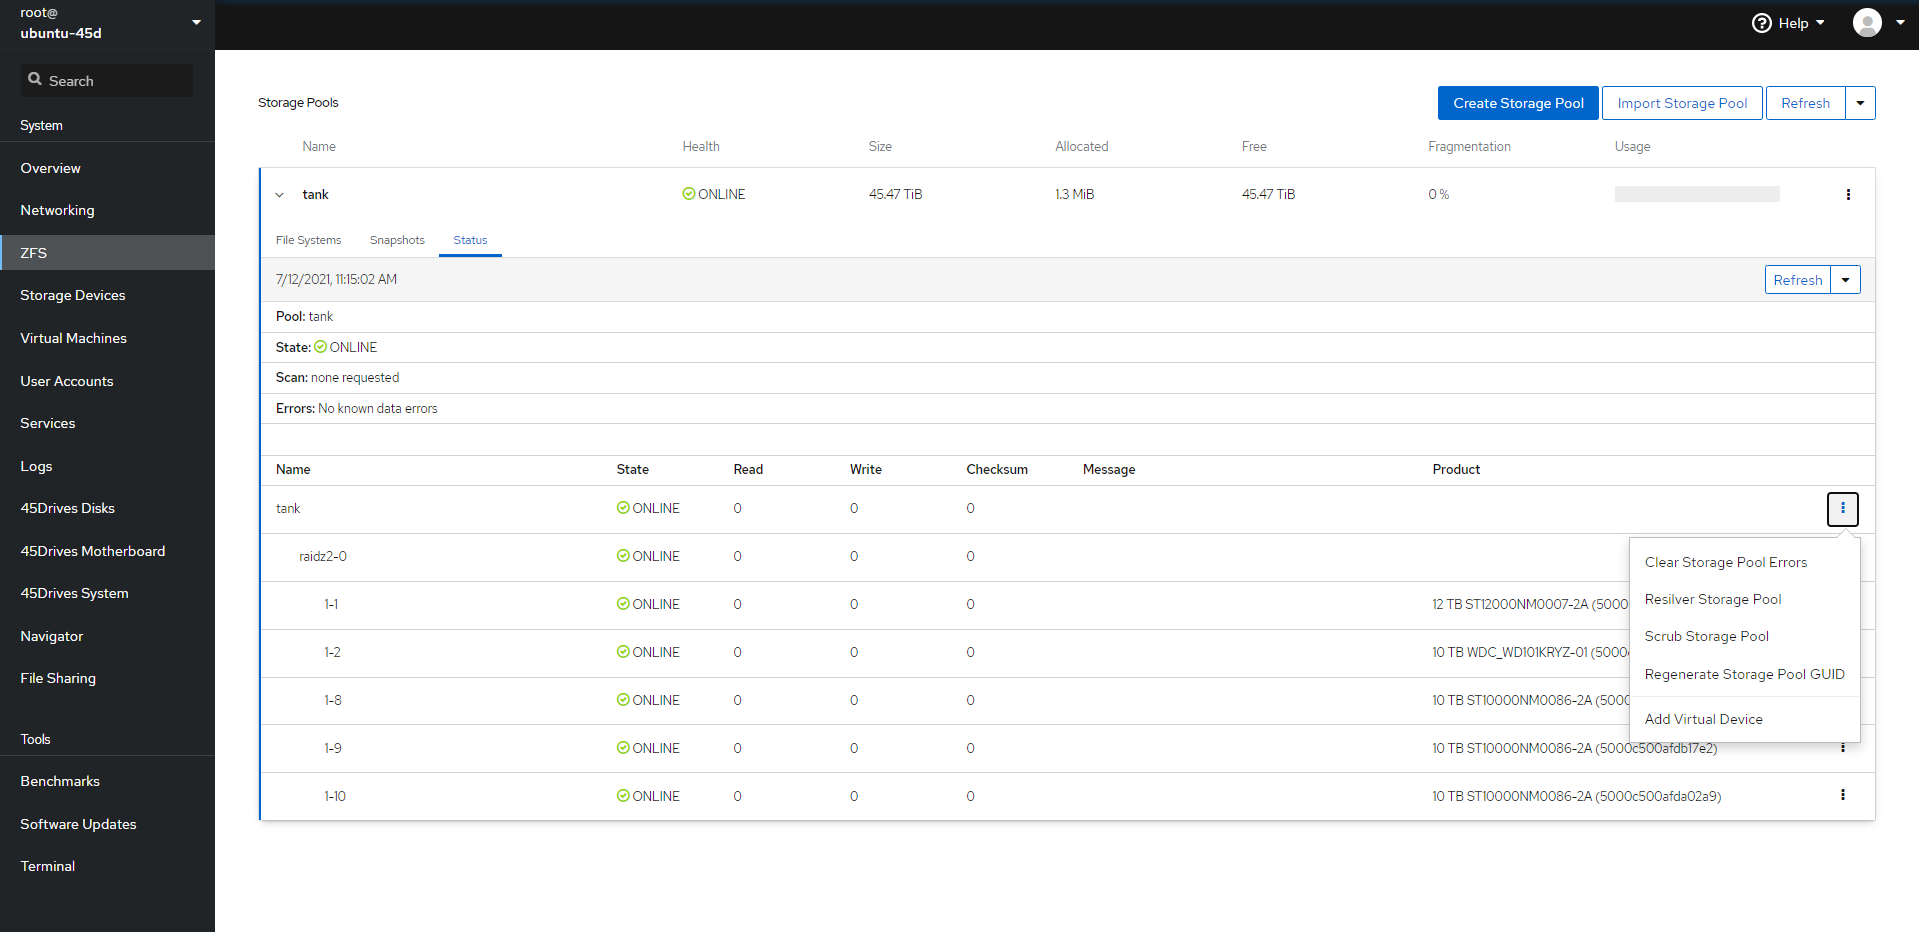
- With your VDEV expanded, look to the far right to see three ellipsis’ at the end of your pool name. Click on those to expand your options and select Add Virtual Device.
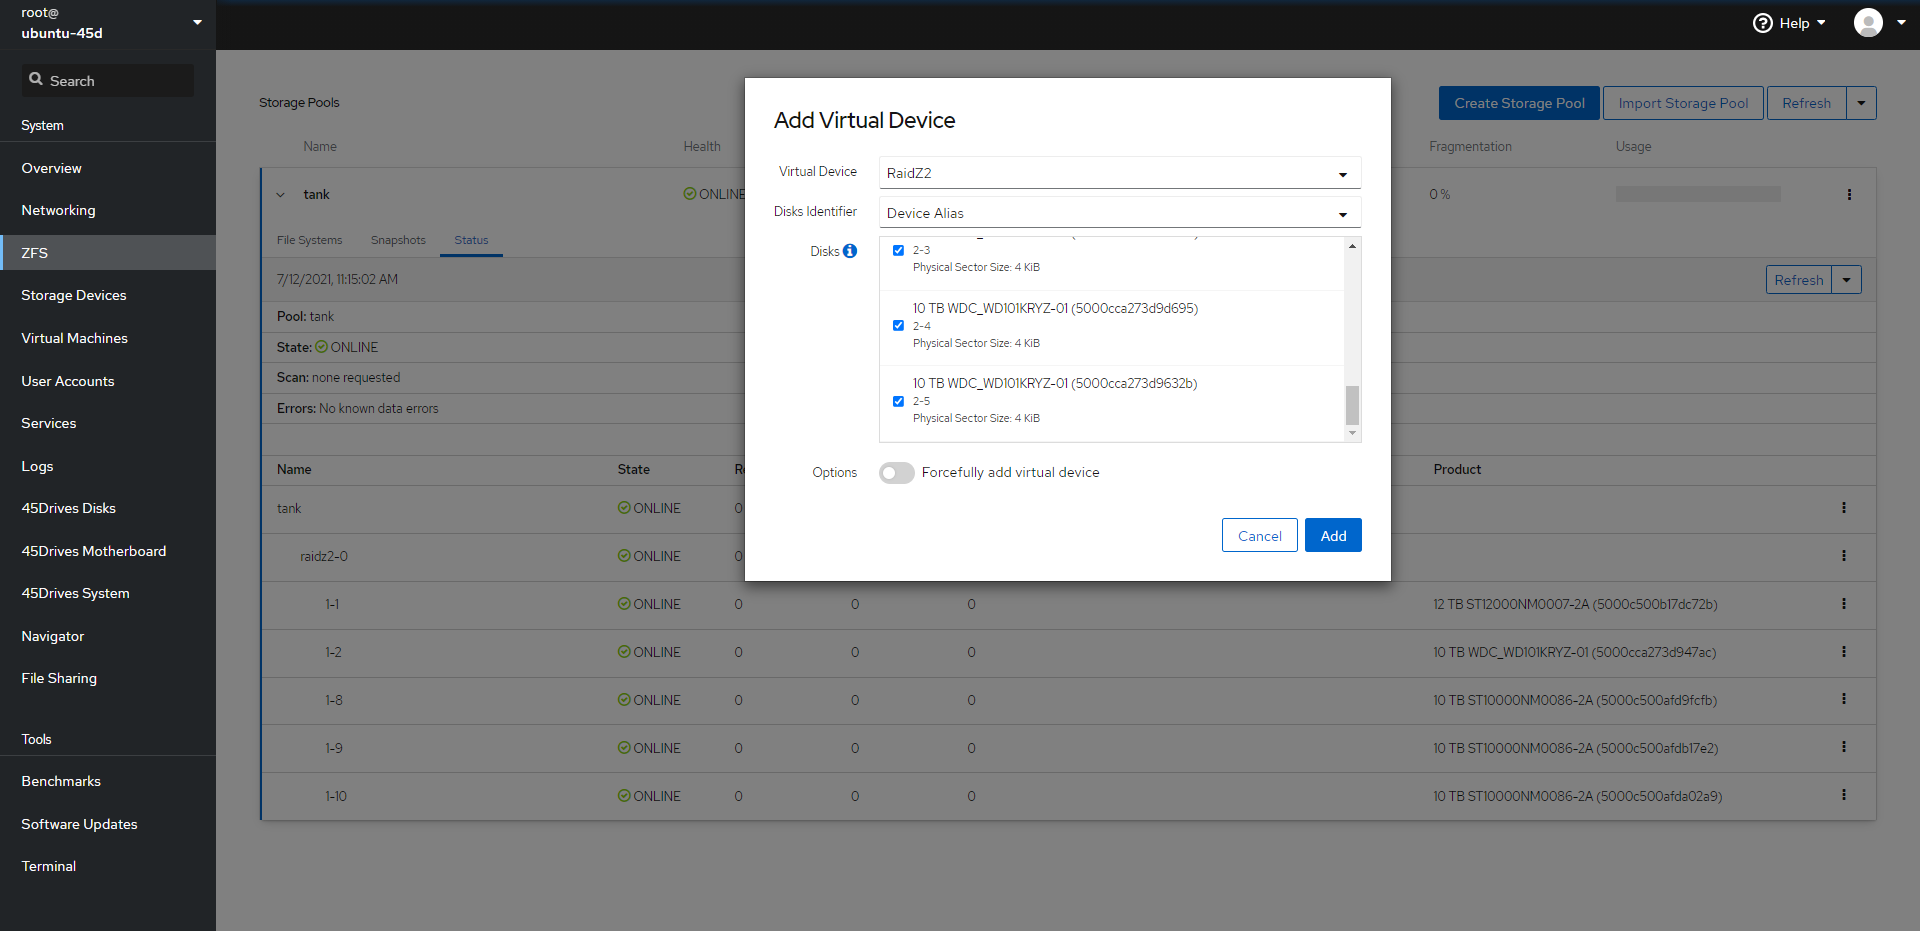
- This will prompt open a new window. Under Virtual Device select the raid in which you have already configured.
- Change Disks Identifier if you’d like. It is best practice to assign as Device Alias so you can see which drive is in which slot.
- Go ahead and select the drives you will be using, once done, hit Add to add this new VDEV to your pool.
Do not check “Forcefully add virtual device” unless absolutely necessary, as this will bypass typical ZFS vdev restrictions (mismatched vdev sizes, differing drive capacity).
- You will now see that your newly created VDEV has been added to your already existing pool.
Verification
- You are able to see your ZFS pool, datasets, and drives within the File Systems Tab, and Status Tab within the ZFS module.
- If you are to run zpool status command within the Terminal you should see the output of the ZFS Pool, it’s VDEVs, and Disks.
Troubleshooting
- If you are unable to expand the pool, ensure the drives you are using are free of any partitions.
- Ensure the disks you are using to expand the pool are of the same size.
- Ensure you are expanding the pool with the same type and size of VDEV.
Views: 2788