Scope/Description
- This article will walk through the process of installing Ubuntu 20.04 on redundant boot drives.
Prerequisites
- An ubuntu 20.04LTS server iso downloaded
- Attach iso to server, either remotely with IPMI or physically with USB drive.
Steps
Starting Installation
- Verify server BIOS is set to “legacy” boot mode
- Boot attached Ubuntu 20.04 installation ISO
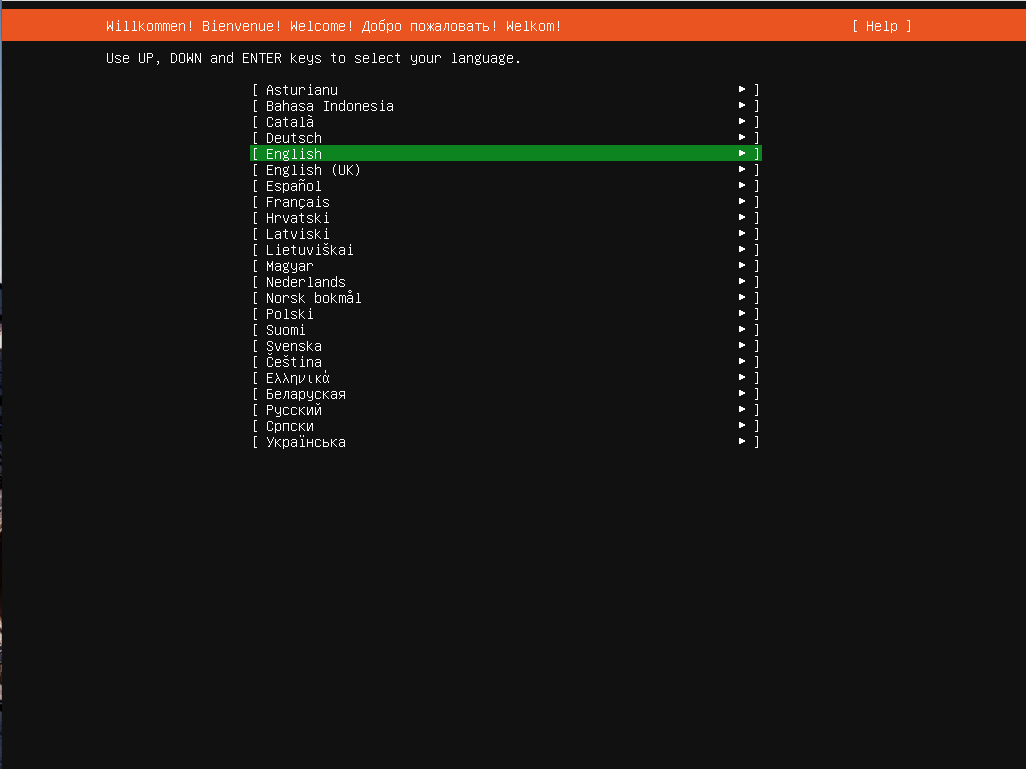
- Once booted into Installation ISO, the first choice presented will be “Language”
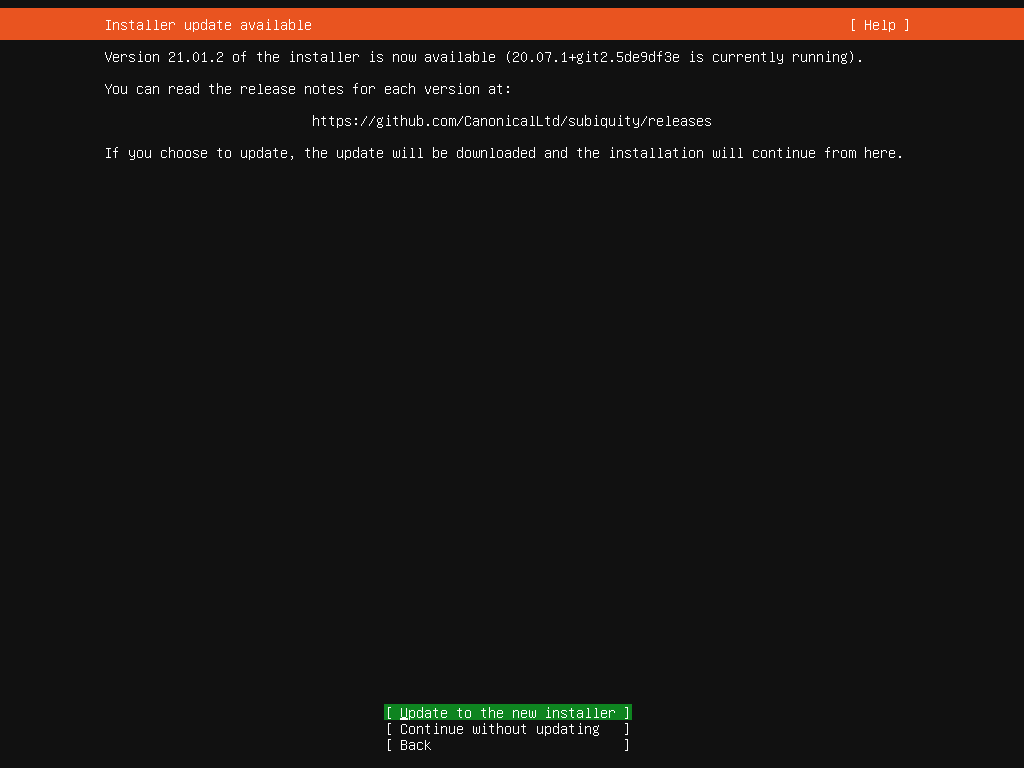
- You may be presented with the option to update the installer. Choose to update
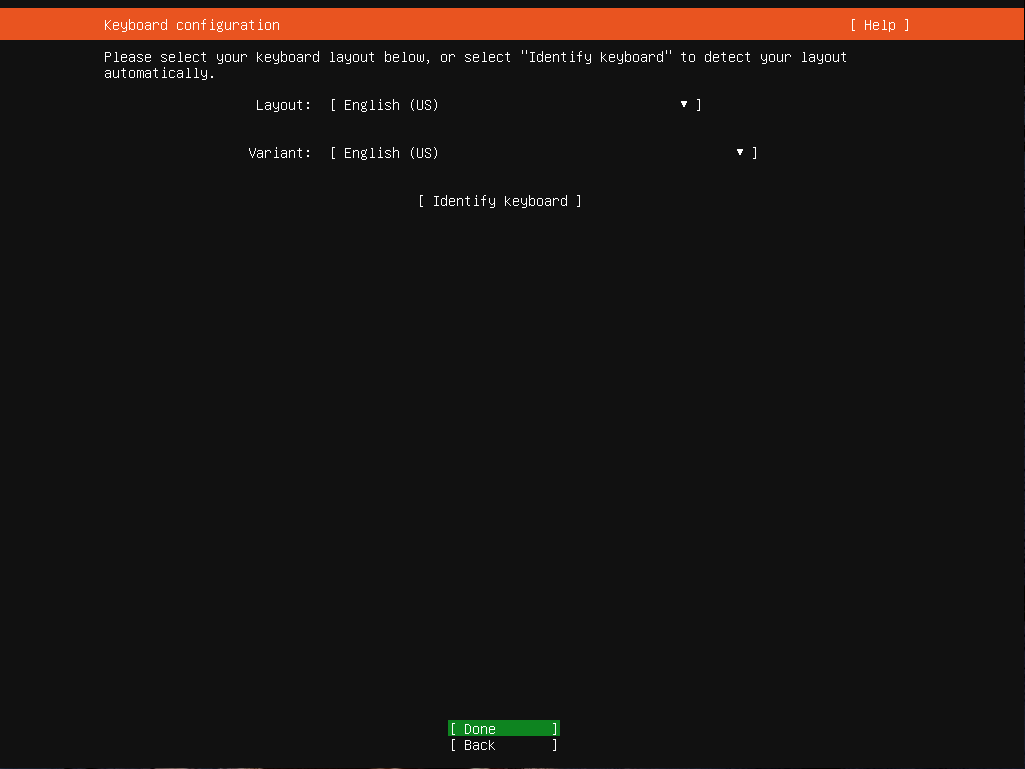
- Next choose keyboard layout
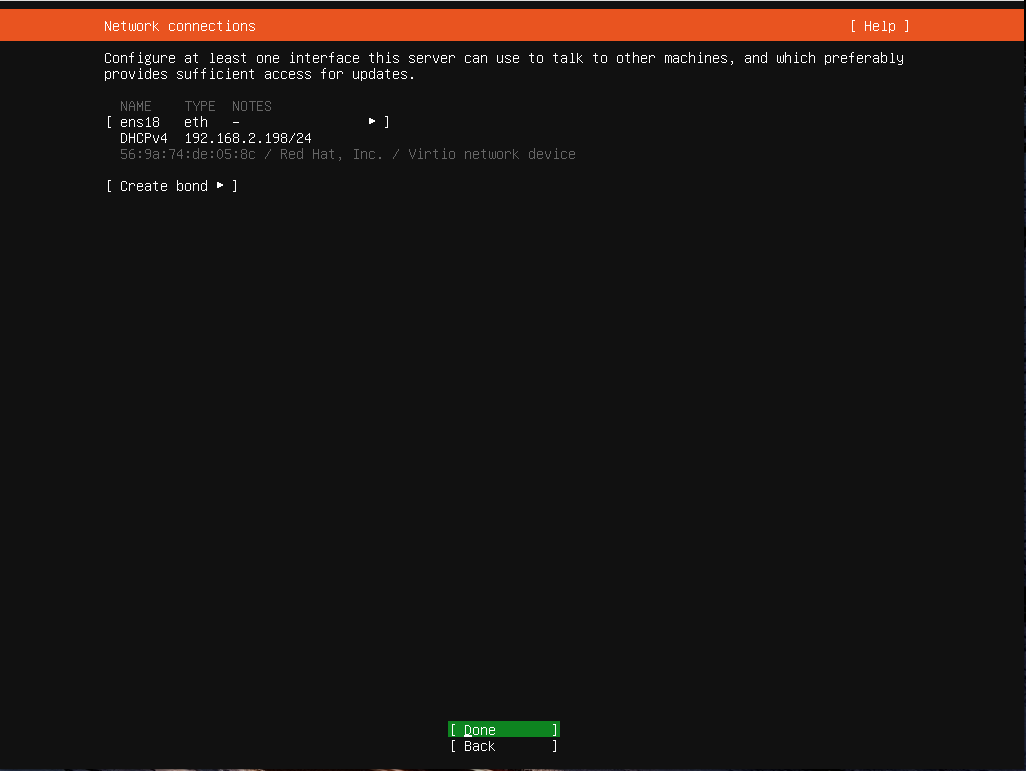
- Choose which interface to configure.
- Configure a interface so it has internet access. This is not required, but is convenient as updates will be installed during install time
- Do not configure anything beyond basic connection for installation as we will be switching to Network Manager after installation
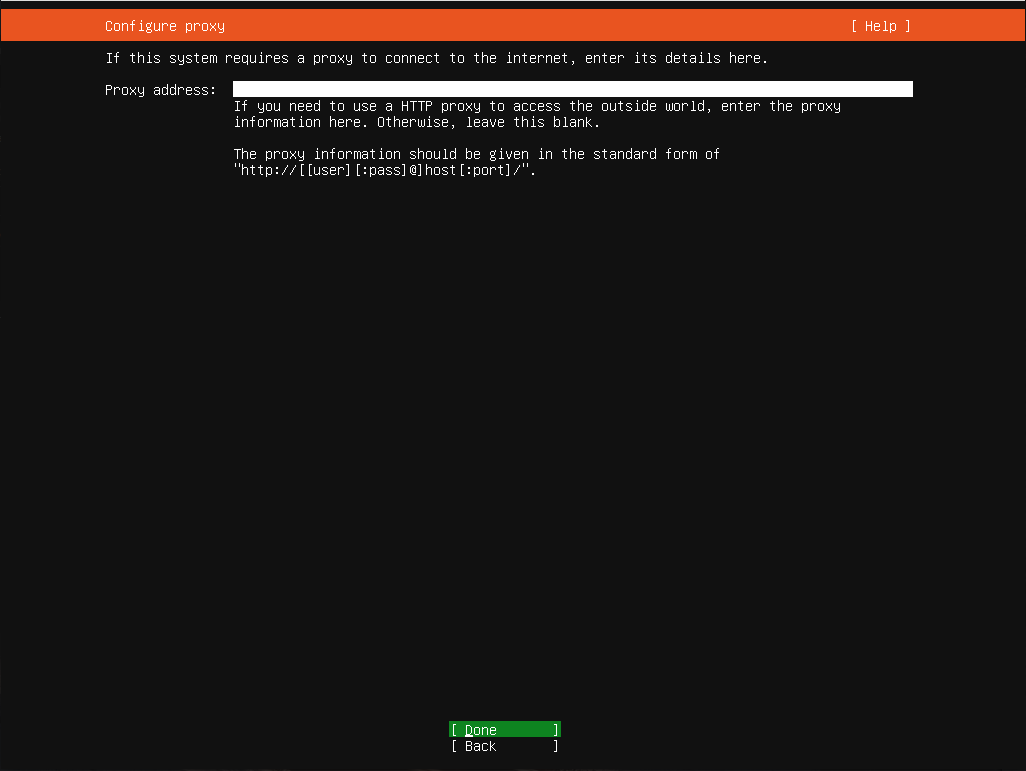
- Proxy Address, leave blank unless proxy server is present.
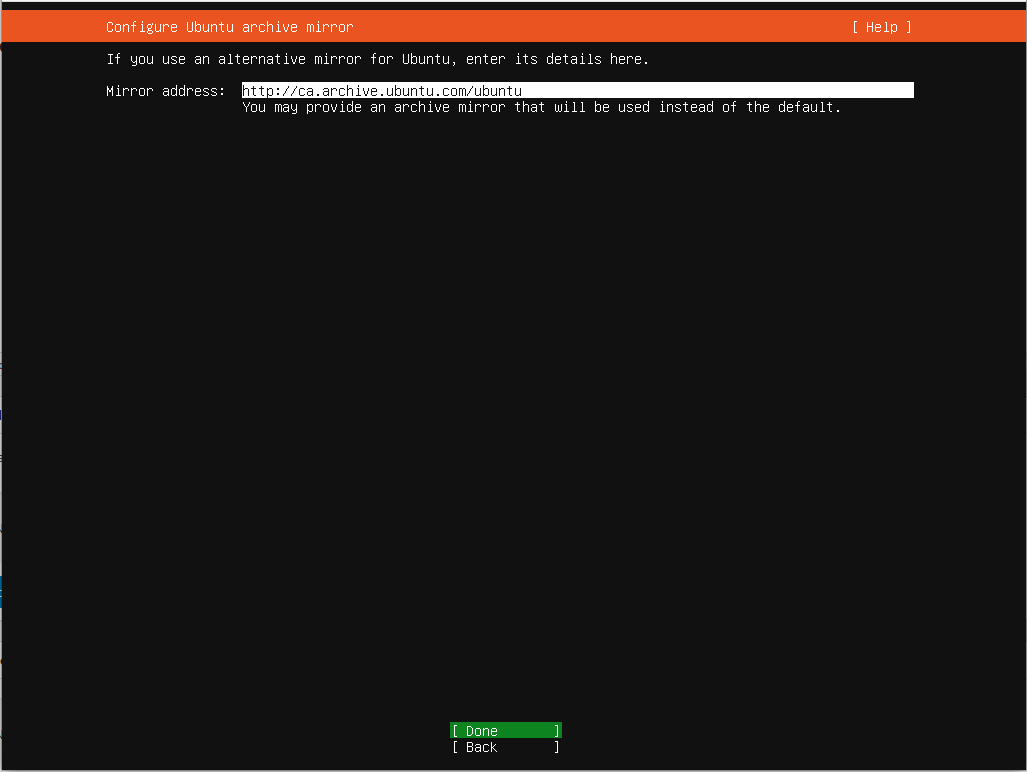
- Alternative U
- buntu mirror for installation, leave the default choice
Creating Mirrored Partitions
- Storage Configuration, select “Custom Storage Layout”
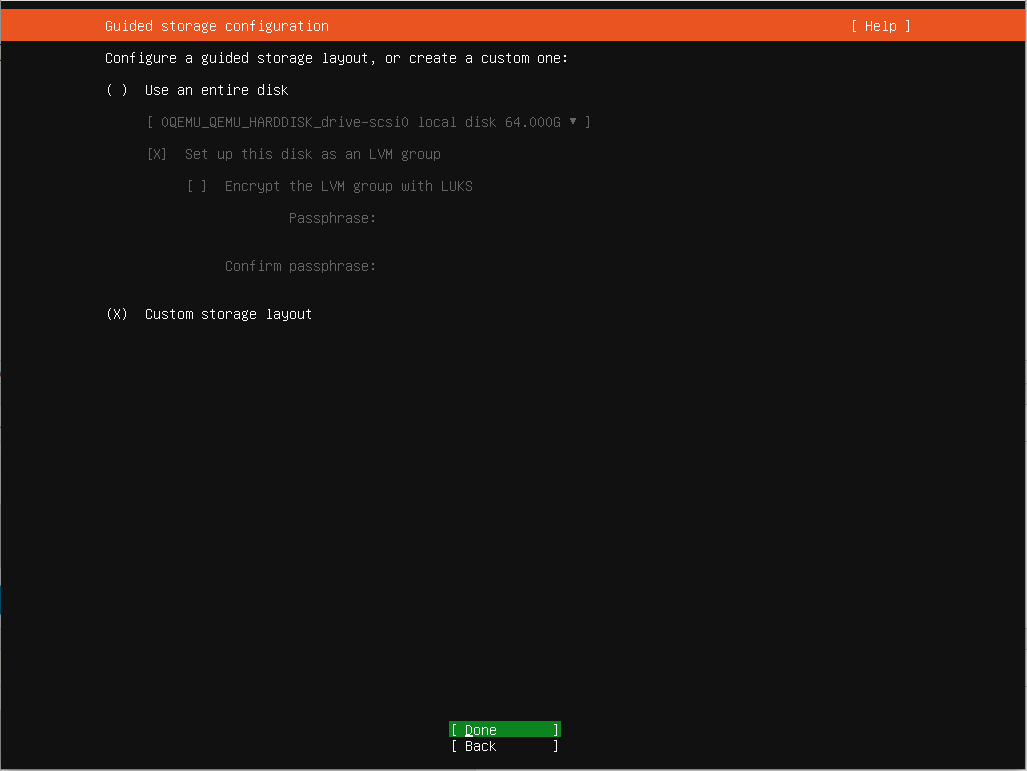
- If the disks have already been used (ex. installing over an existing OS) then choose “reformat” on each boot disk. This will not actually erasre any data until the process commited at the end.
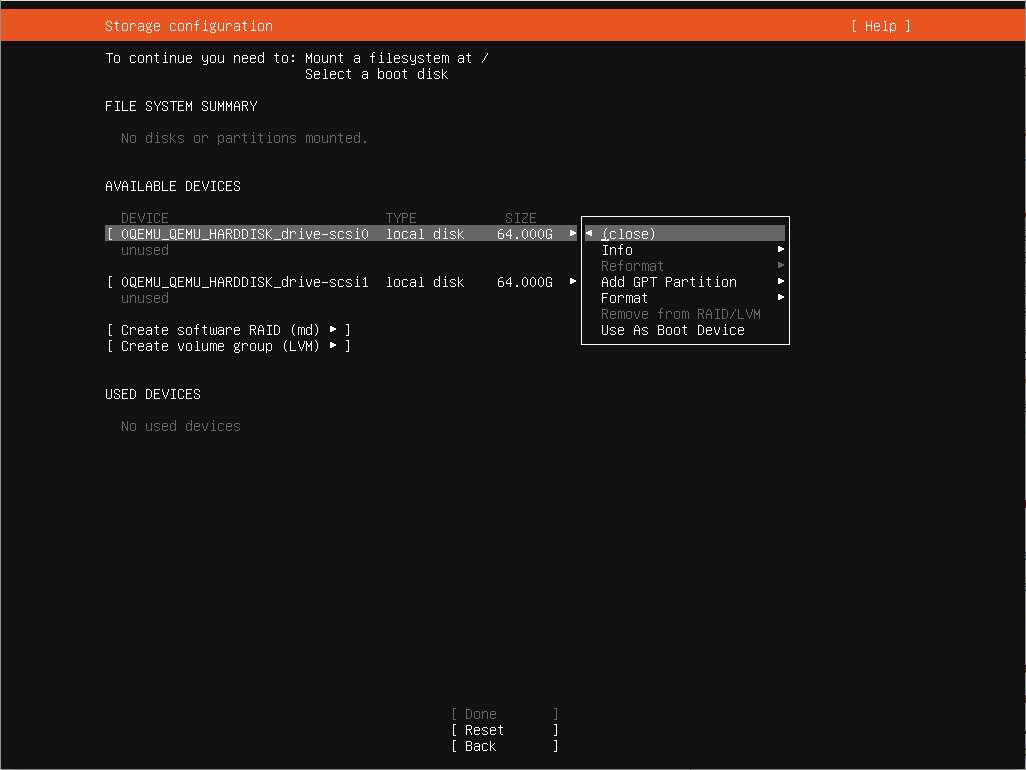
- Select each disk to be used as a boot device
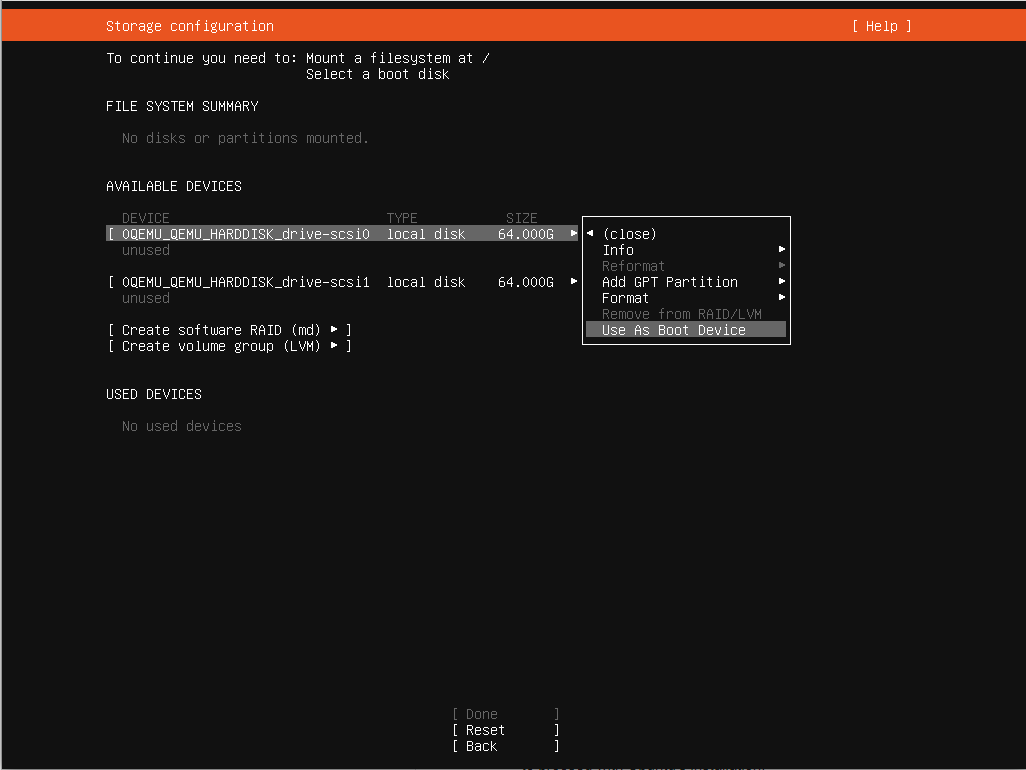
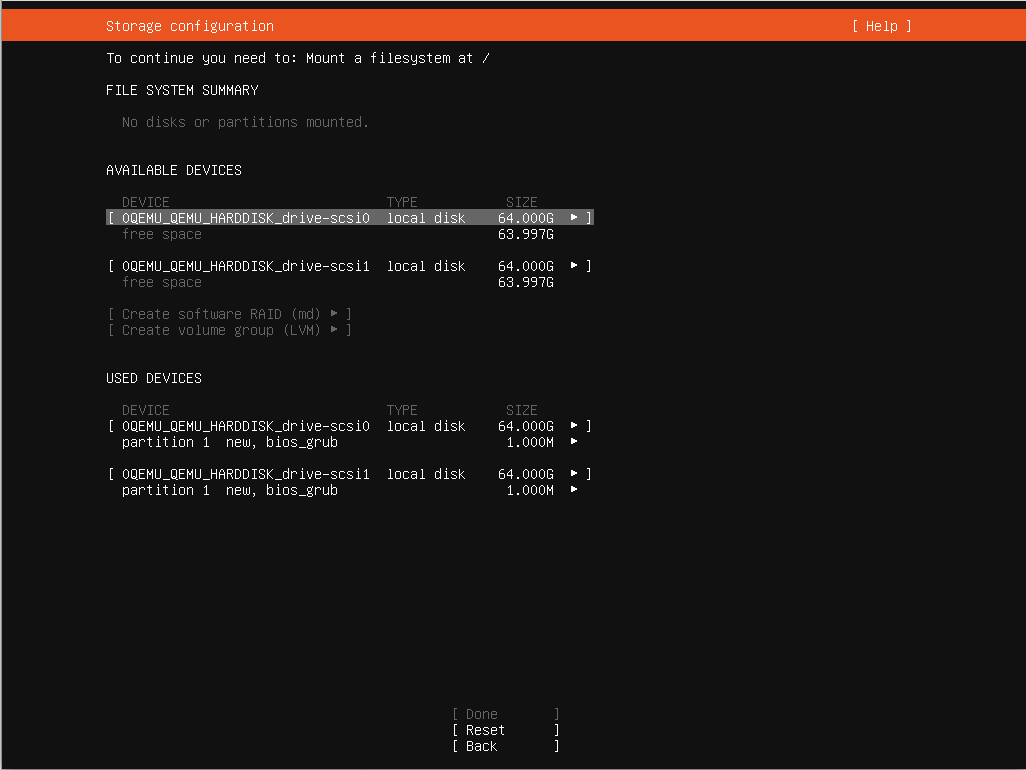
- Create a 1GB partition for the first raid device on each disk. Leave the partition “unformatted”
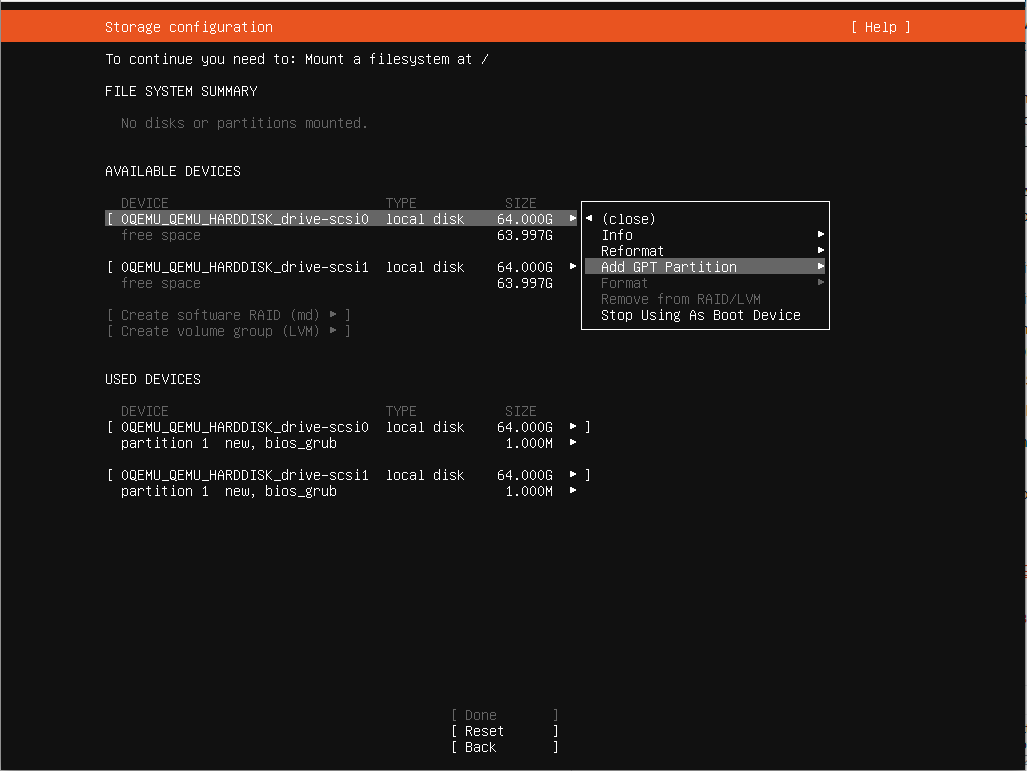
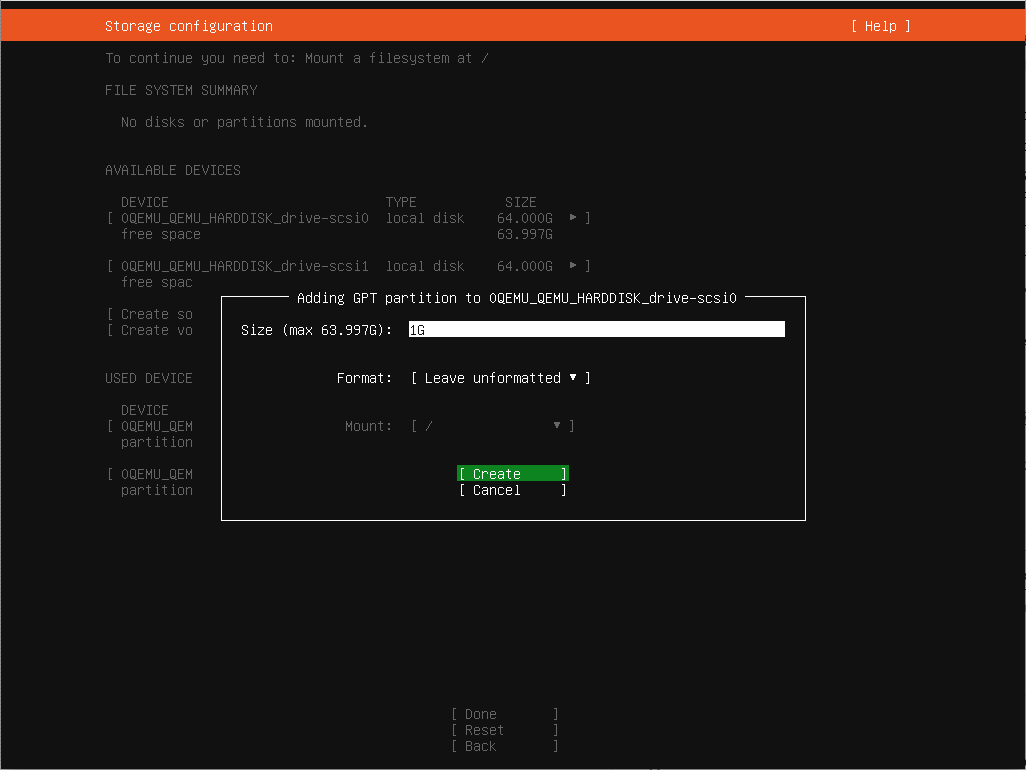
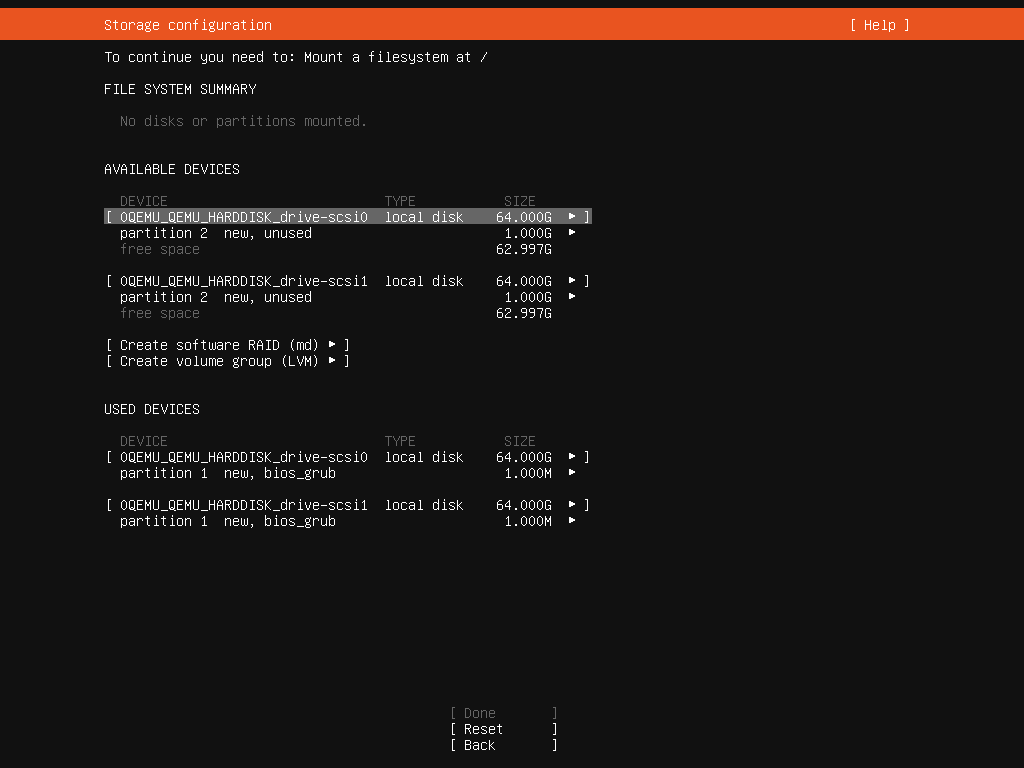
- Create a 4GB partition for the second raid device on each disk. Leave the partition “unformatted”
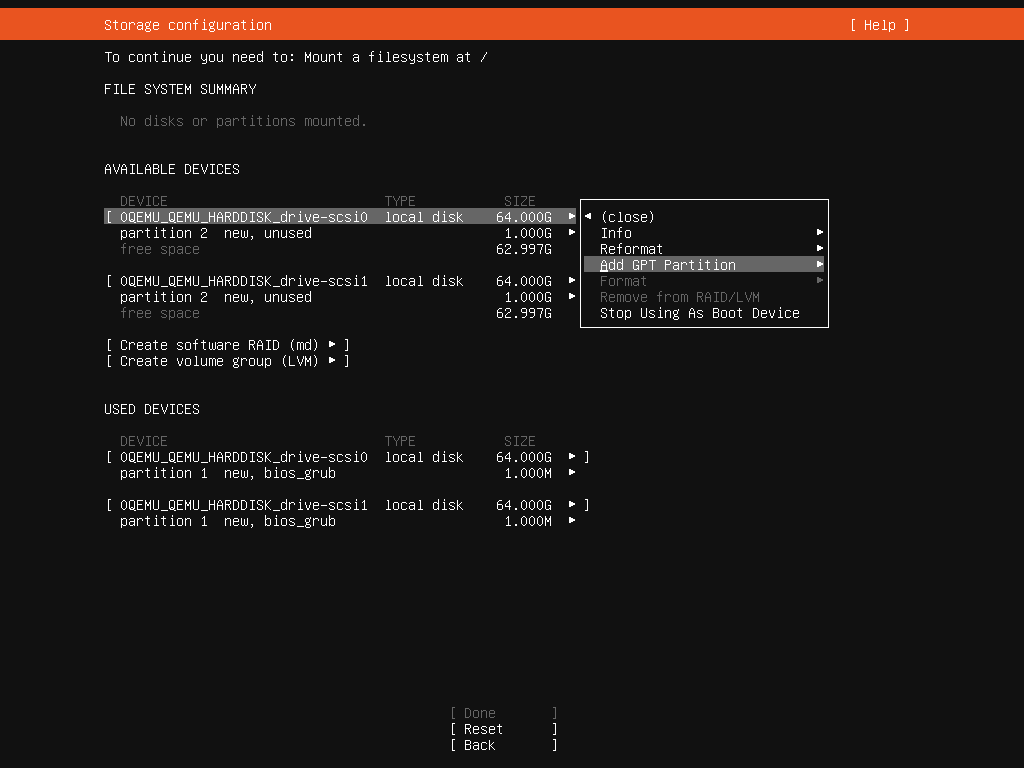
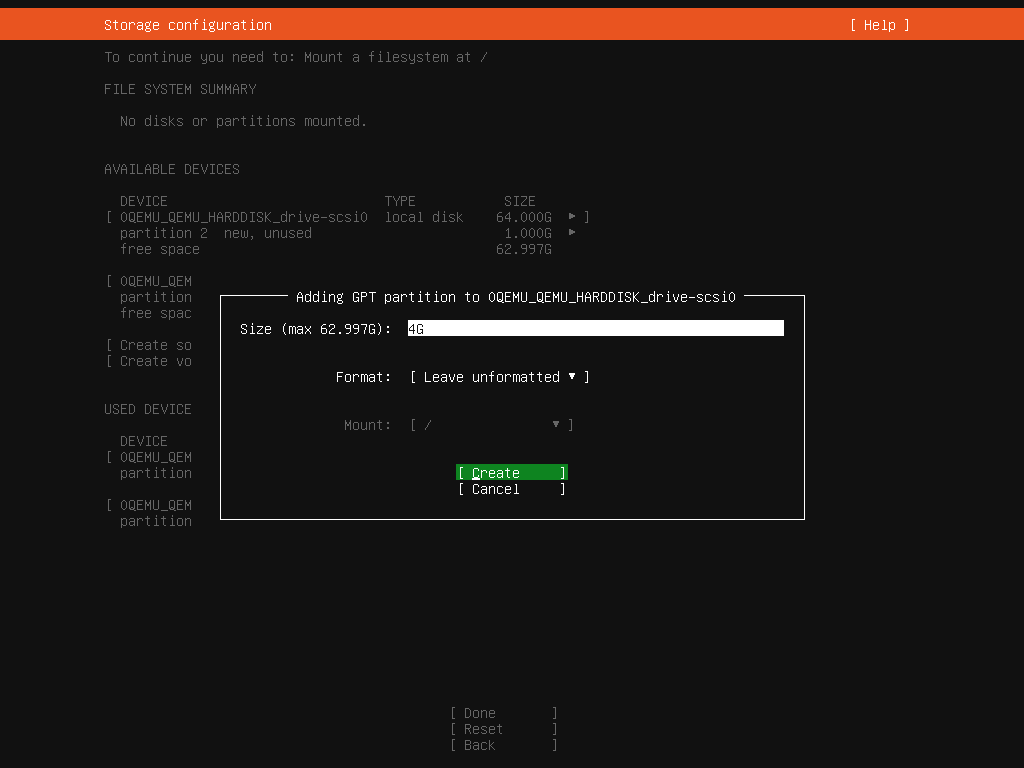
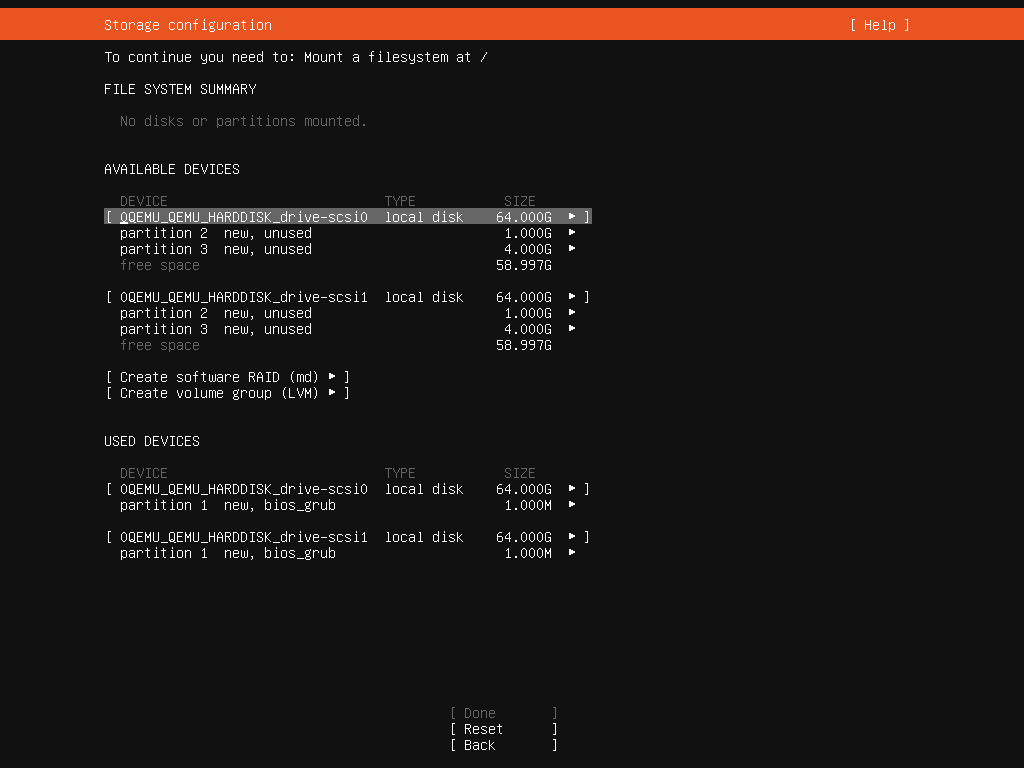
- Create a partition that fills the rest of the space for the third raid device on each disk. Leave the partition “unformatted”
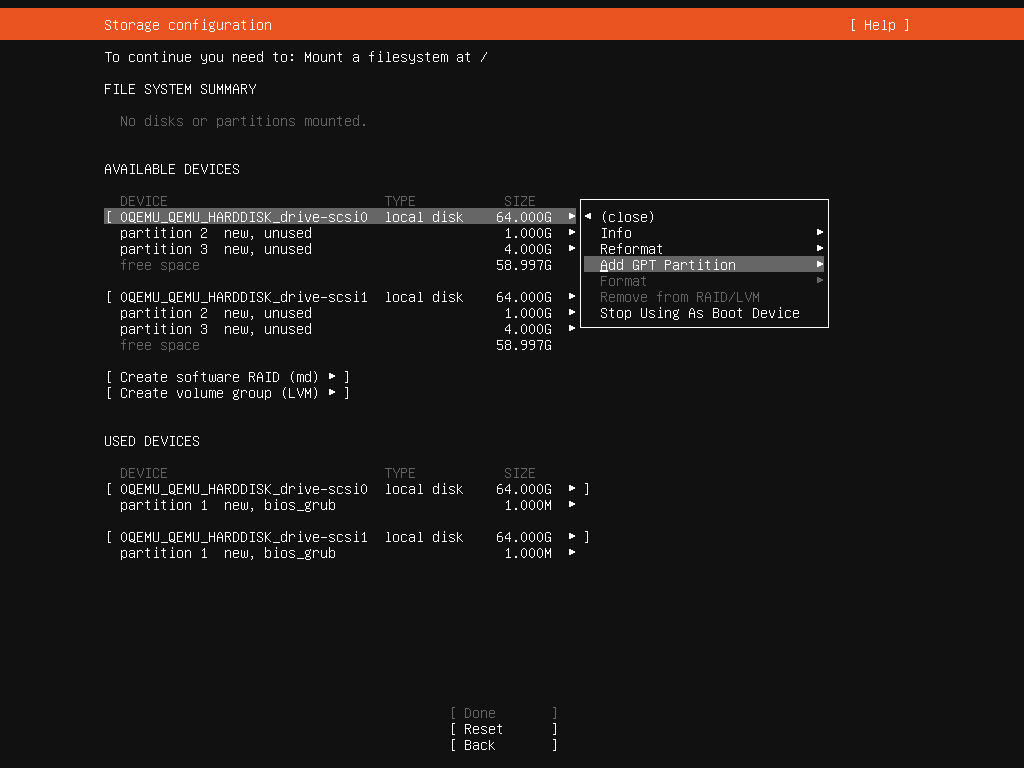
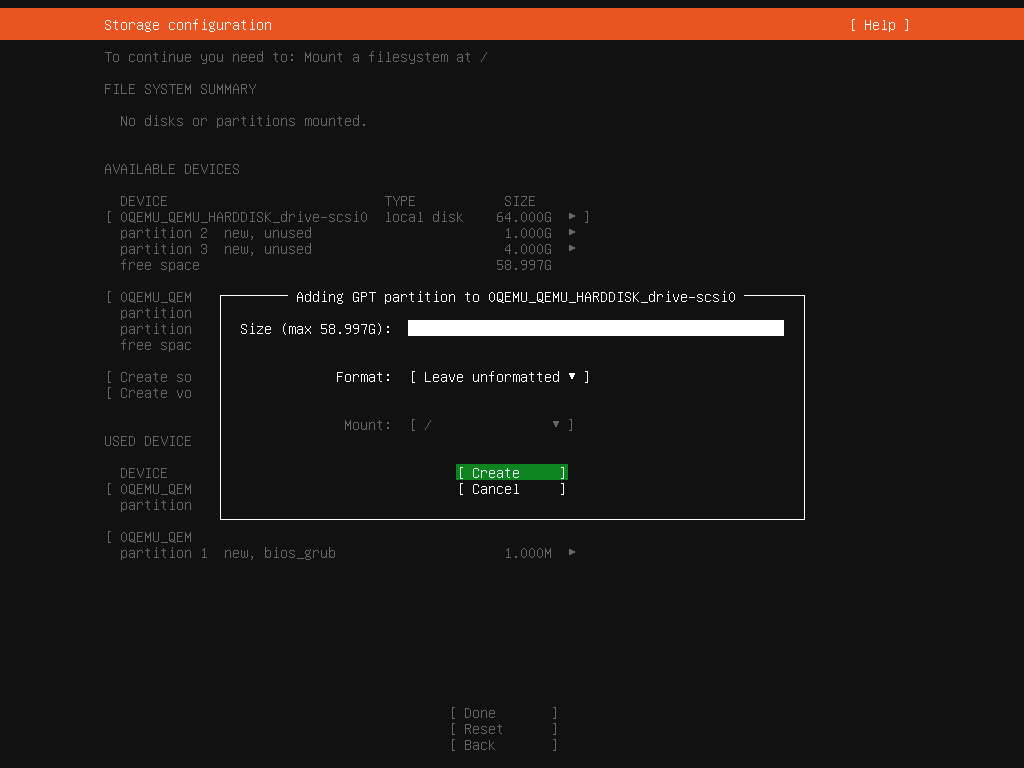
- Select “Create Software Raid (md)” to create first raid device, Choose 1GB partition on each disk and name the device “boot”
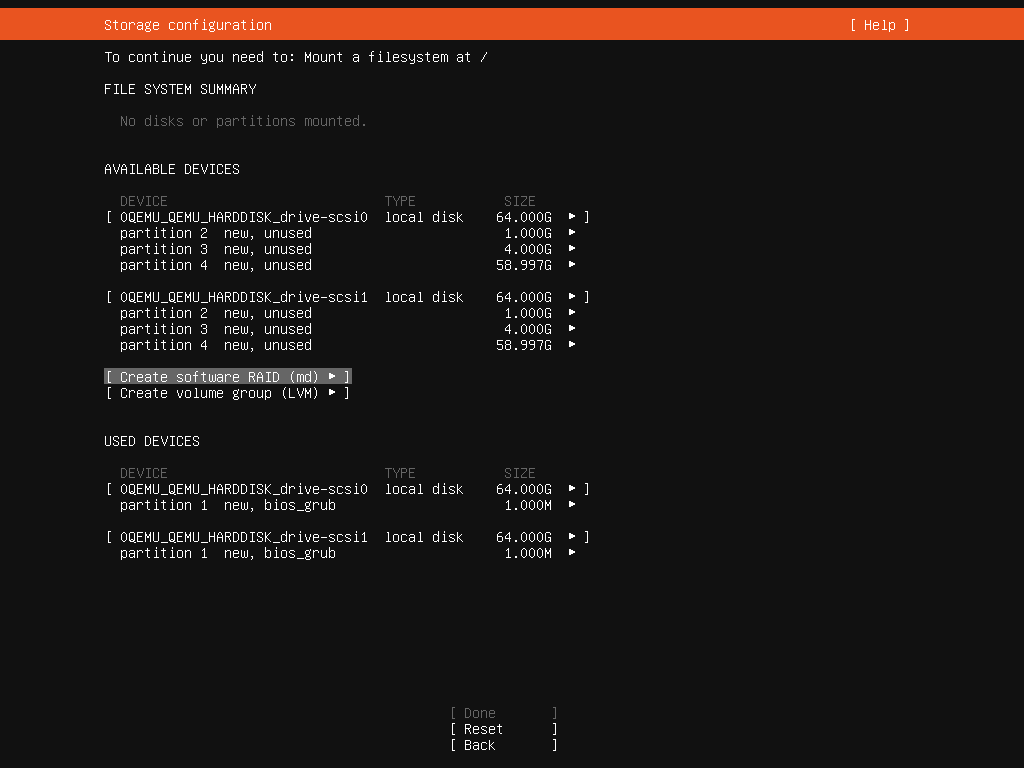
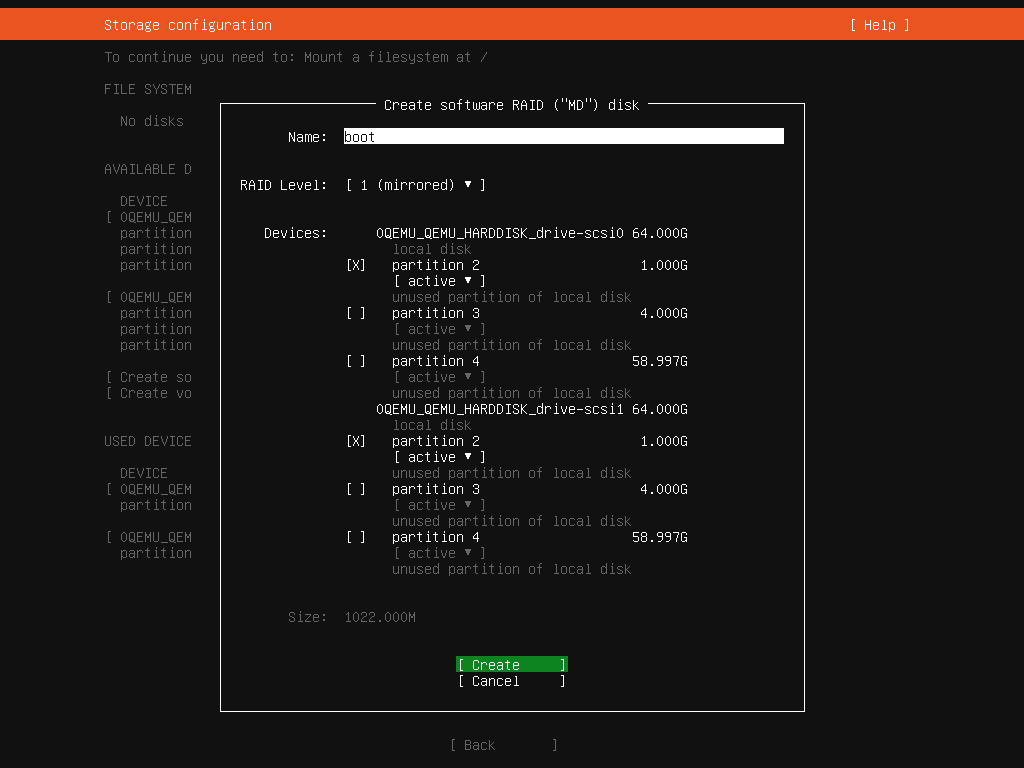
- Select “Create Software Raid (md)” to create second raid device, Choose 4GB partition on each disk and name the device “swap”
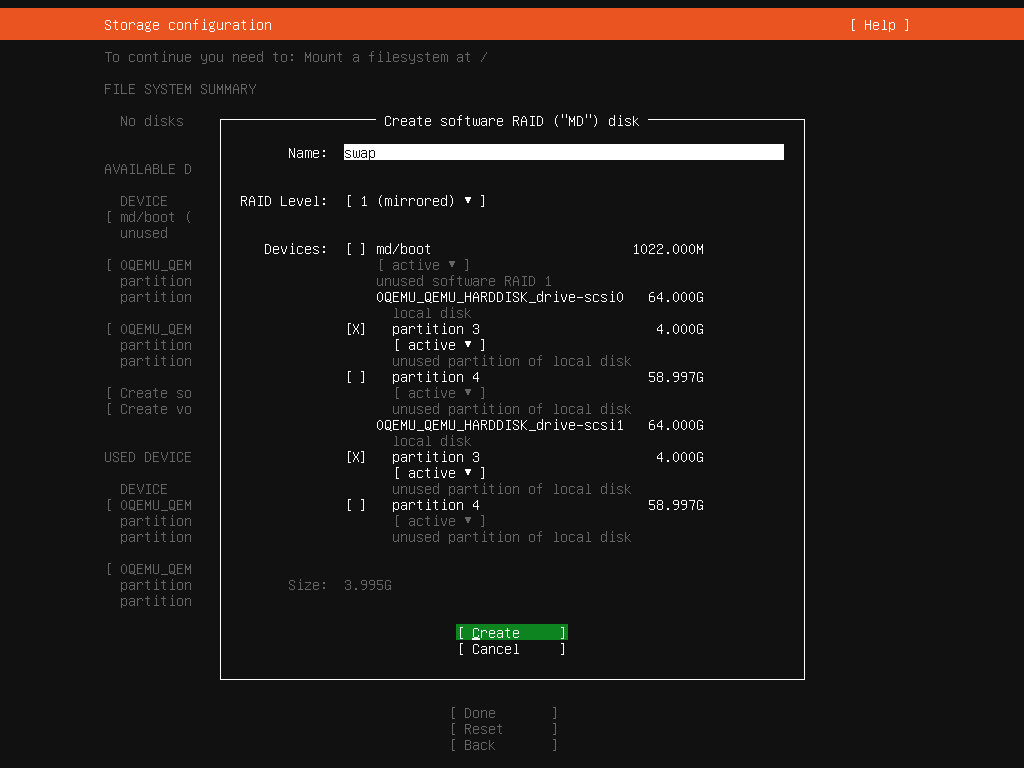
- Select “Create Software Raid (md)” to create third raid device, Choose teh last partition on each disk and name the device “root”
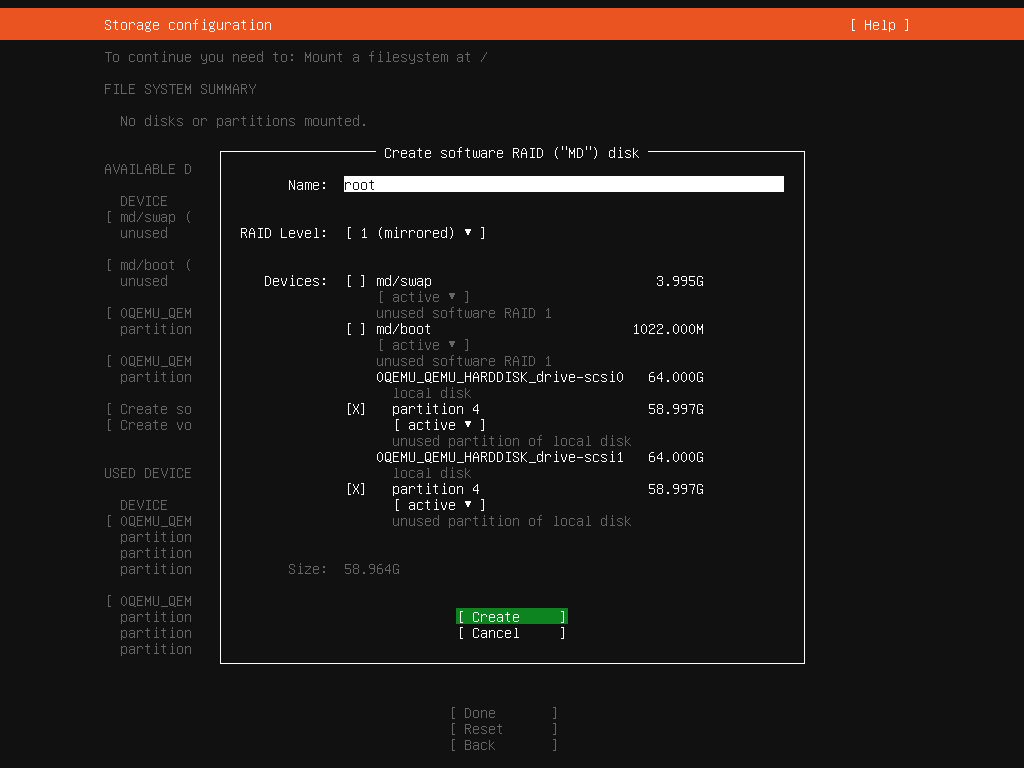
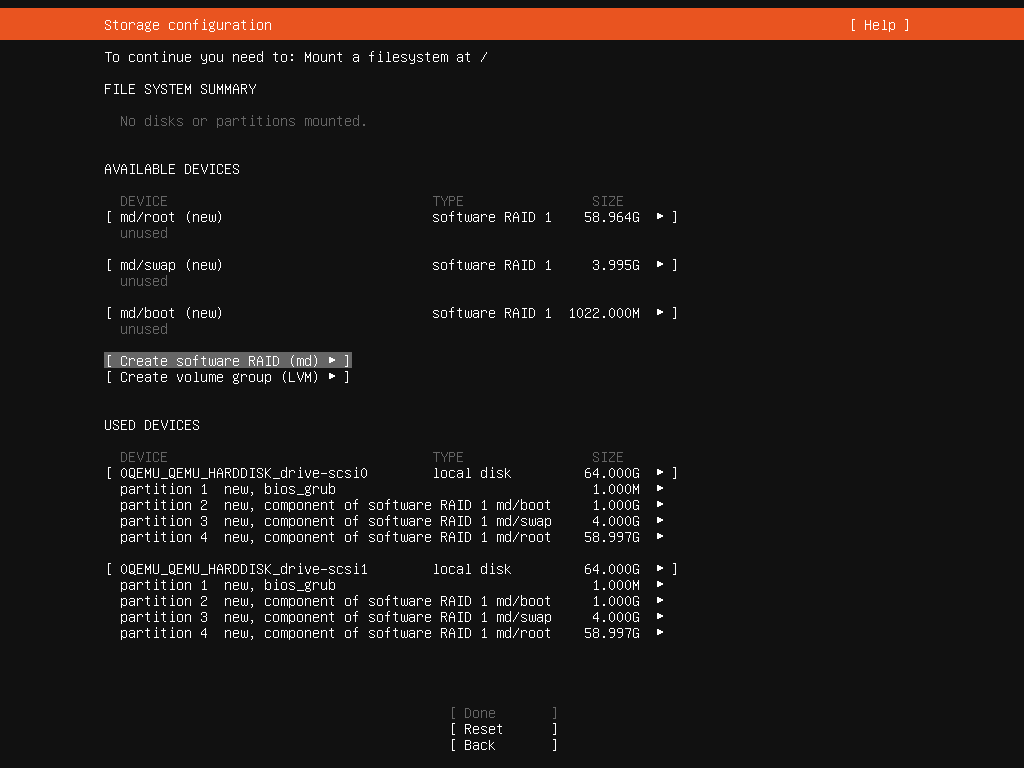
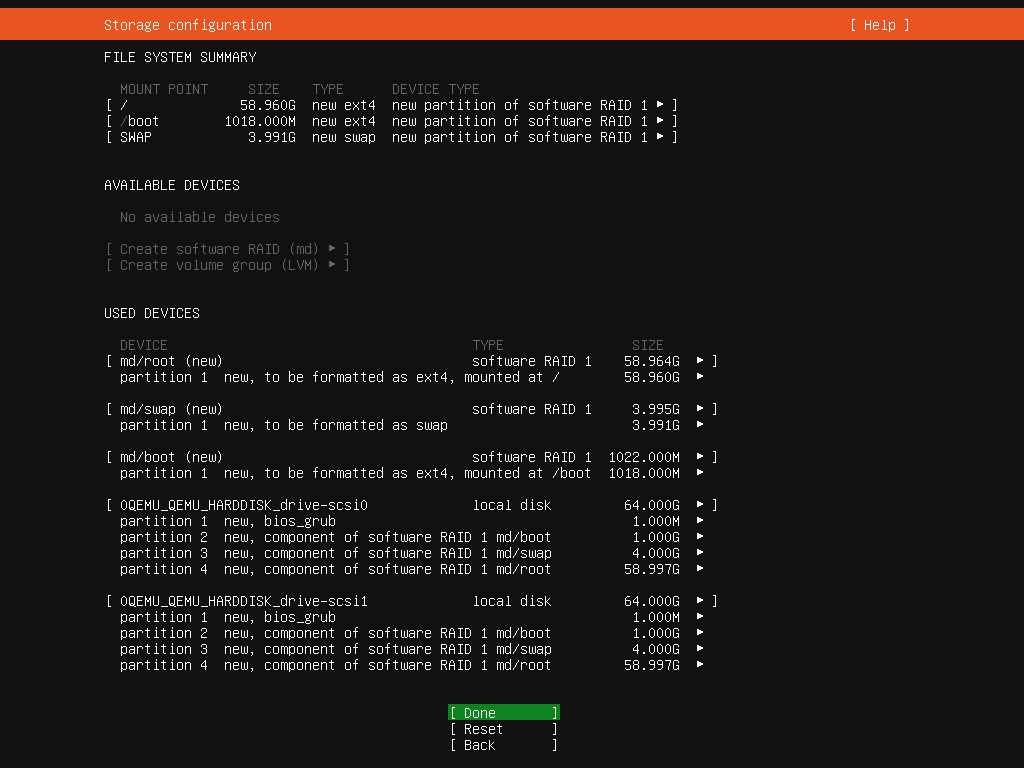
- Verify all three boot devices, boot,swap and root are created
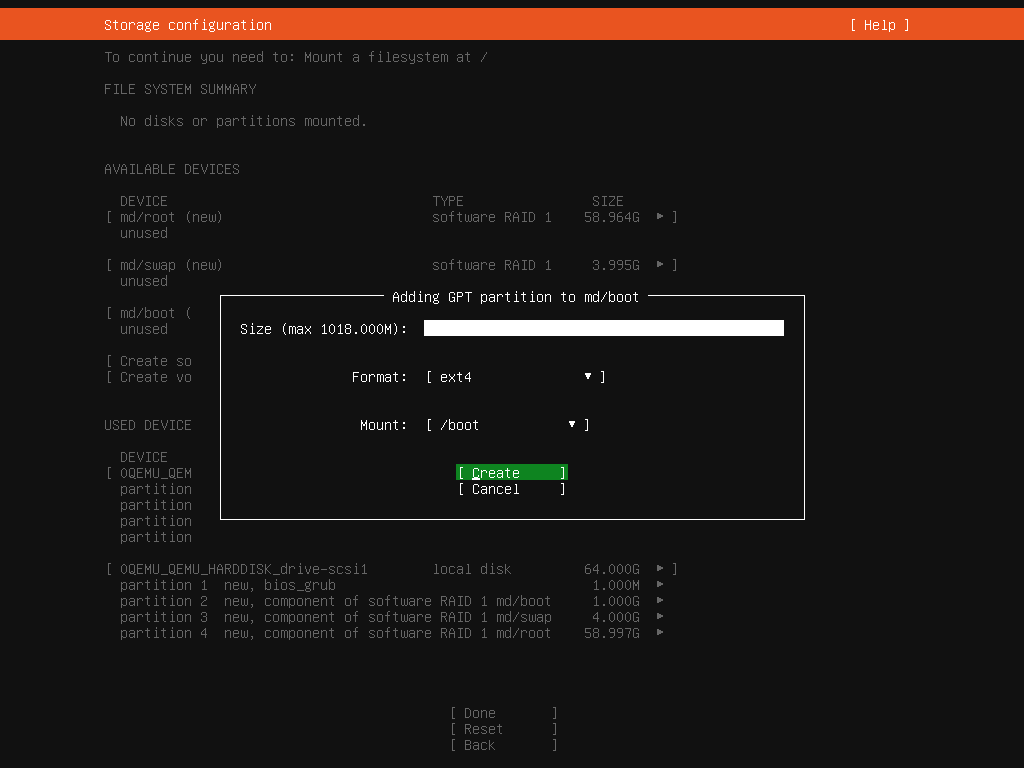
- Create partition on boot raid device. Leave “size” blank, select “ext4” and change mount point to “/boot”
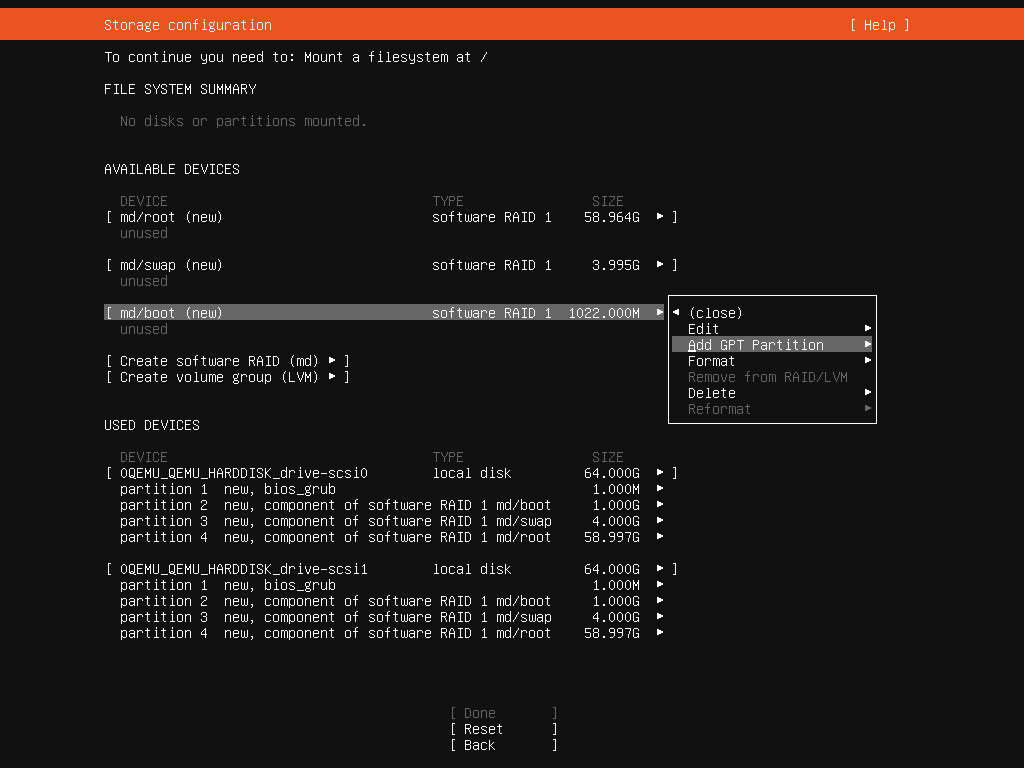
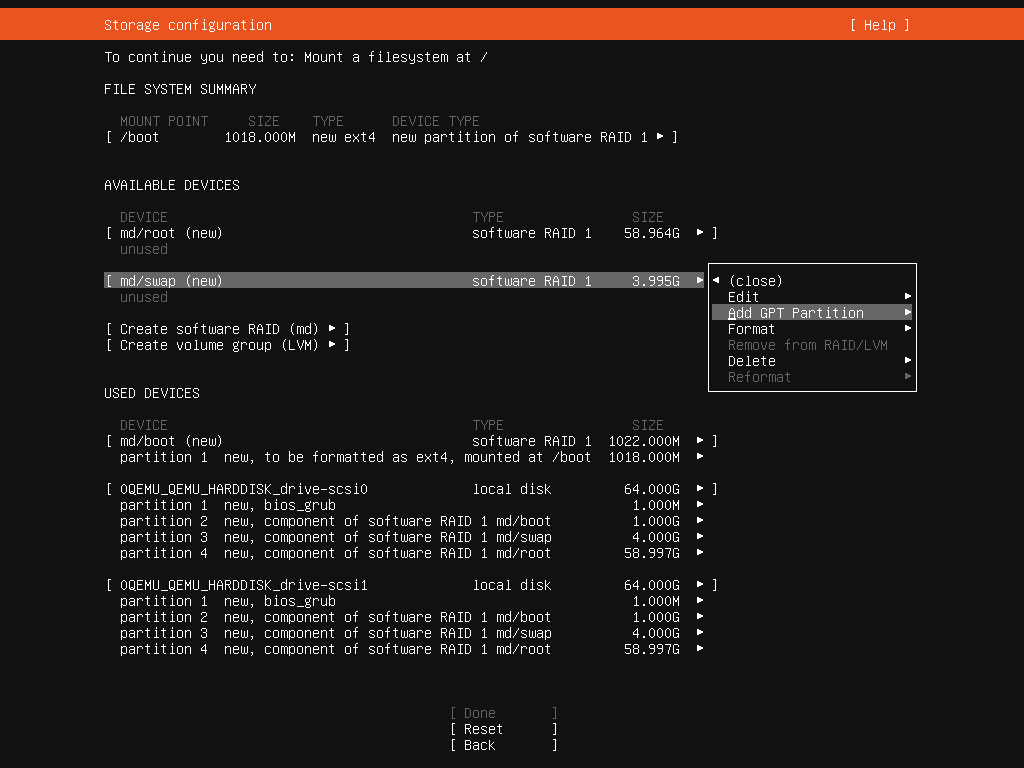
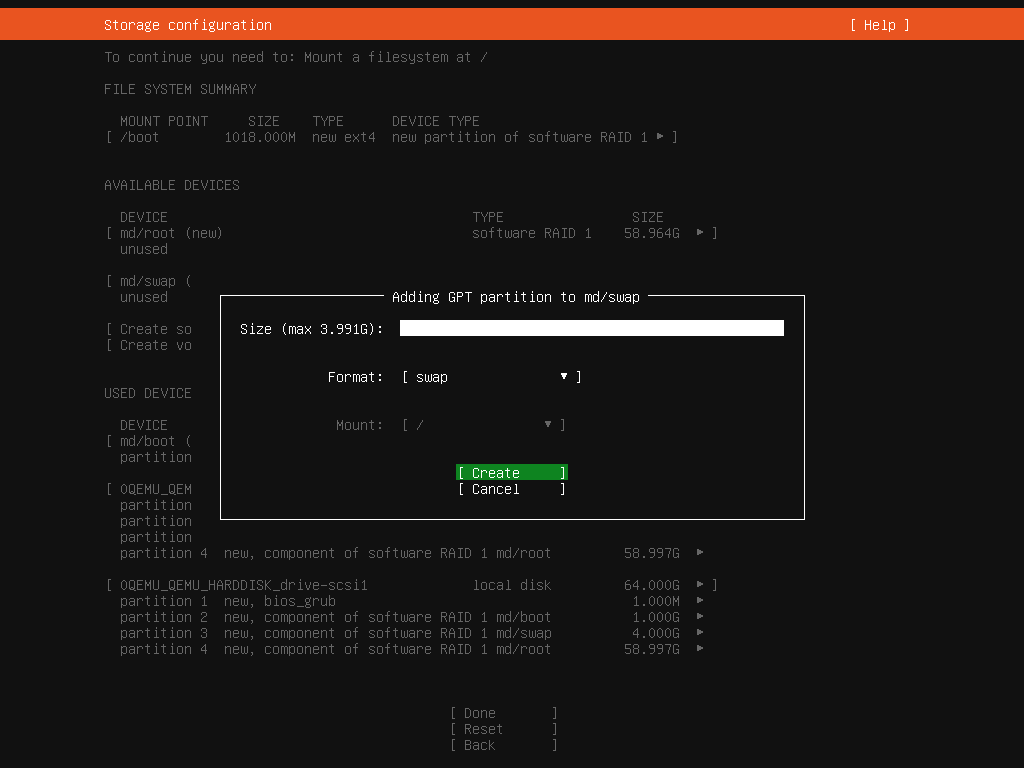
- Create partition on swap raid device. Leave “size” blank, format as “swap”.
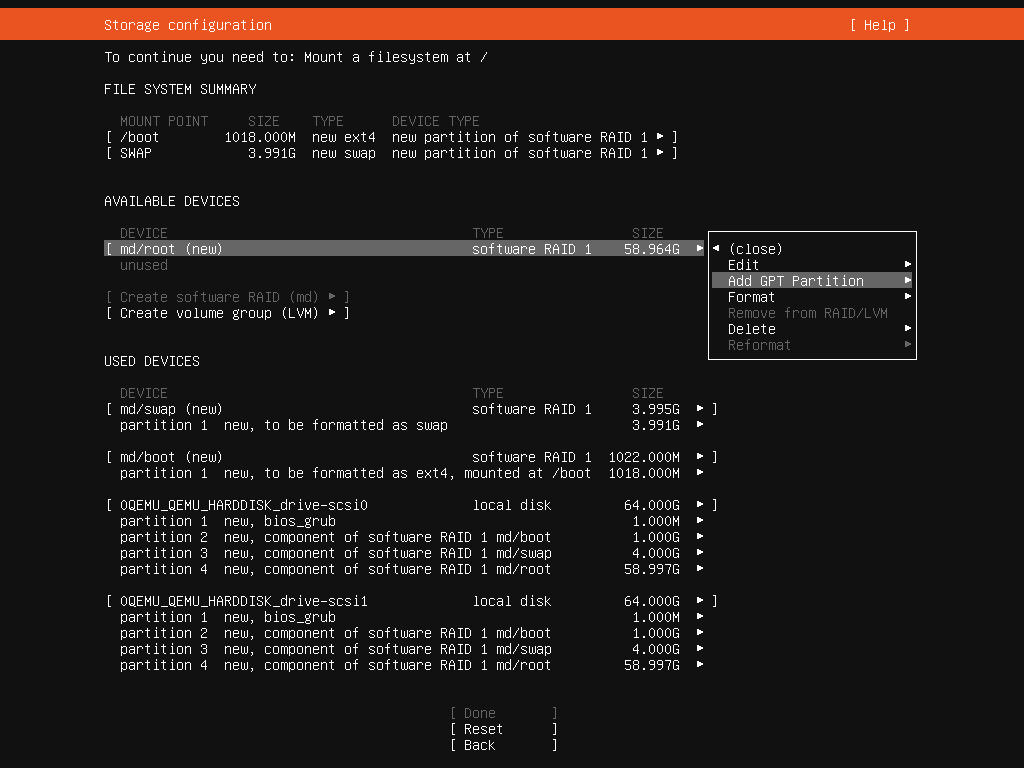
- Create partition on root raid device. Leave “size” blank, format as “ext4” and change mount point to “/”
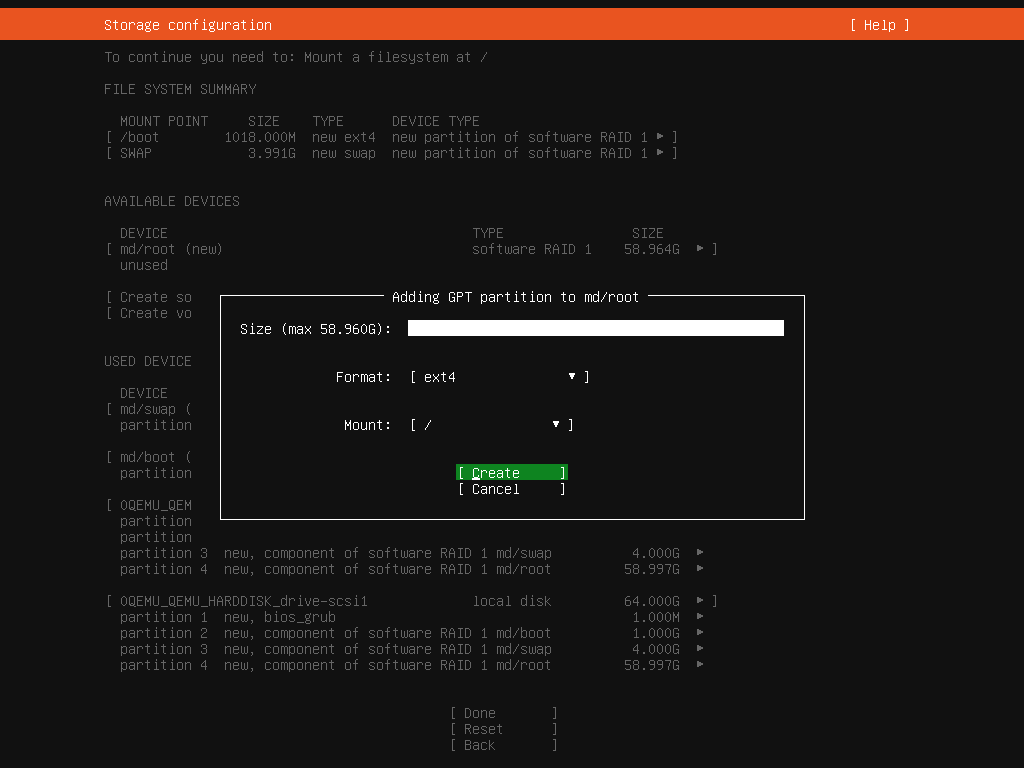
- Verify that each raid device is created and all three are formatted, the “Done” button will activate at the bottom of the screen
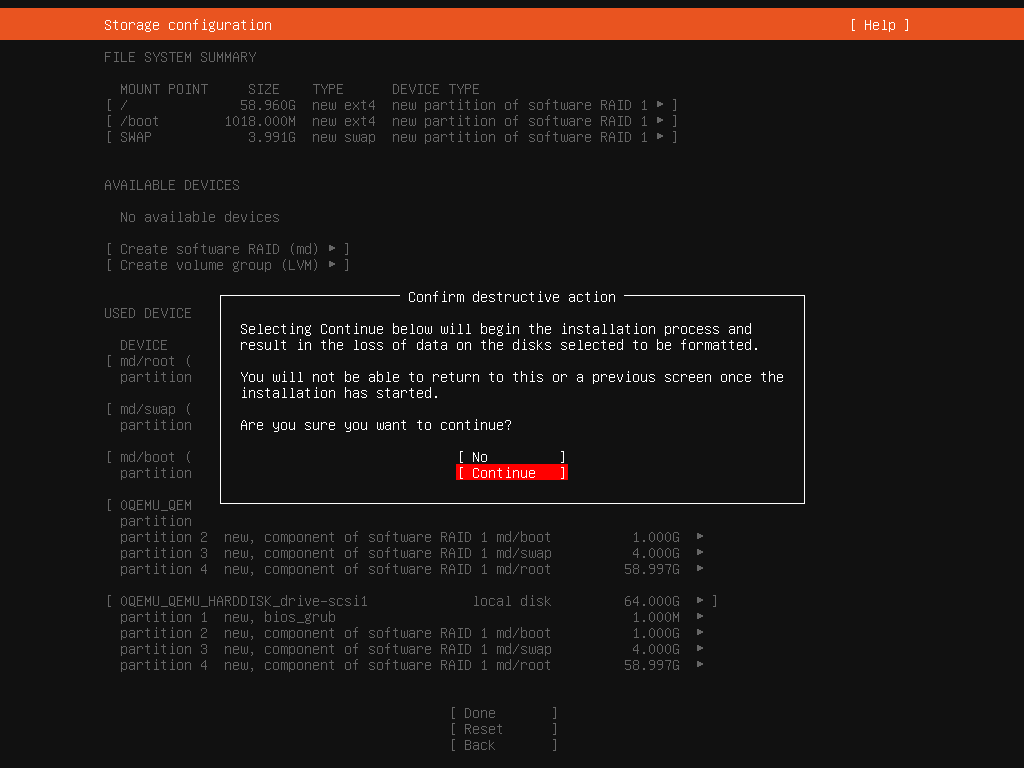
- Confirm Storage Layout, WARNING, there is not turning back as existing data WILL be overwritten.
Finish Installation
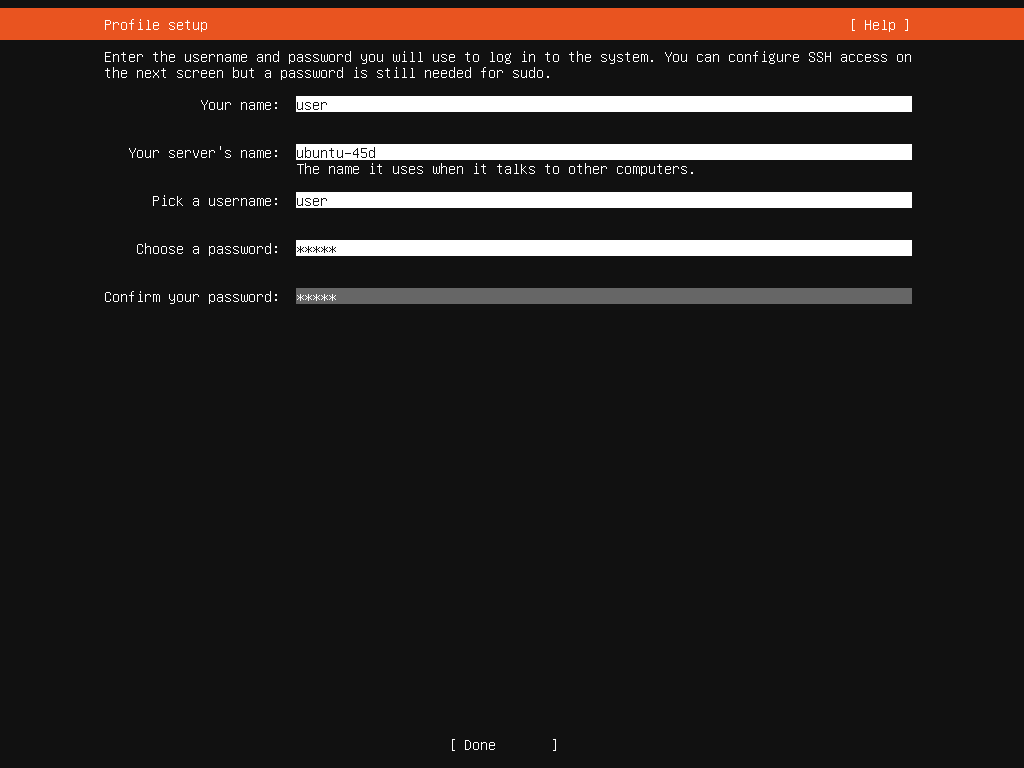
- Create local user
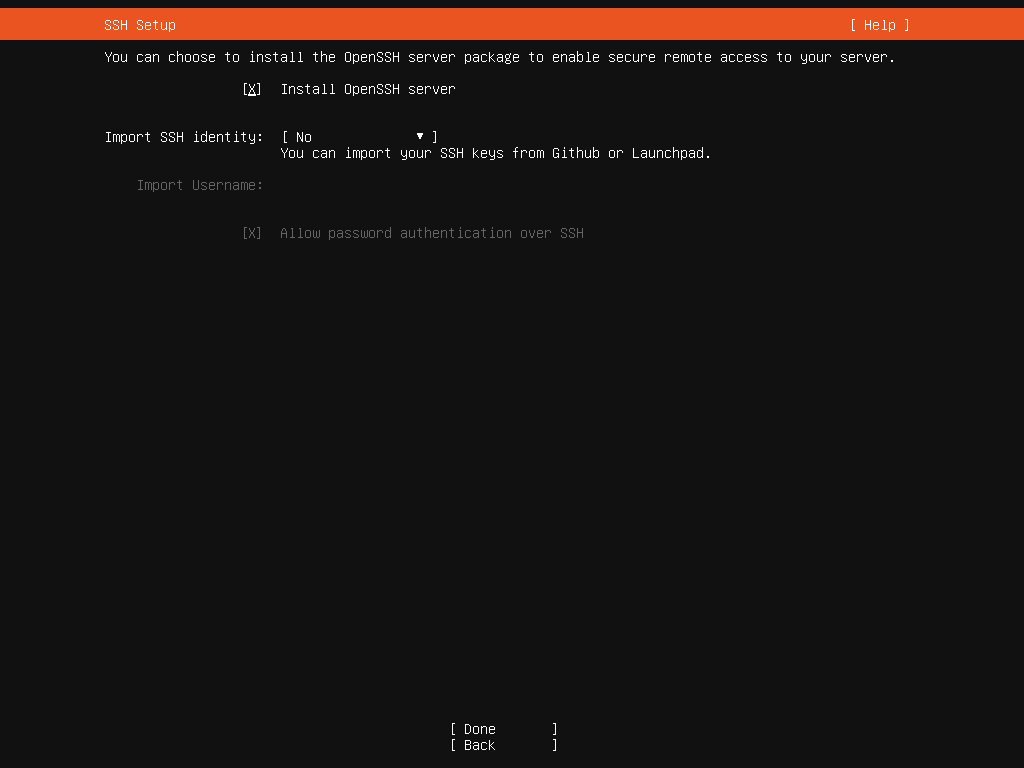
- Check box to install OpenSSH, leave user import blank
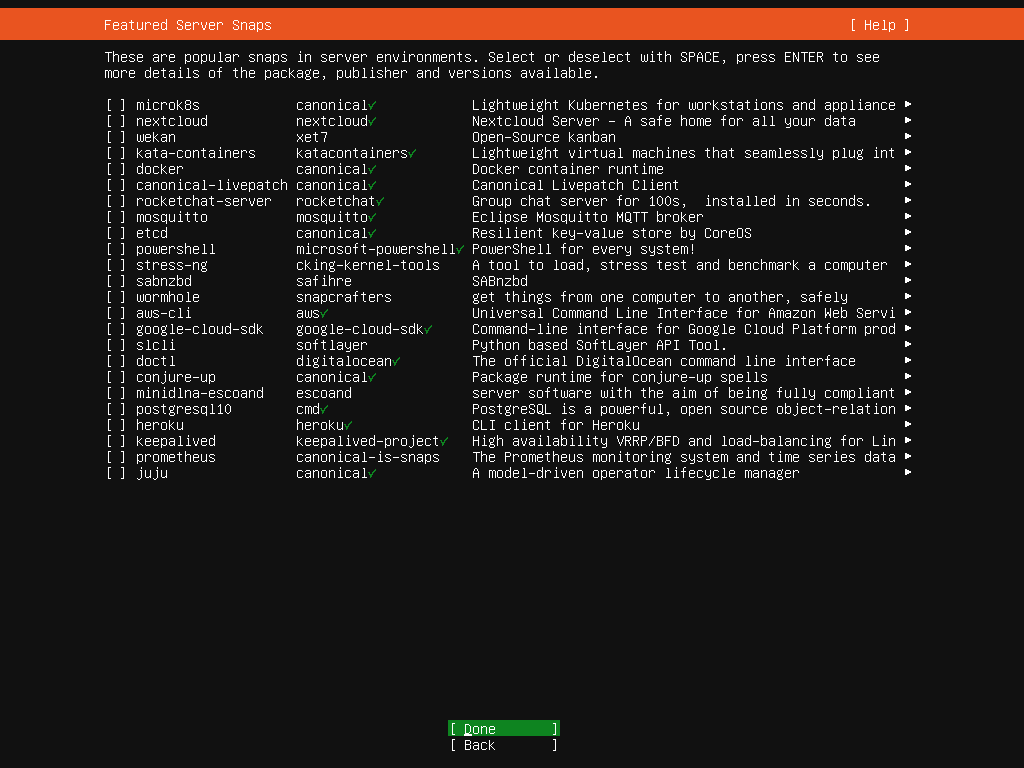
- Do not install any snap packages as we will be removing snapd completely after installation
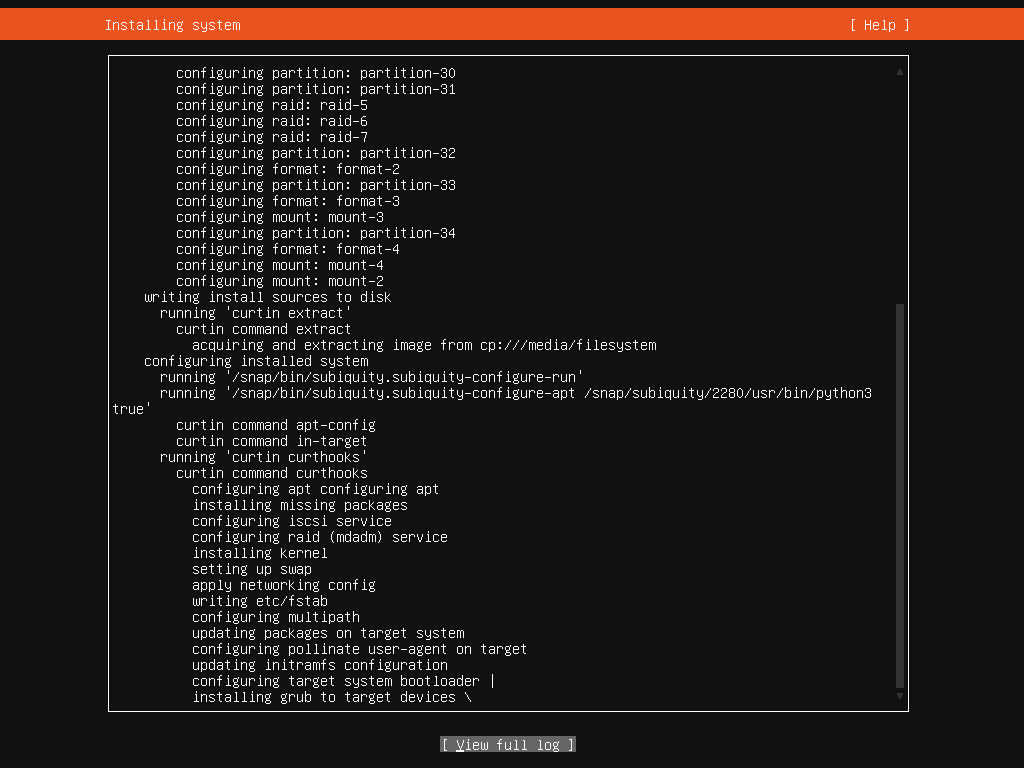
- Installation will begin. Select “View Full Log” to see more detailed process logging. Select “Reboot Now” when installation finishes
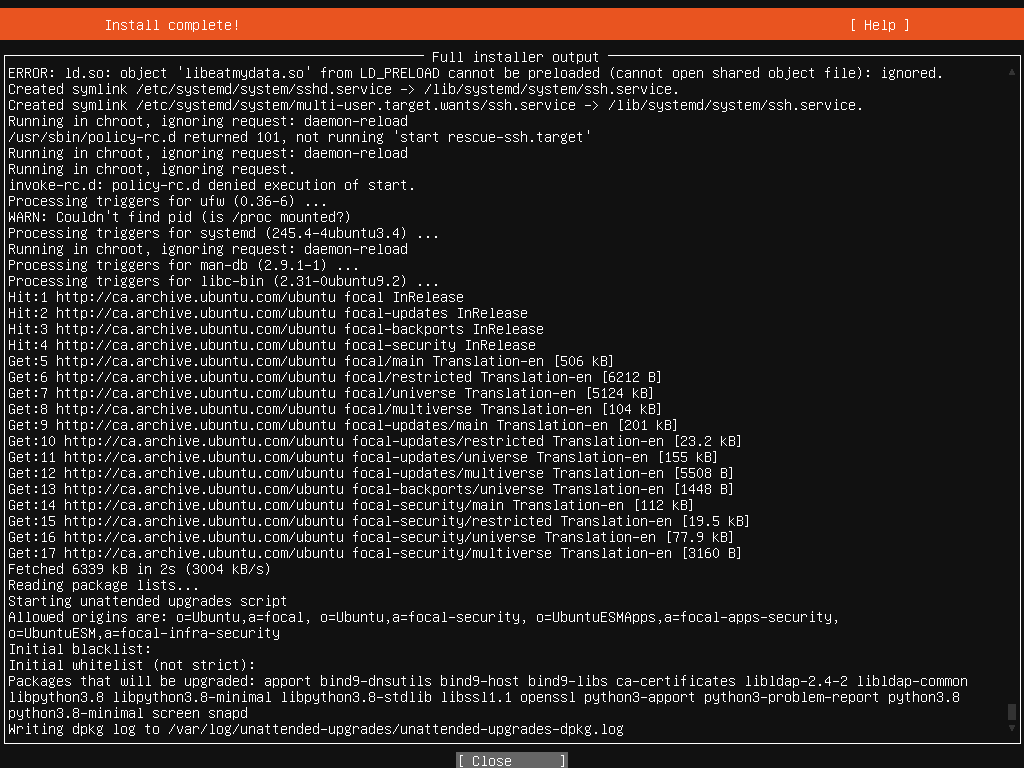
- Once the installation is complete, remove the ISO USB or the Virtual Mount and reboot the system.
- Installation is now finished and you can follow this documentation to finish configuration of Ubuntu
Verification
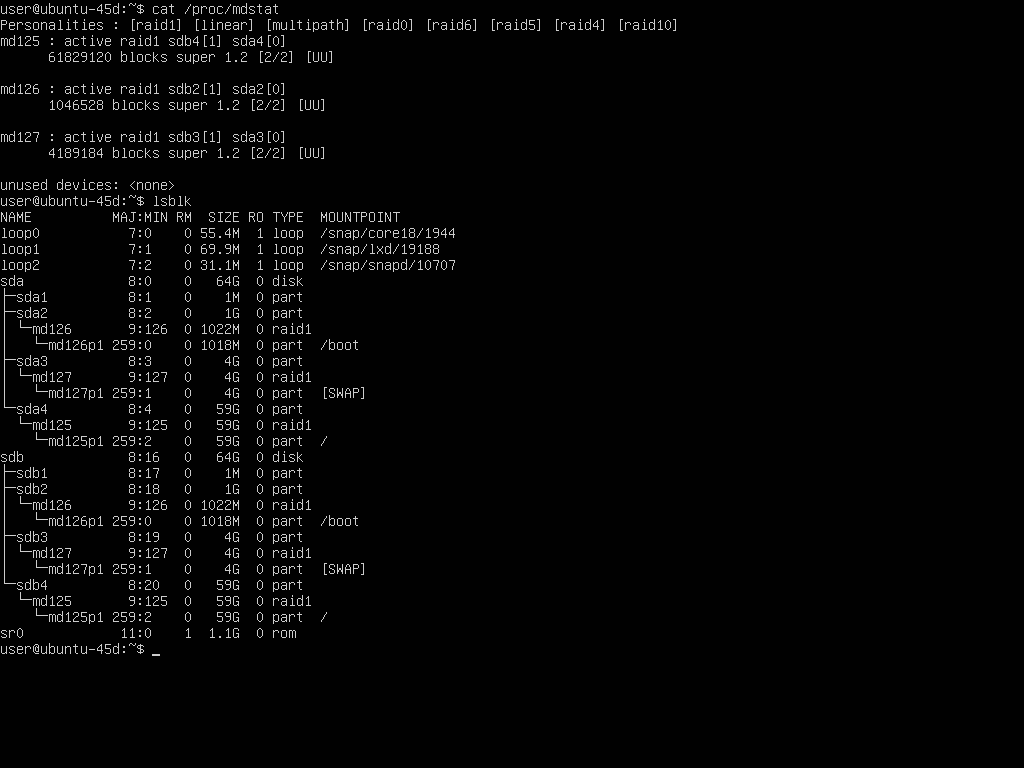
- Once the installation is complete you should be able to boot into the Ubuntu 20.04 OS.
- Boot into system and verify raid devices
Troubleshooting
- If installer is stuck trying to “Remove Media” It is safe to power reset the server. Either detach the ISO through the IPMI or physically remove USB stick from server.

- If the installed fails it may mean you will need to boot the OS into a Live ISO to wipe the boot drives before continuing with the installation.
Views: 5579