Scope/Description
- This article covers the process of creating and managing SMB shares (Samba/Server Message Block) within the Houston UI management interface.
Prerequisites
- Before starting, ensure the following conditions are met:
- Access to the Houston UI Cockpit.
- The File Sharing Module and Packages are installed.
- SMB Packages are installed.
- SMB Services (smb/smbd) are running and enabled.
- SMB Ports are open on the firewall:
- TCP: 133, 445
- UDP: 137, 138
Steps
Accessing the File Sharing Tab
- In Houston UI, navigate to the File Sharing tab. you can begin configuring your SMB Shares.

Adding options to the smb.conf global section
-
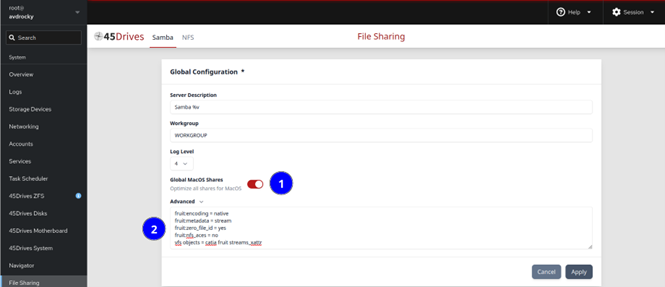
- Navigate to the section for the Global SMB configuration.
- Here you can change the Server Description, Workgroup, and Log Level.
- Add any additional parameters to the SMB configuration in the Advanced Settings box by enabling Global MacOS Shares
Example: Parameters to help with MacOS performance on an SMB share may be added here.
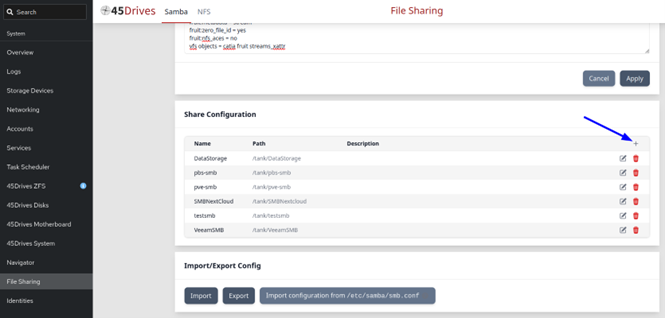
Creating an SMB share
- Scroll down to Shares and select the Plus button to start creating a new share.
Configure the following settings:
- SMB Share Name
- Description:
- Path to be shared out (The path can be created here instead of in ZFS).
- Choose Create ZFS Dataset.
- Optionally select to use Windows ACLs if the system is domain-joined.
- This option is not going to be available for a non Active Directory Joined Server )
- Specify any Valid Users and Valid Groups.
- Choose to allow Guest Access.
- Set the share to be Read Only or Browsable.
Adding options to the SMB share
- Add any additional options specific to the share in the Advanced Settings box via the drop-down arrow.
Example: Entering “inherit permissions = yes”.
- There are preselected options that can be easily added by selecting one of the buttons below the box: Shadow Copy, MacOS Share, or Audit Logs.
For macOS Time Machine backups, you must add these options:
vfs objects = shadow_copy2 catia fruit streams_xattr

fruit:encoding = native

fruit:metadata = stream

fruit:zero_file_id = yes

fruit:nfs_aces = no
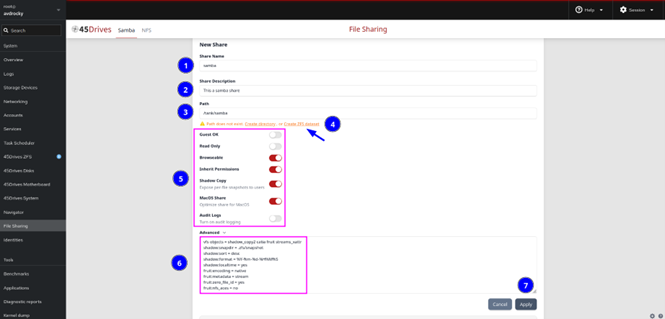
- Hit Apply
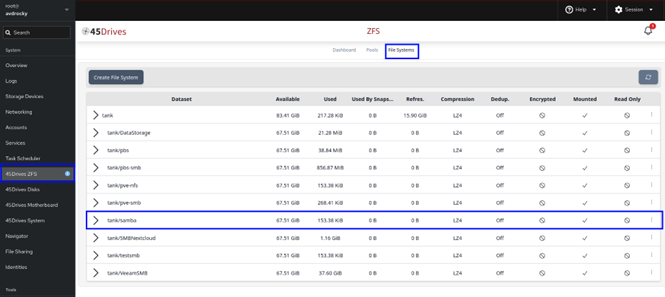
- Confirm that it also created the ZFS dataset ( This is important to have especially in setting up snapshots )
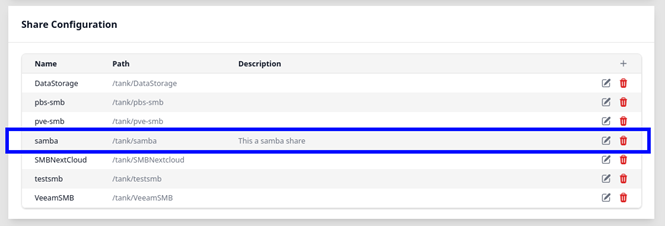
Verification
- To verify that your share has been created and configured correctly, You will see it listed under Share Configuration.
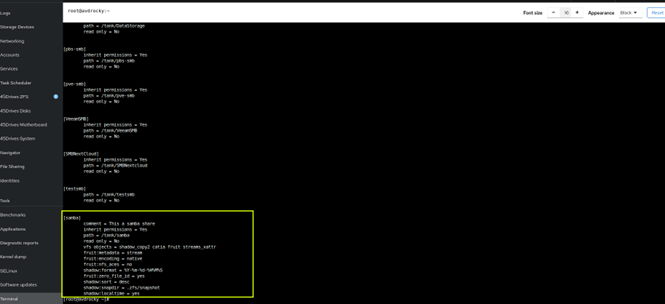
- Run testparm -s on the command line. You should see your samba share added and configured in its own section.
Attempt to connect to the SMB share from client machines.
Guide: KB450446 – Connecting to SMB Share on Windows and MacOS
Troubleshooting
- If you encounter issues, ensure the following are correct:
- The Firewall is configured correctly, with the necessary SMB ports open.
- The smb/smbd service is running and enabled.
- The permissions on the shared directory are correct.
- Typically, when using POSIX ACLs, set permissions to 770 and set the owner user/owner group to the user/group that should own the share.
- The connecting user has an SMB password set.
- The connecting user is part of the group that owns the SMB share.
- SeLinux is set to permissive (if using Rocky Linux).
- The value for 127.0.1.1 matches the system’s hostname (if using Ubuntu).
Further Reading
Views: 12963