Scope/Description
- This article will provide a step-by-step on how to create a S3 user, creating a S3 bucket and then how to link that bucket to either push or pull data.
Prerequisites
- Ceph Cluster
- An S3 service to make use of Ceph’s S3 offering, such as Amazon, Azure, etc.
- Rados Gateway services must be installed on the cluster. If installing RGW dependencies on a cluster that is already standing, you will need to run the dashboard playbook and create the necessary pools for the RGW.
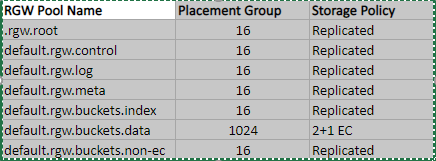
- RGW Pools created on the cluster. These will be created by doing the ansible-playbook for Ceph RGW.
- These are the necessary pools for RGW, they can be viewed on your cluster at any time using ceph df in the CLI:
Steps
Creating a User
- First, navigate to your Ceph dashboard. If you’re uncertain of which Ceph node the dashboard is hosted on, run ceph mgr services on one of the manager node.
- Once you’re logged into the dashboard, navigate to Object Gateway on the top ribbon. Select “Users”
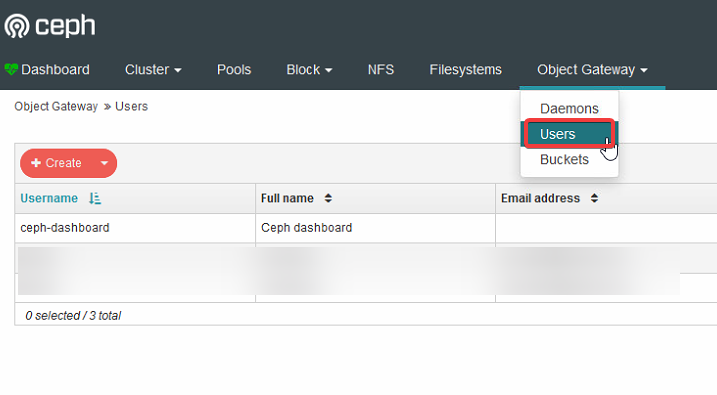
- In the create user screen, there are a few fields to take into account.
- S3 Key: This key can be auto-generated to supplied from your S3 service, such as Azure. Using auto-generate will depend on whether you wish to push or pull data. When pulling data, you will want to input your access key or secret key from your S3 service.
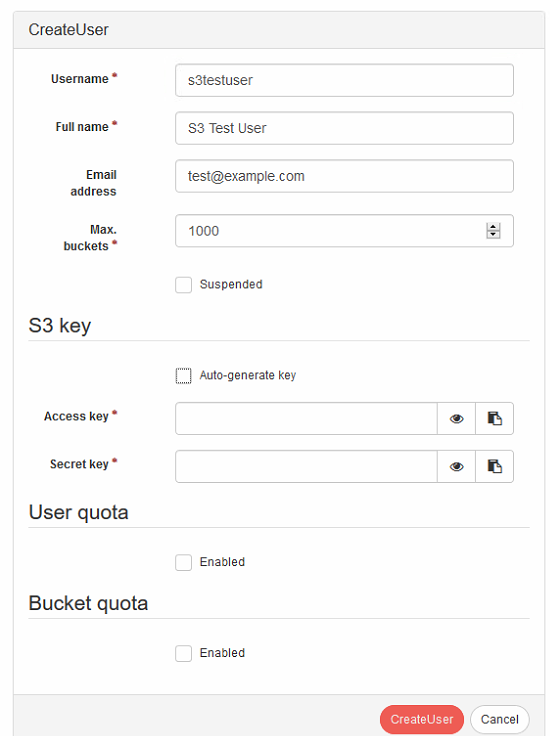
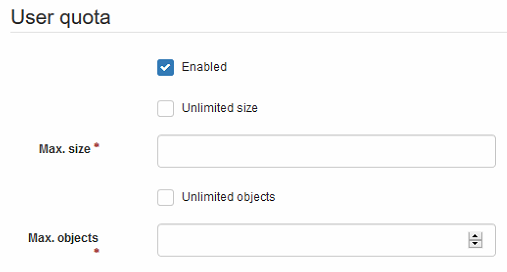
- User Quota: Using this field, you can set the maximum number of objects allowed per user, and/or, the storage capacity of their bucket.
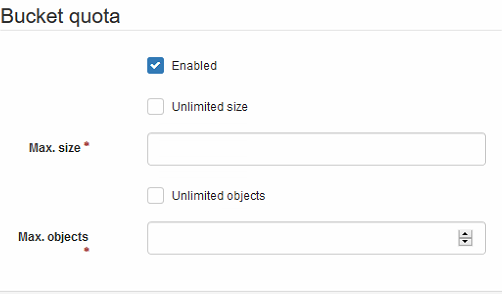
- Bucket Quota: Rather than set limits on a user, you can also set limits on the buckets themselves to ensure they do not exceed a maximum capacity.
Creating a Bucket
- Creating a new S3 bucket is done through the same Object Gateway tab on the Ceph dashboard/

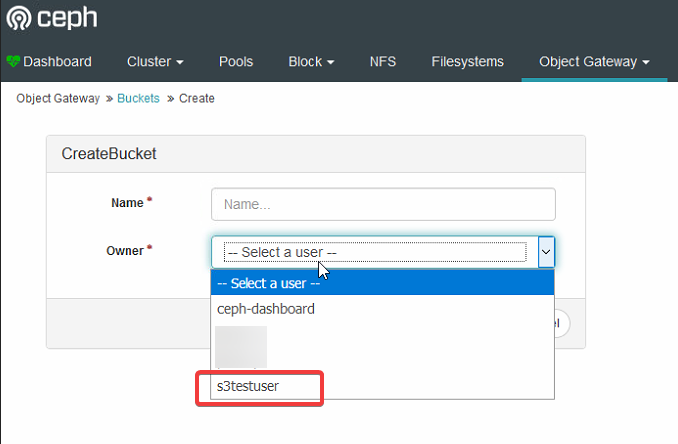
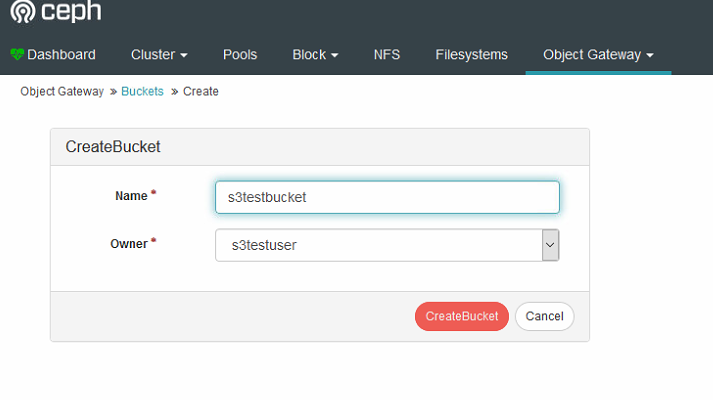
- Select create. Before naming the bucket, make sure the user you want to access the bucket is listed under users to select as the owner.
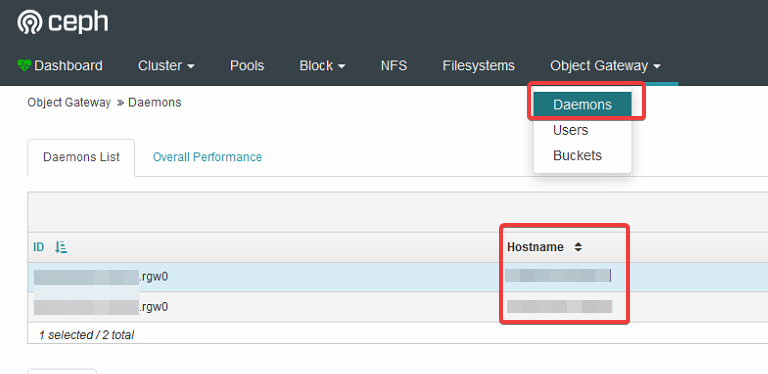
- To access the new bucket, you’ll need the hostname of the node the Rados gateway is living on.
- You can find this information under Object Gateway > Daemons
Verification
- Once you have the host name, you will be able to access the S3 gateway through the S3 application of choice with http://[HostIP]:8080, http://RGW-IP:80, or https://RGW-IP:443 depending on if you setup load balancing or not, as well if you setup SSL for https or not, followed by the username and password. In this case, it would be s3testuser. The password would be the S3 key.
Troubleshooting
- Ensure you created the S3 User.
- Ensure you re-did the dashboard.yml playbook after the S3/RGW playbooks.
Views: 5980