Scope/Description
- This article will show you how to map Ceph RBD images to Windows clients directly. Ceph now has native windows drivers/support that allows to map RBD images directly.
Prerequisites
- A standing Ceph cluster
- Windows Client with Ceph for Windows drivers Installed
- An RBD image created
Steps
Installing Ceph for Windows
- First we will need to install Ceph for Windows Drivers. Go through the installation process on the default settings.
Creating Windows Client Ceph Conf and Keyring
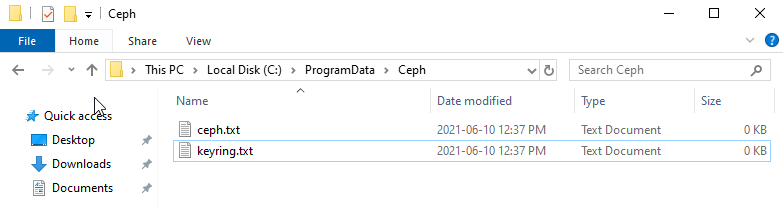
- Open File Explorer on the Windows Client and go to the directory: C:\ProgramData\Ceph. This directory should be empty on default. Create a ceph.conf and keyring file.
- Look at the ceph.conf file on the cluster to copy the mon host address. Use the following command and copy the address.
cat /etc/ceph/ceph.conf
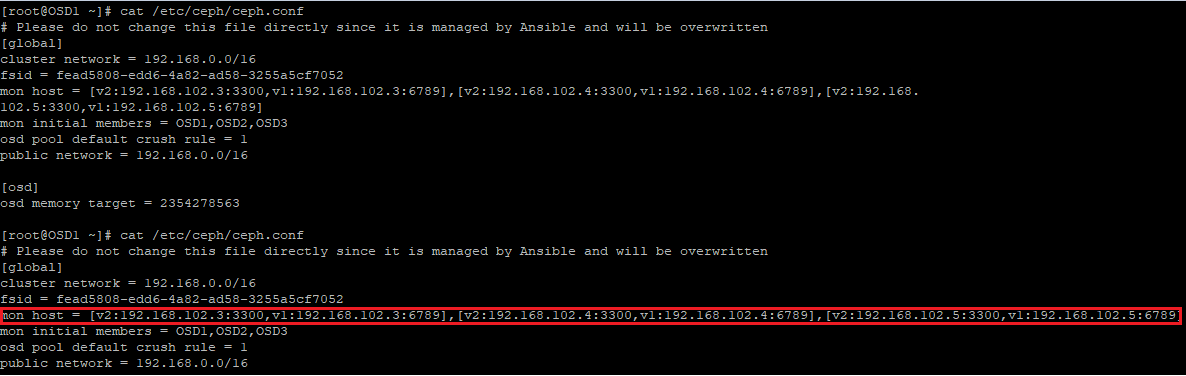
- Windows has a different syntax for the ceph.conf file, below is the correct syntax. Copy and paste it into the ceph.conf file, make sure to update the mon host section to match the ceph.conf on the cluster.
[global]
    log to stderr = true
    ; Uncomment the following in order to use the Windows Event Log
    ; log to syslog = true

    run dir = C:/ProgramData/ceph/out
    crash dir = C:/ProgramData/ceph/out

    ; Use the following to change the cephfs client log level
    ; debug client = 2
[client]
    keyring = C:/ProgramData/ceph/keyring
    ; log file = C:/ProgramData/ceph/out/$name.$pid.log
    admin socket = C:/ProgramData/ceph/out/$name.$pid.asok

    ; client_permissions = true
    ; client_mount_uid = 1000
    ; client_mount_gid = 1000
[global]
    mon host = <ceph_monitor_addresses> #Update this line to match /etc/ceph/ceph.conf on the cluster
- Save the file, but make sure it is a .conf, by saving as “all documents” and adding .conf to the end of the filename.
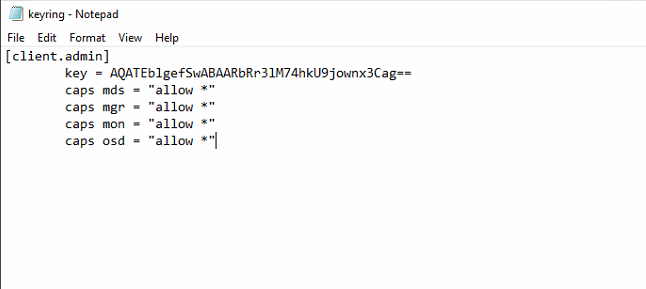
- Now we will need to copy the keyring from the cluster. Use the following command and copy the contents.
cat /etc/ceph/ceph.client.admin.keyring
- Now create a keyring file on the windows client and copy the contents from the last step. Make sure the file is saved as a keyring not a text document.
- For newer versions of the driver, you may need to create an empty directory for driver crash/disconnect logs. See below for images of the Ceph directory, if it is required the RBD map will fail in the next section.

- Open up the windows command line as an administrator and run the following command. This will output your RBD images, confirm the image you want to map to the client is listed.

Mapping RBD image on Windows
- Now you can mount the image to the windows client using the following command.
![]()
rbd map "pool"/"rbdimage"
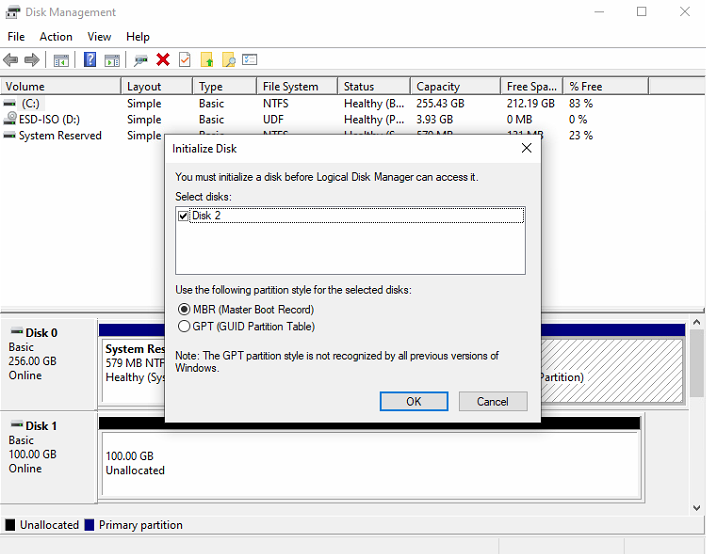
- You should see the block of storage in disk manager on windows. Now you can create a new volume on that storage.
Verification
- Once the volume is initialized on disk manager the mapping is completed and will work as needed. The Ceph RBD Mapping Service has been created, and will reconnect the mapping after a reboot of the client system.
Troubleshooting
- For Ceph Clusters running Latest Nautilus release/Octopus you will need to keep the auth_allow_insecure_global_id_reclaim flag as true or there will be issues mapping the RBD Image. This will leave the cluster in the health_warn state, but is not a cause for any concern.
- To disable this warn state use the following command:
ceph config set mon mon_warn_on_insecure_global_id_reclaim_allowed false
ceph config set mon mon_warn_on_insecure_global_id_reclaim false
- If the name of the RBD pool is not the default rbd, we must specify the pool name when listing or mounting rbd images.
Views: 3206