Scope/Description
- This article describes the process of installing Rocky Linux 8.4 & 9.6 on redundant boot drives.
Prerequisites
- Rocky Linux Minimal ISO.
Steps
Configure Boot Drives into Mirrored Array
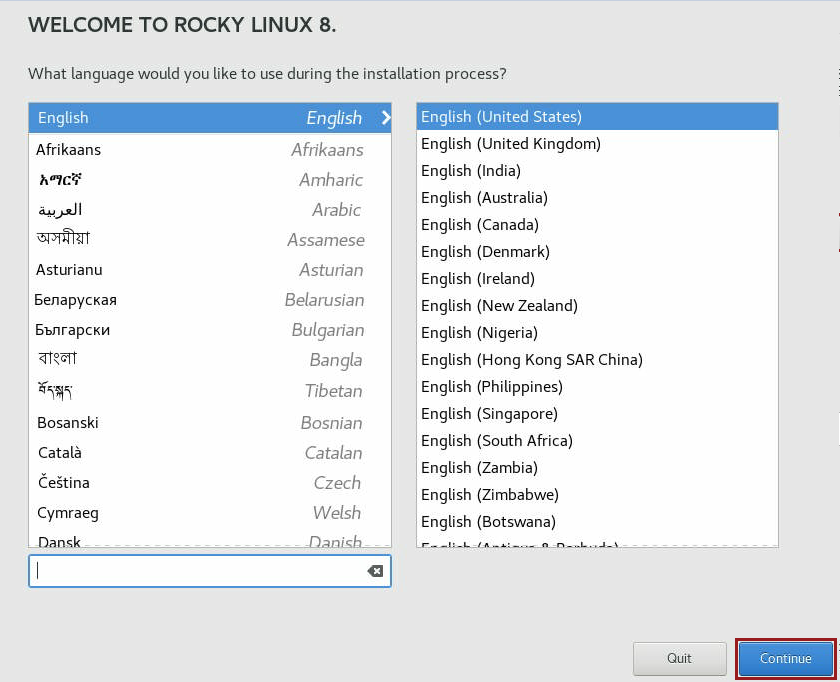
- Boot into the ISO, select Install Rocky Linux 8 or 9.

- English is the default language, just click continue to proceed with the installation.
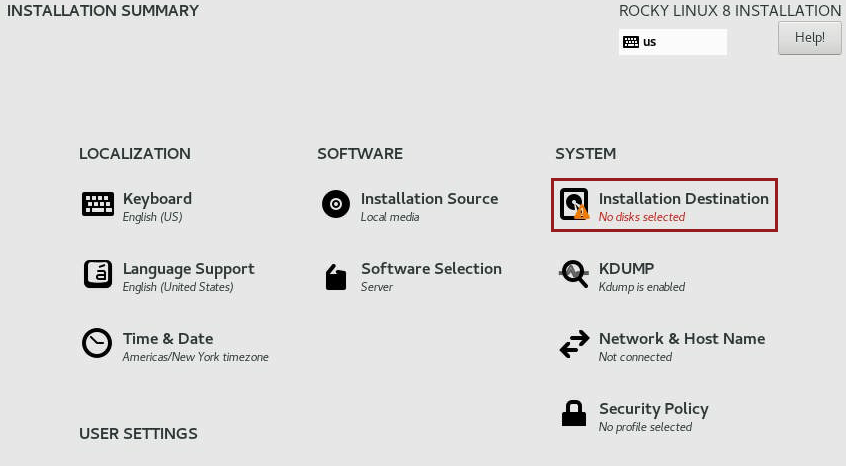
- First, setup the Installation Destination.
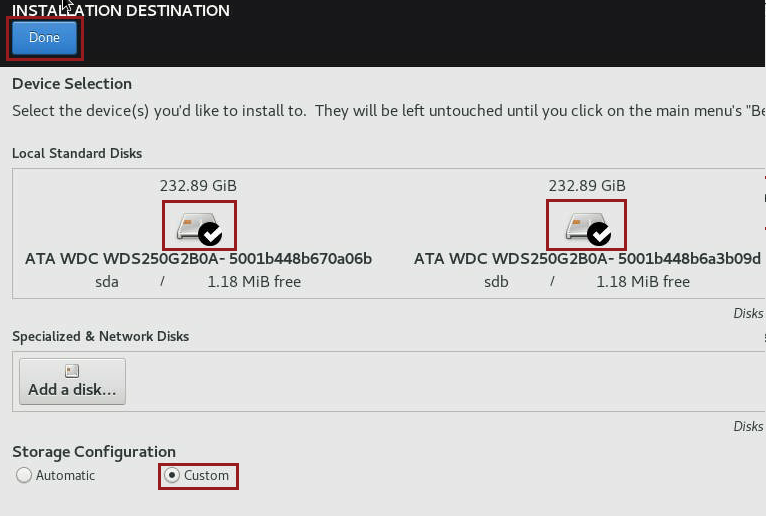
- Select both boot drives for the redundant install, make sure to click Custom and then to proceed click Done.
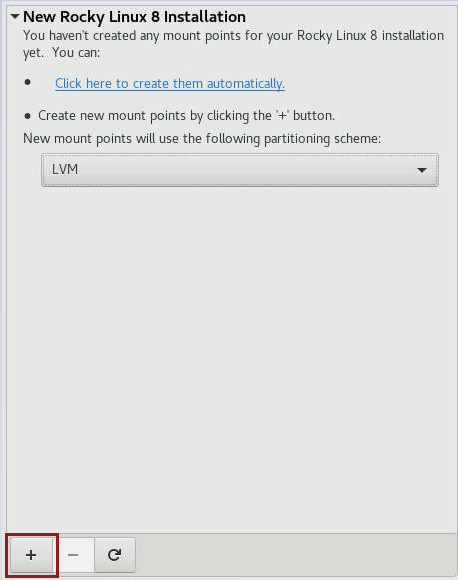
- Click the New Rocky Linux 8 Installation drop down, and click the + to add a mount point.
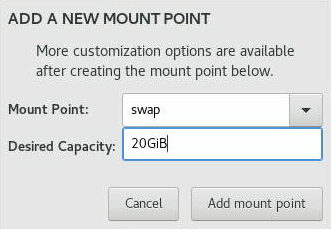
- Create a 20GiB swap mount, then click Add mount point.
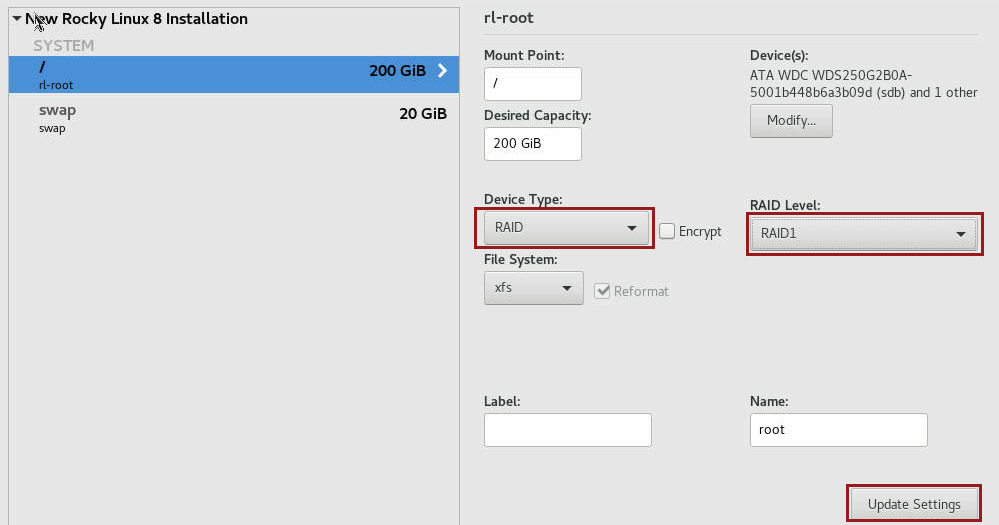
- Edit the swap point to Raid1 for mirrored boot drives. Once Raid 1 is configured, click Update Settings.

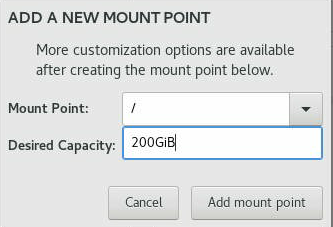
- Now create the second mount point / as 200GiB. Then, click Add mount point.
Note: if it is 256gb HDstor bootdrives, add / partition as 200. If it is micron bootdrives, add / partition as 400G
- Again, edit the mount to be a Raid 1 mirrored setup, then click Update Settings. Then, click Done.
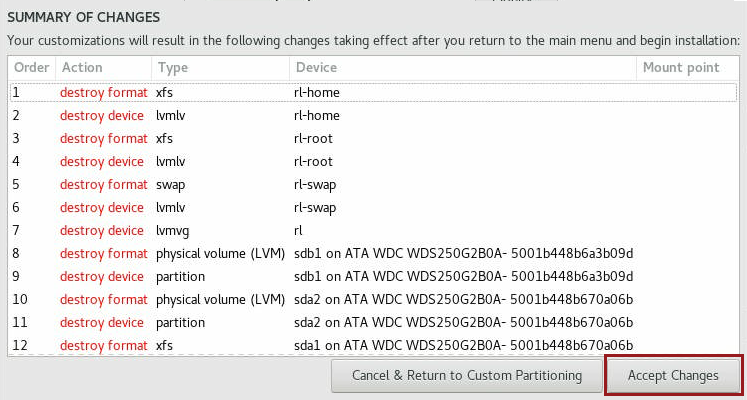
- Accept Changes on the summary pages. This will conclude the configuration for the Installation Destination.
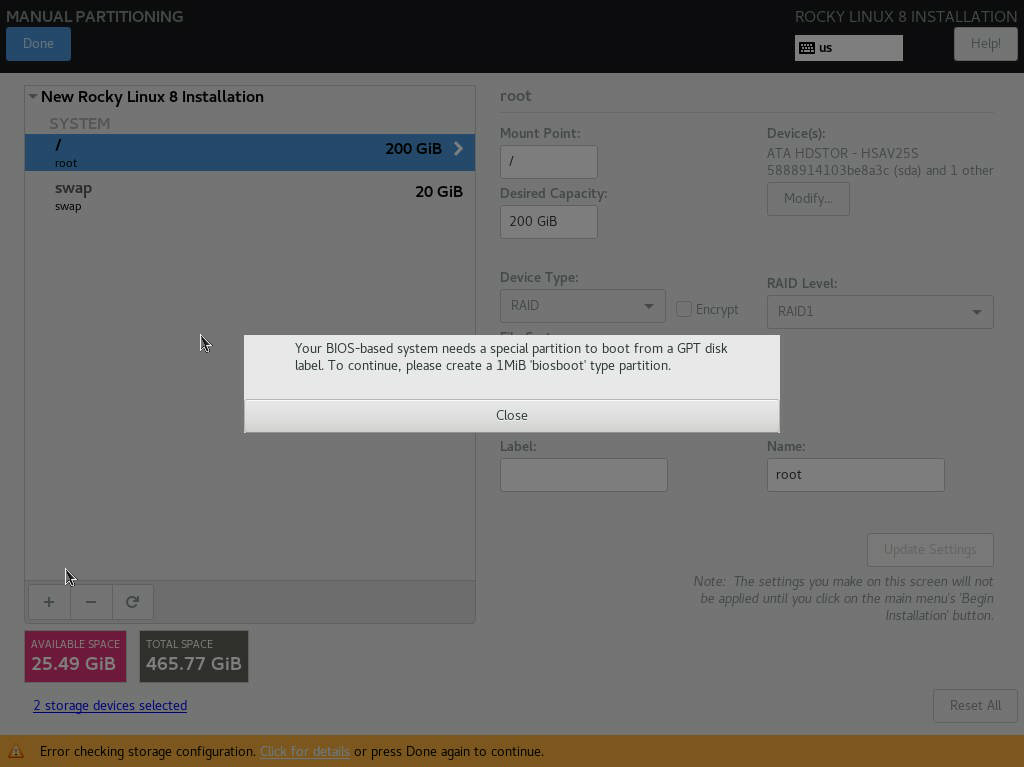
*** If you are greeted with the following error after creating the “/” parition, Please see Troubleshooting section for further details.
- Do a dnf update, reboot, and then run the repo script
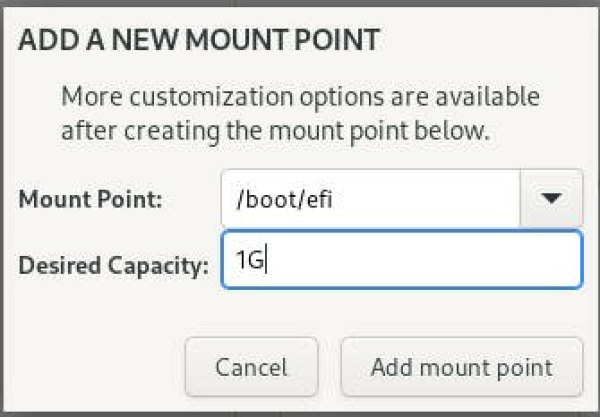
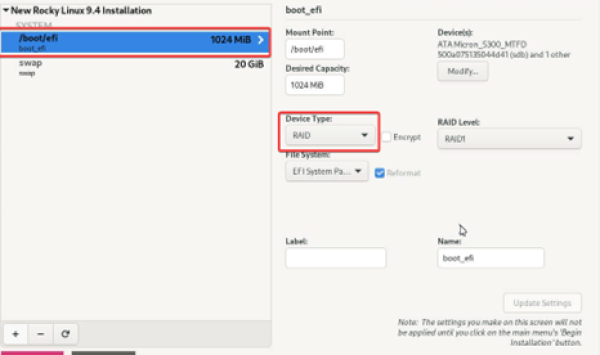
Note: if motherboard in UEFI mode then use the following steps below
- Boot into the BIOS and make sure your boot mode is set to UEFI, if you have the option (on Supermicro motherboards).
-
Press + again and create a 1G /boot/efi partition for UEFI (RAID device type).
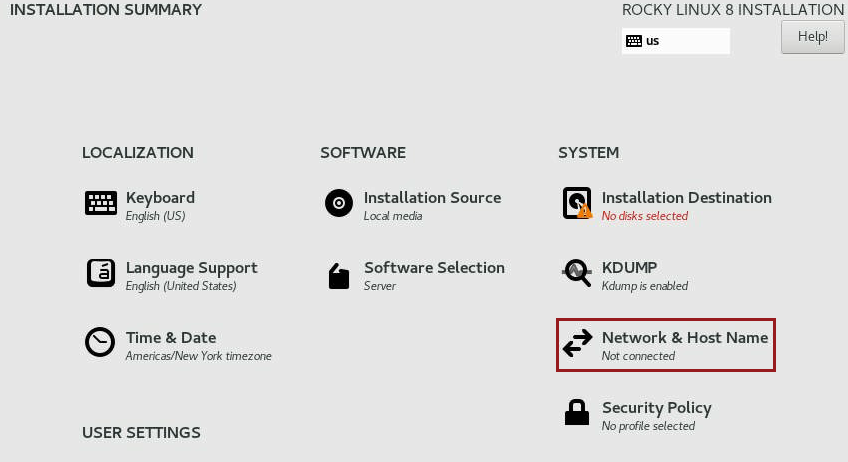
Configure Networking
- Next, the networking will be configured. This section can be skipped if you wish to setup the networking after the install.
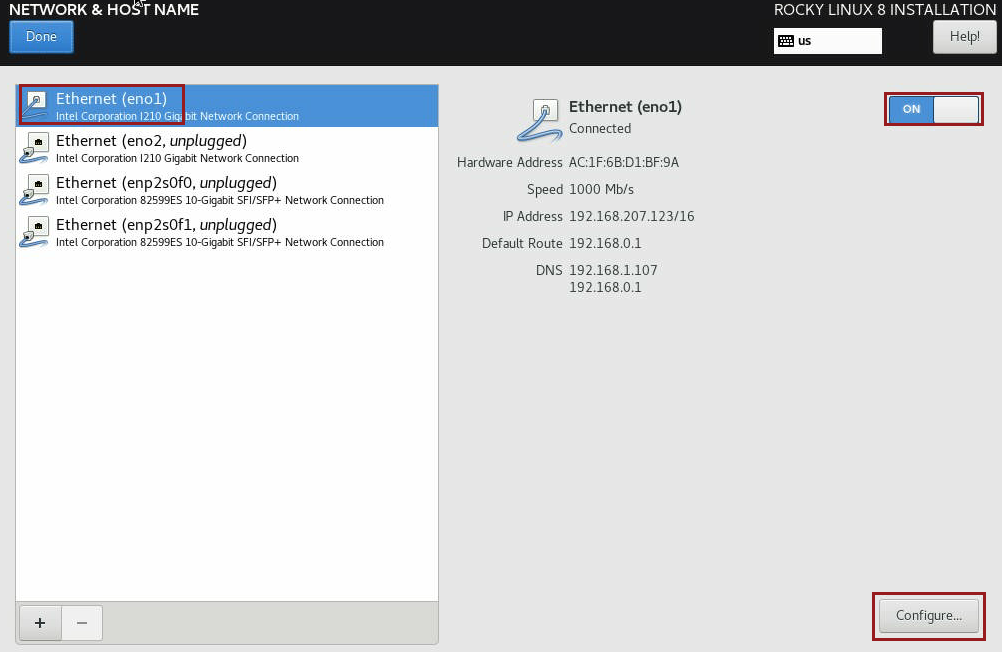
- Select the interface you wish to configure, turn it ON. Then, click “Configure…“.
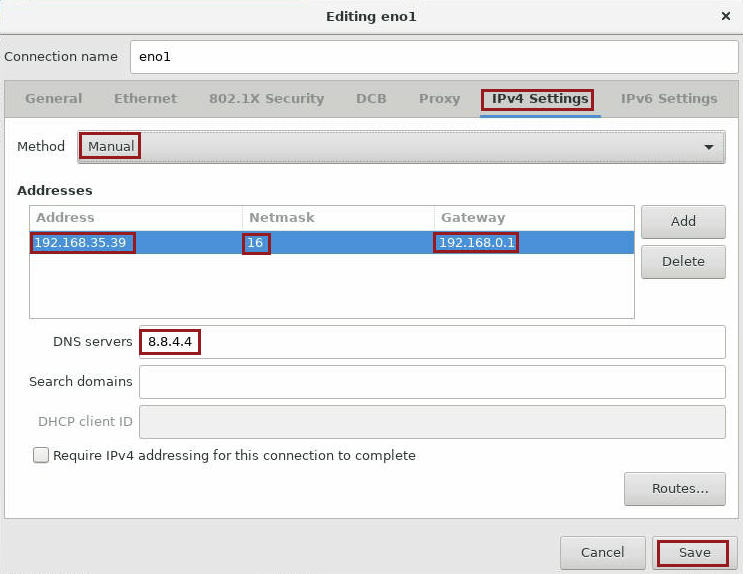
- In this example, I am configuring using IPv4, if you are using IPv6 edit those settings. Set the method to Manual, and fill in the following information, Address, Netmask, Gateway and DNS. Then, click Save.
- You can set the hostname within the network configuration tab, see below:

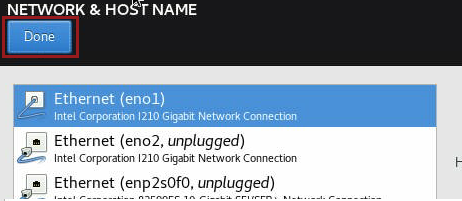
- Once the networking is complete click the Done.
Setup Users
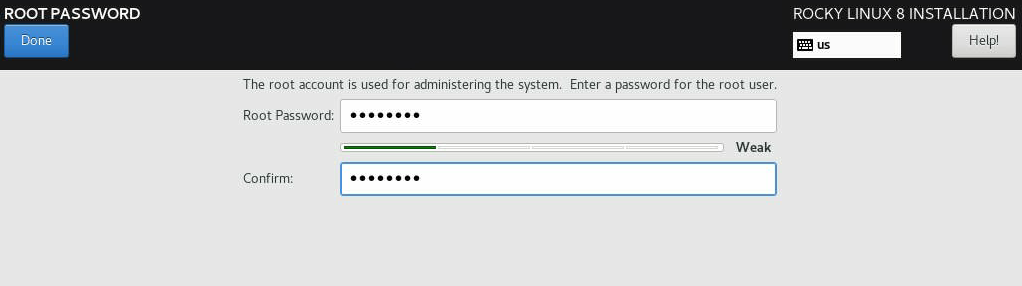
- During the installation, the root password will need to be configured.
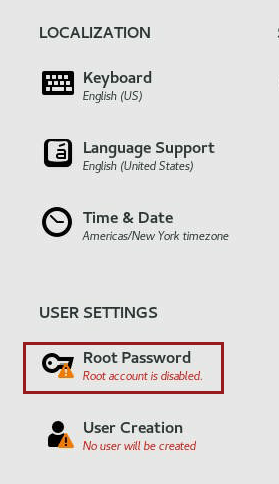
- Fill in the password for root. If the password bounces back as Weak, you can click Done twice to override.
Begin Installation
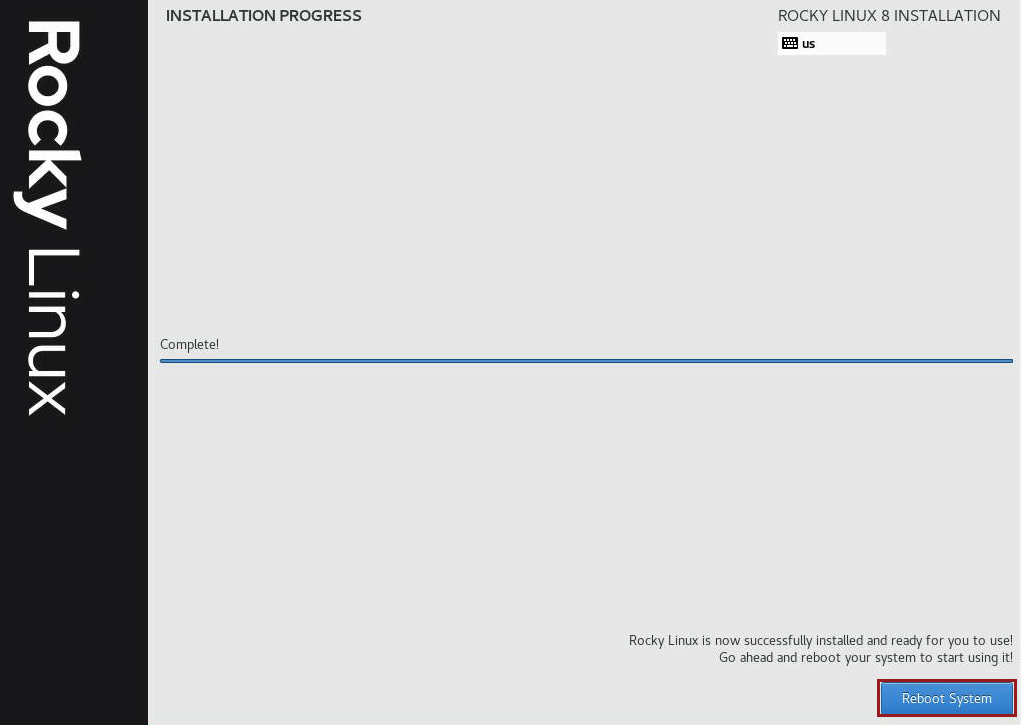
- Once the configuration of the installation destination, root user and networking is done you can click Begin Installation.

- Once the installation is complete, click Reboot System.
Verification
- After the reboot, the system should boot into Rocky Linux. To get Houston UI and 45Drives tools, see here.
Troubleshooting
- If you come across the following error when configuring the boot devices’ RAID set-up, please follow to correct.
- Click “+” to add another mount point and select “biosboot” & make the parition atleast 1 MiB in size.
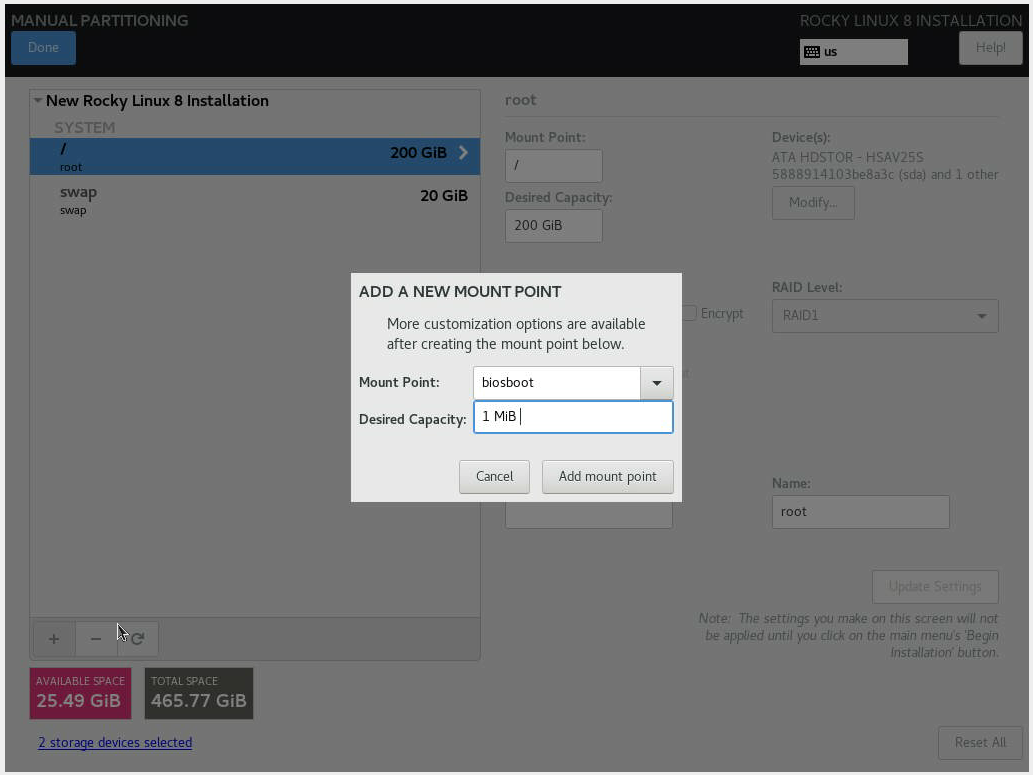
- Once the new partition is created, you will be able to complete the Manual Partitioning section.

Views: 5175