Scope/Description
- This article will walk you through the process of installing Rclone and connecting a remote to a cloud service such as Backblaze or Google Drive. This will allow you to move files to these cloud services.
Prerequisites
- CentOS or Ubuntu 20.04LTS Server. (See here for instructions on how to install Ubuntu20.04LTS)
- Google Drive, Backblaze, etc, account set up with a bucket/drive created.
- Terminal access to the server through SSH.
Installing Rclone
Ubuntu
apt install rclone
CentOS
yum install rclone
Backblaze
Installation
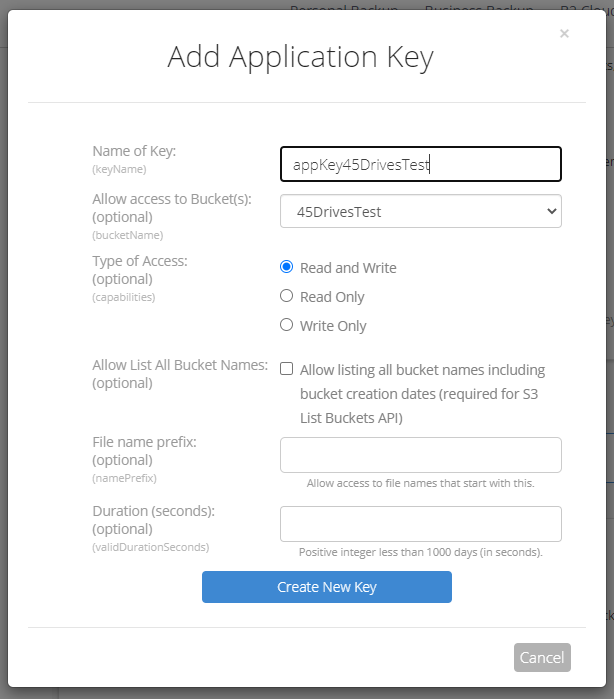
- Create an application key for the bucket.
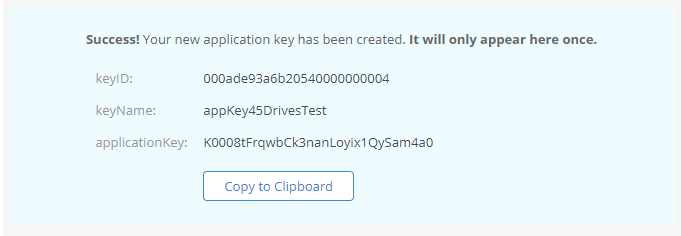
- Copy this down. It will only appear here once.
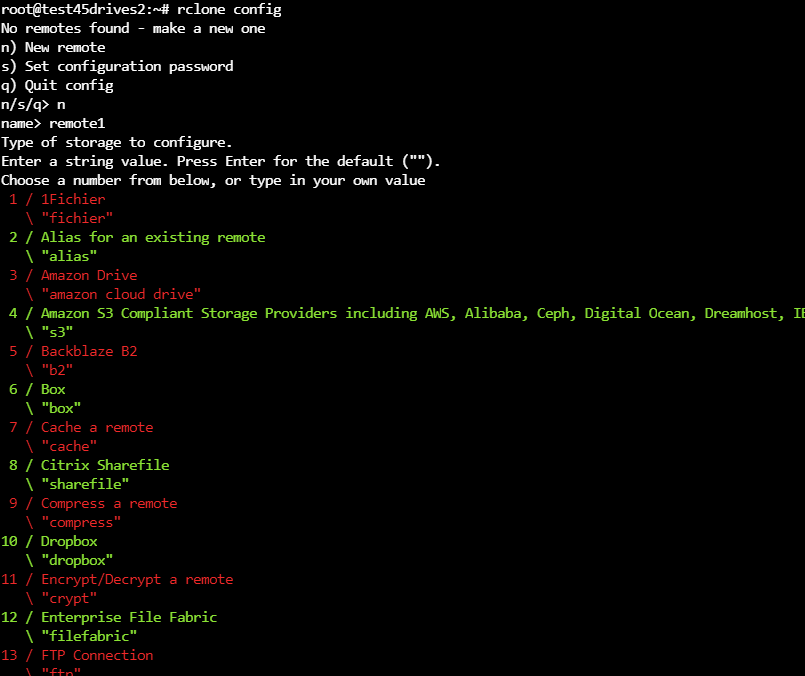
- Create a new remote for rclone by running “rclone config” and you will be prompted for a name and which type of remote. Enter “5” for Backblaze B2.
- Enter the keyID and applicationKey from the backblaze webpage. Enter true or false on hard_delete option as you need.

Verification
- You should now be able to push or pull files from a Backblaze bucket. You can have multiple remotes at a time and have multiple buckets. The files can be moved in either direction based on the syntax of the Rclone commands. A list of Rclone commands is available here.
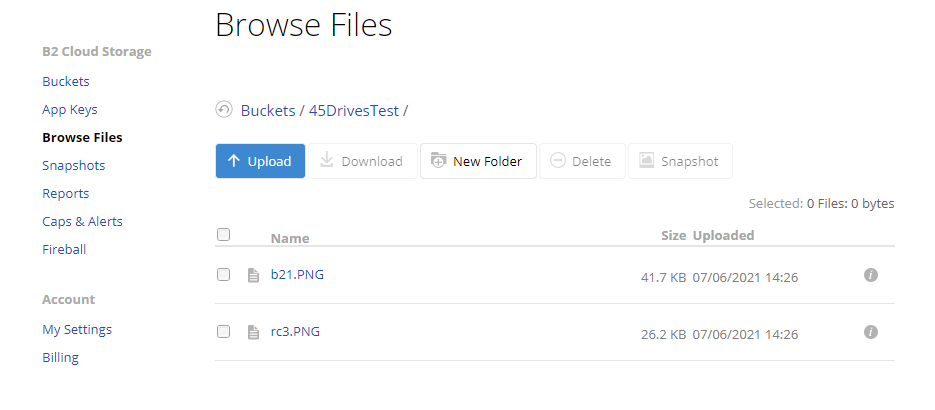
- We can then test that the authentication works. Here I have uploaded two random files.
- I will copy them to a folder I have created on the server using “rclone copy”

Google Drive
Installation
While it is free to connect to Google Drive, you will be limited to a personal drive. This can be shared to others but if the owner deletes the folder it will be removed for everyone. In order to use a Shared Drive (Team Drive) you need a G Suite Business account. Here we cover connecting to a personal drive, the Shared Drive setup is similar.
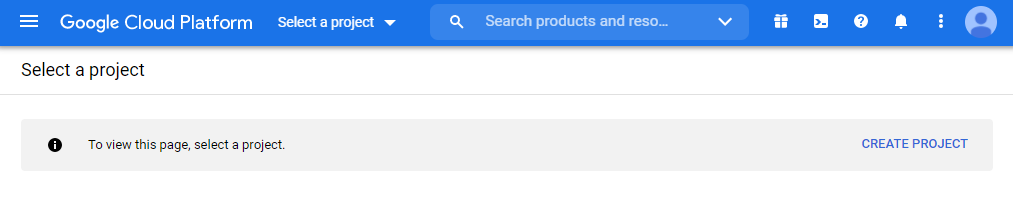
- Visit console.cloud.google.com/projectselector2/ and click “create project”
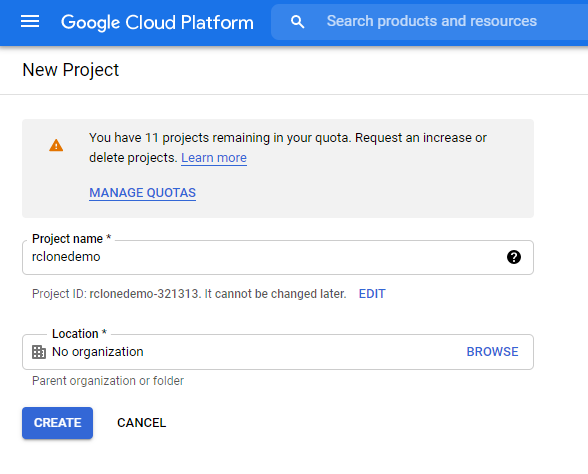
- Choose a name for the project and click “create”.
 Go to the navigation menu at the top left of the webpage > APIs & Services > OAuth consent screen. Select External and click “create”.
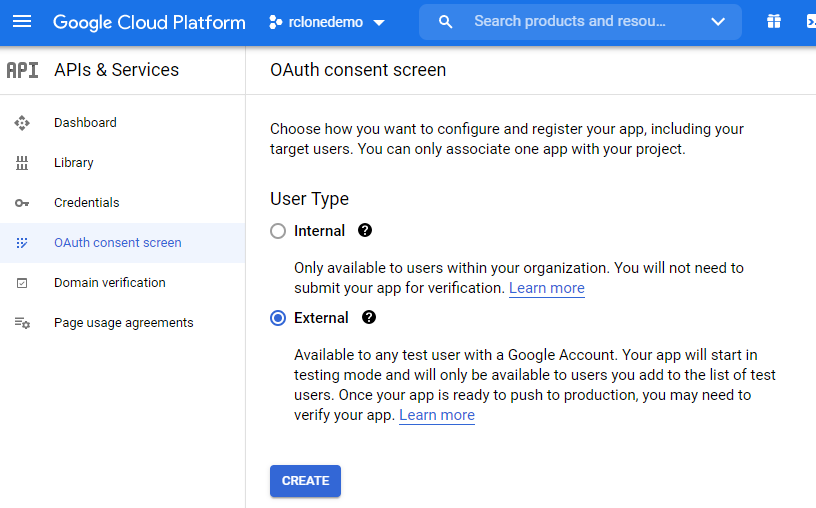
- Fill in the App name, User support email, and scroll down and enter an email under Developer contact information. Click “save and continue”. Click “save and continue” on the following page.
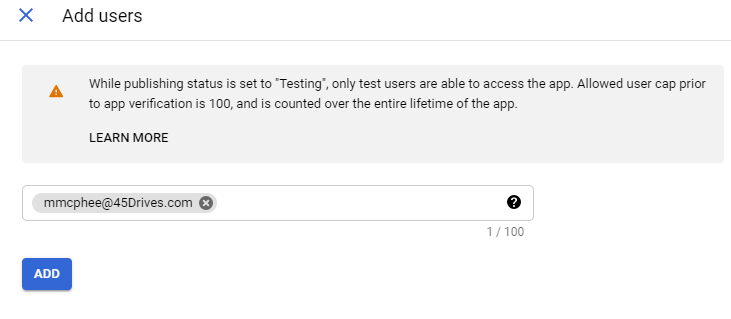
- On Test users, click “add users” and enter the email of the gmail account you are using to create the project. Then click “save and continue”.
-
- Navigate to Credentials page and click “create credentials” at the top, then click “OAuth client ID”.
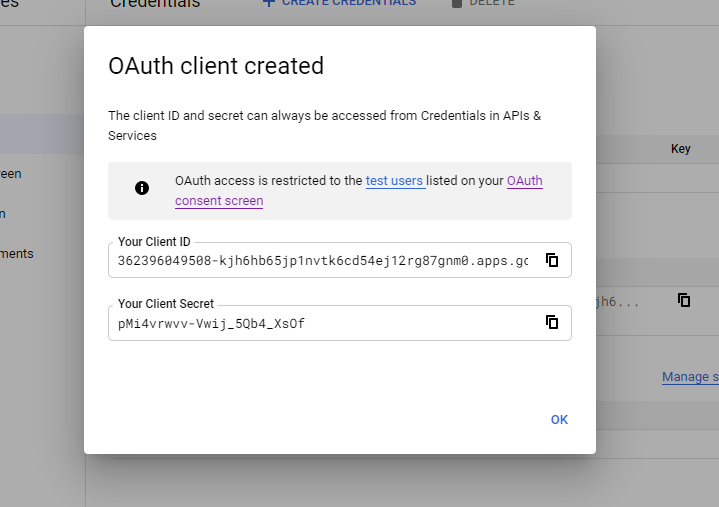
- Set the application type to Desktop app. The name can be left the same. Click “create”. You will be presented with the client ID and secret you need for the Rclone remote.
- Go to the Houston terminal on your Storinator, or SSH into it.
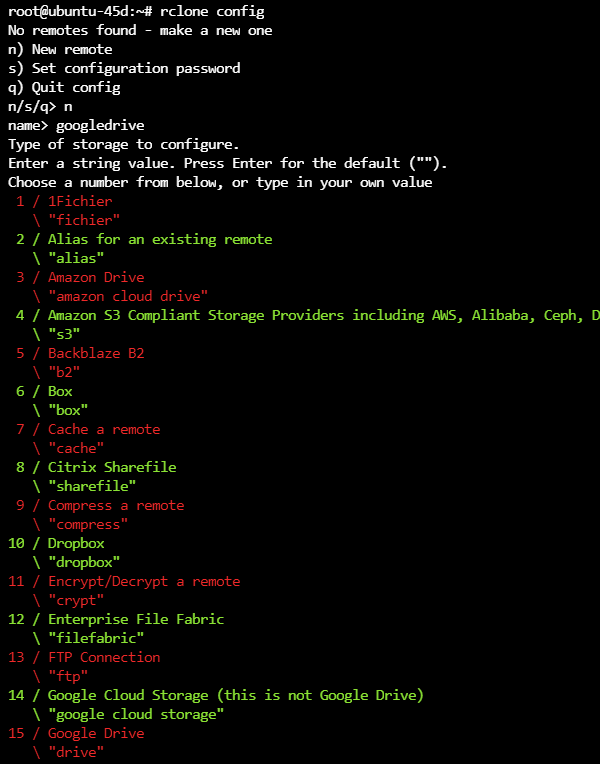
- Run through the Rclone configurator by typing “rclone config” and create a new remote. On our version of Rclone, Google Drive is #15 so enter 15.
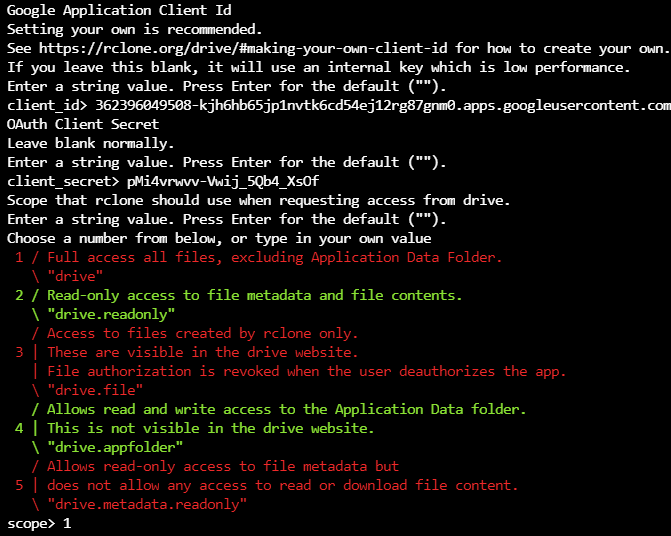
- Enter the ID and secret from the previous steps and select a scope for rclone’s access. For simplicity I chose option 1 here.
- Continue through the config leaving everything default until it asks us to use auto config. Say no, as we are on a headless machine without a desktop and internet browser.
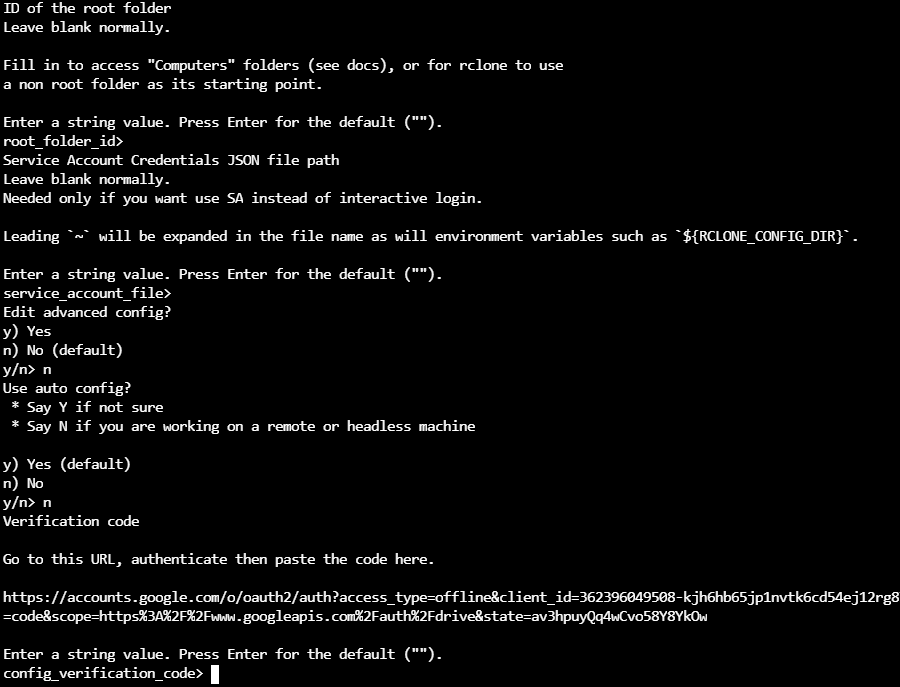
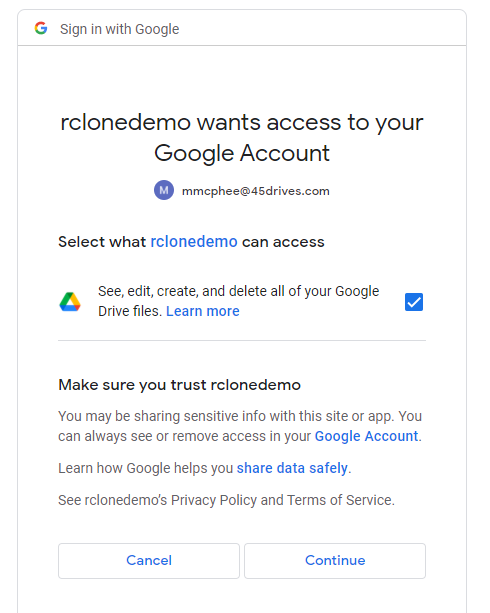
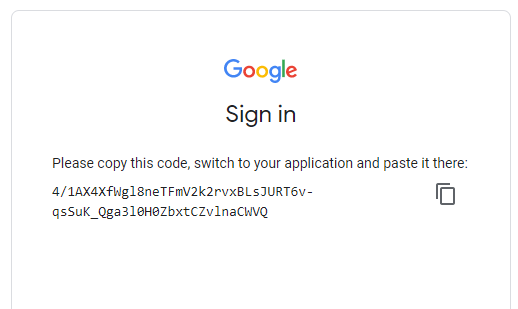
- Copy the URL from the terminal into a browser on your pc. Choose the google account you gave access to, and allow your “project” to access your google drive.
- Continue through the config leaving the rest as default and then review and confirm the config.

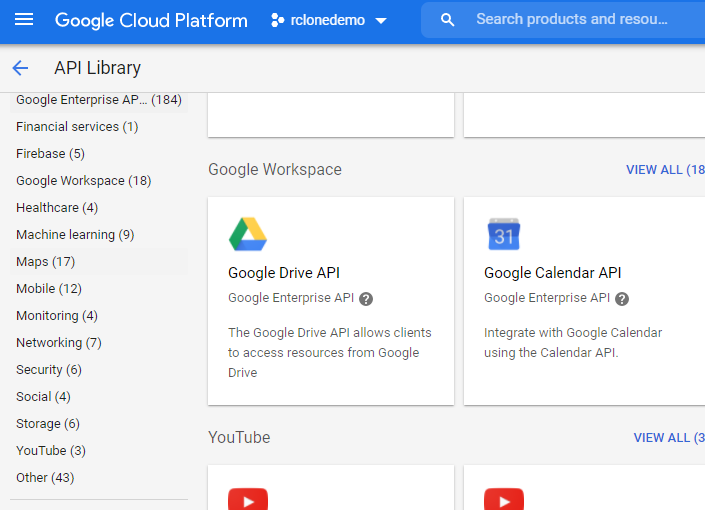
- Go back to the Google Cloud Platform webpage. Go to the API Library and scroll down to Google Drive API. Click on that and enable it. You should now be able to send files to your drive.
Verification
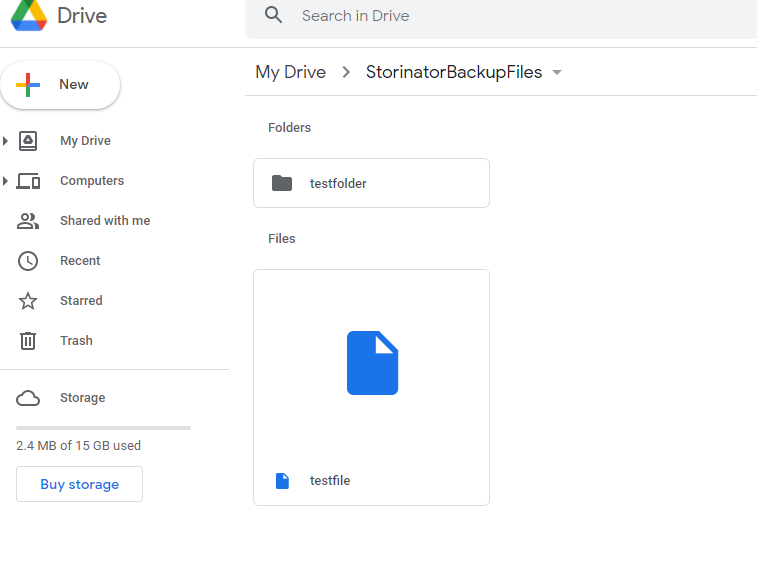
- You can send/retrieve files from your google drive. Here I have created an empty file named “testfile” and a few folders. They can be sent to your drive by running an rclone command like copy.
- Here I ran a command to copy the entire contents of my current folder to a folder on my drive named “StorinatorBackupFiles”. This folder didn’t previously exist so it is automatically created. I also had to add “–create-empty-src-dirs” flag as my test folder was empty and rclone skips empty folders by default.

Dropbox
Installation
This process is smoothest when done on a client with Dropbox attached. you’ll also need to download Rclone on your client detailed below.
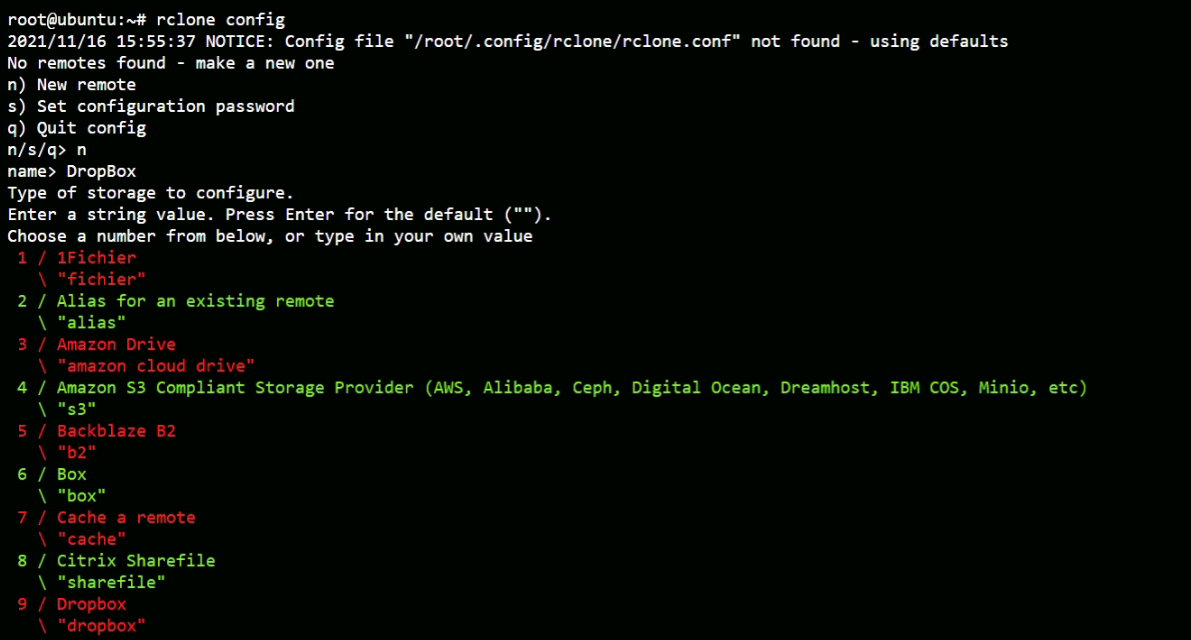
- Type “rclone config” in the terminal, select new remote, enter a name and choose the corresponding number at this time DropBox is #9 but this does change as more cloud options are added.
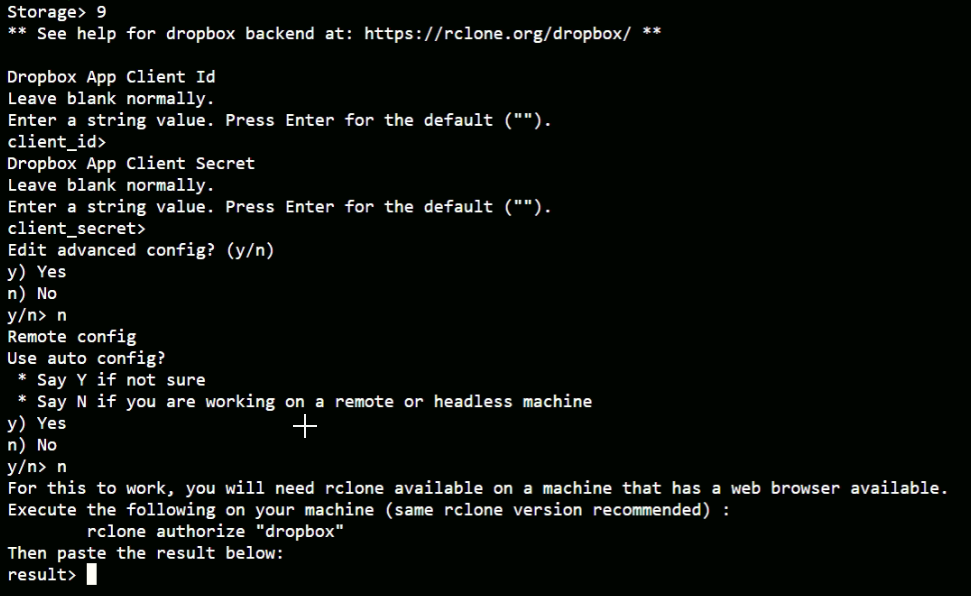
- Press enter for the first two prompts and when asked to edit advanced config, type “n”. when prompted to use auto config type “n” again as the next portion will take place on a client withUI/browser
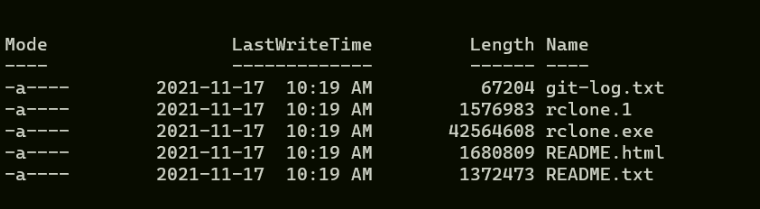
- At this point we need to install Rclone onto our client using this page “https://rclone.org/downloads/” Save it to an easy to find location like your desktop. unzip the file we’ll then go into the command line on our client move to the directory where “rclone.exe” is located.
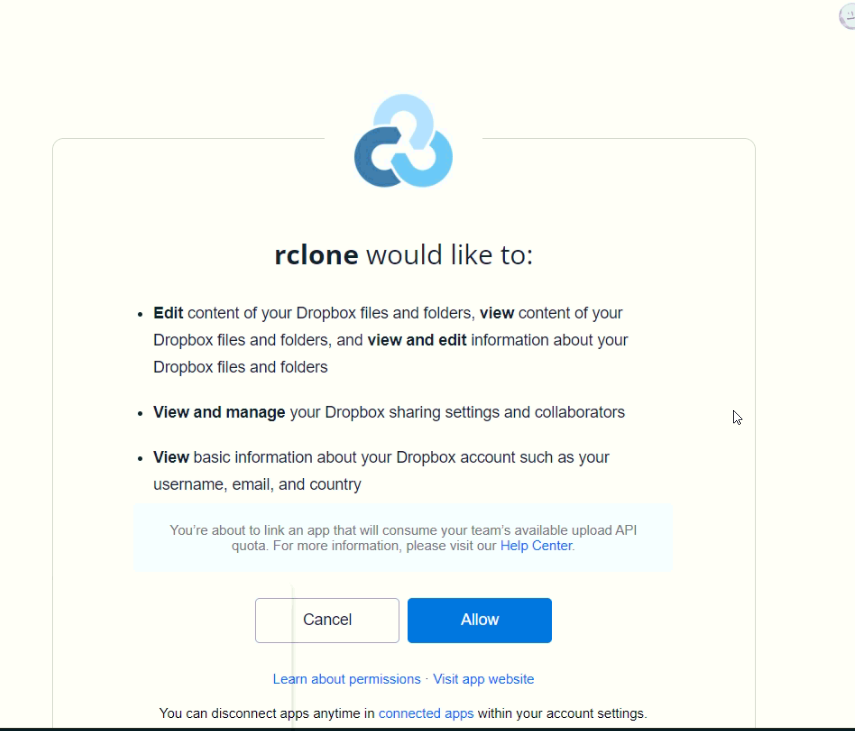
- Once in the directory run “.\rclone.exe authorize “dropbox”” you’ll then be taken to a page in your web browser click “Allow”
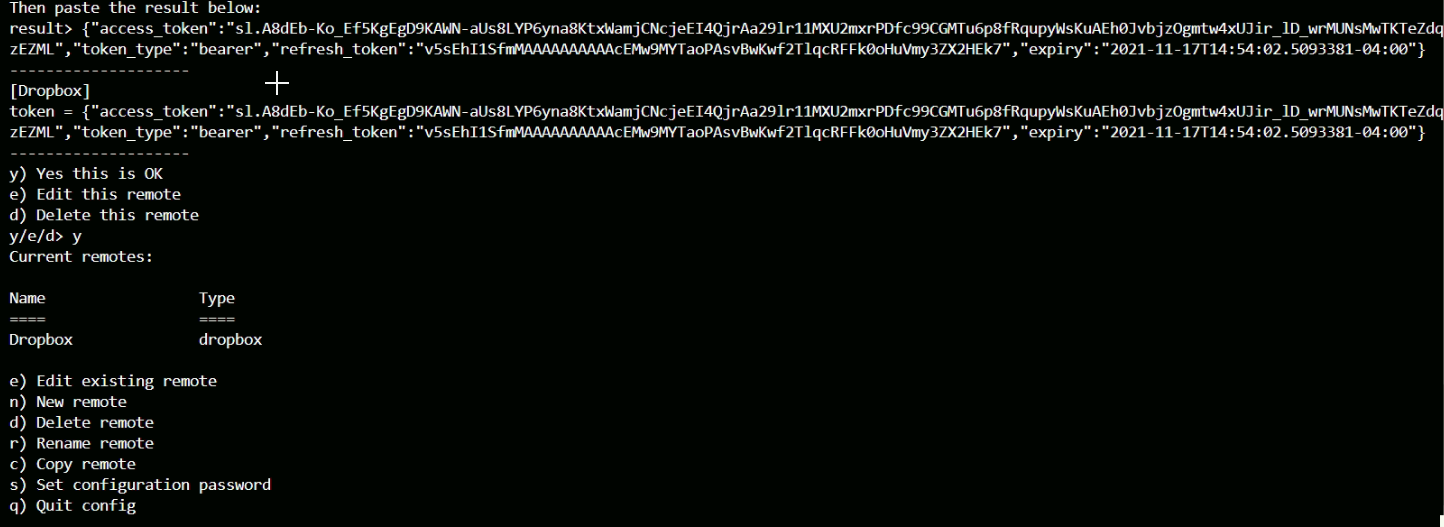
- An access token will populate in the terminal copy everything in between the arrows and paste it in the terminal

- The last step is to enter “y” and then “q” and you should now have your Dropbox account connected to your server!
- Accessing Dropbox Team folders requires a leading slash.
- rclone copy /tank/test/ dropbox:team-folder/
- This will go into user/team-folder , where “user” is the account you authenticated with when setting up rclone initially.
- rclone copy /tank/test/ dropbox:/team-folder/
- This will go into the organizations team folder.
- rclone copy /tank/test/ dropbox:team-folder/
Verification
- to verify the connection has been made type “rclone ls <rclone config name>:” In this case we would enter “rclone ls Dropbox:” and we should see all of our files on our Dropbox
Views: 2367