Table of Contents
Scope/Description
- This article will show how to manage networking in Houston UI
Prerequisites
- Access to Houston UI
- Network Manager installed and configured
Steps
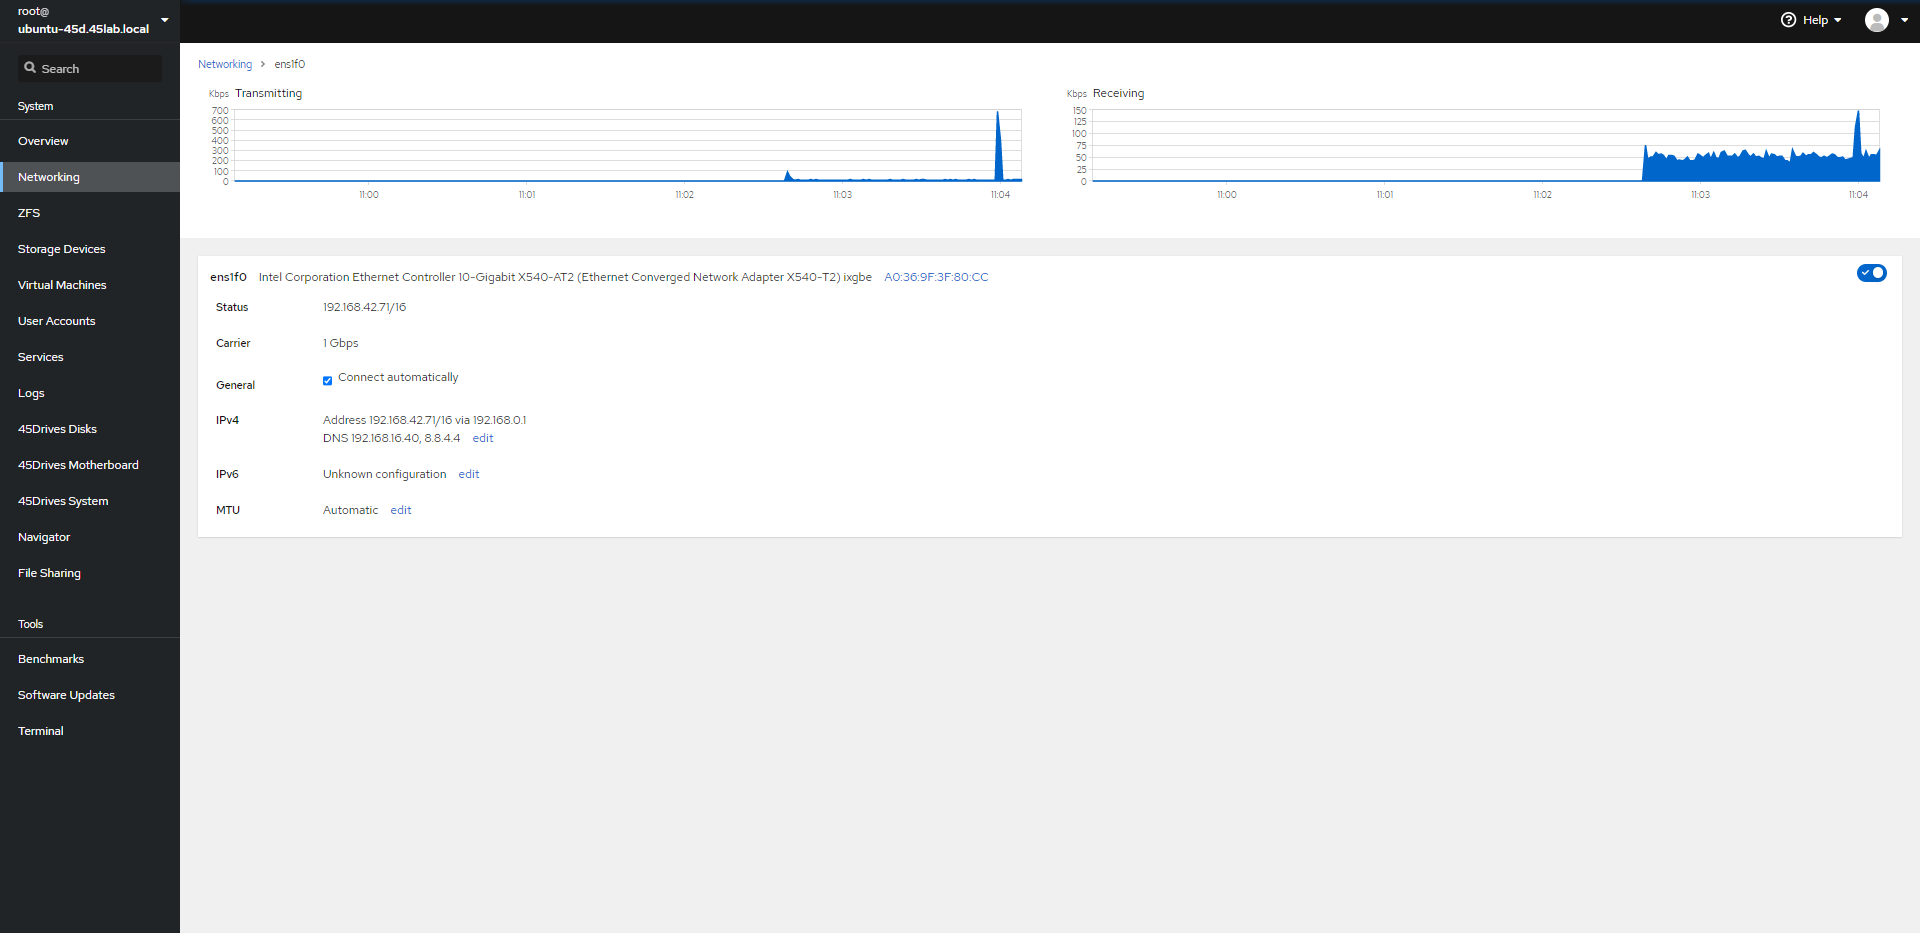
- In the networking tab, we can see our interfaces, and the option to create bonds, bridge, or VLANs. We can also directly select an interface to configure its settings.

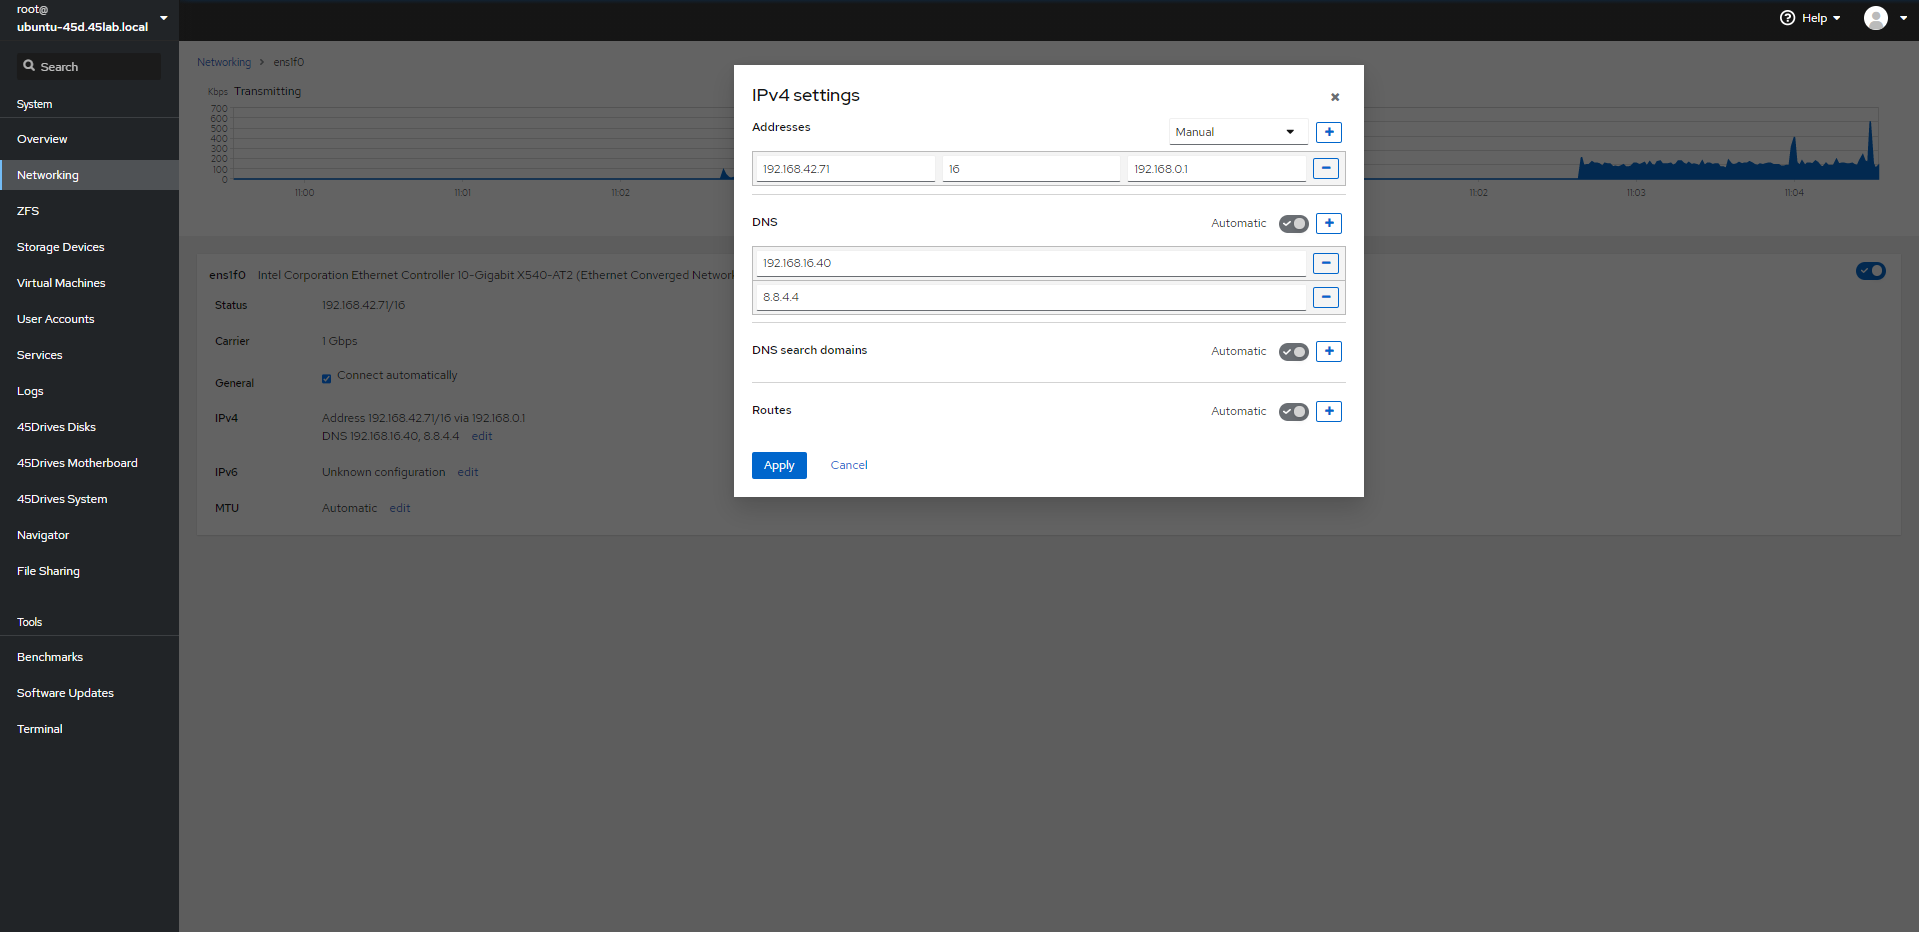
- If we select the interface directly, we can edit iPv4, iPv6, and MTU settings. Here we’ll edit our iPv4 settings.

- Here we’ll assign a static IP, and set the default route and DNS. Here we’ve set an IP of 192.168.*.*, subnet of /16, and a gateway of 192.168.0.1. For DNS we’ve set 192.168.16.40, and 8.8.4.4.

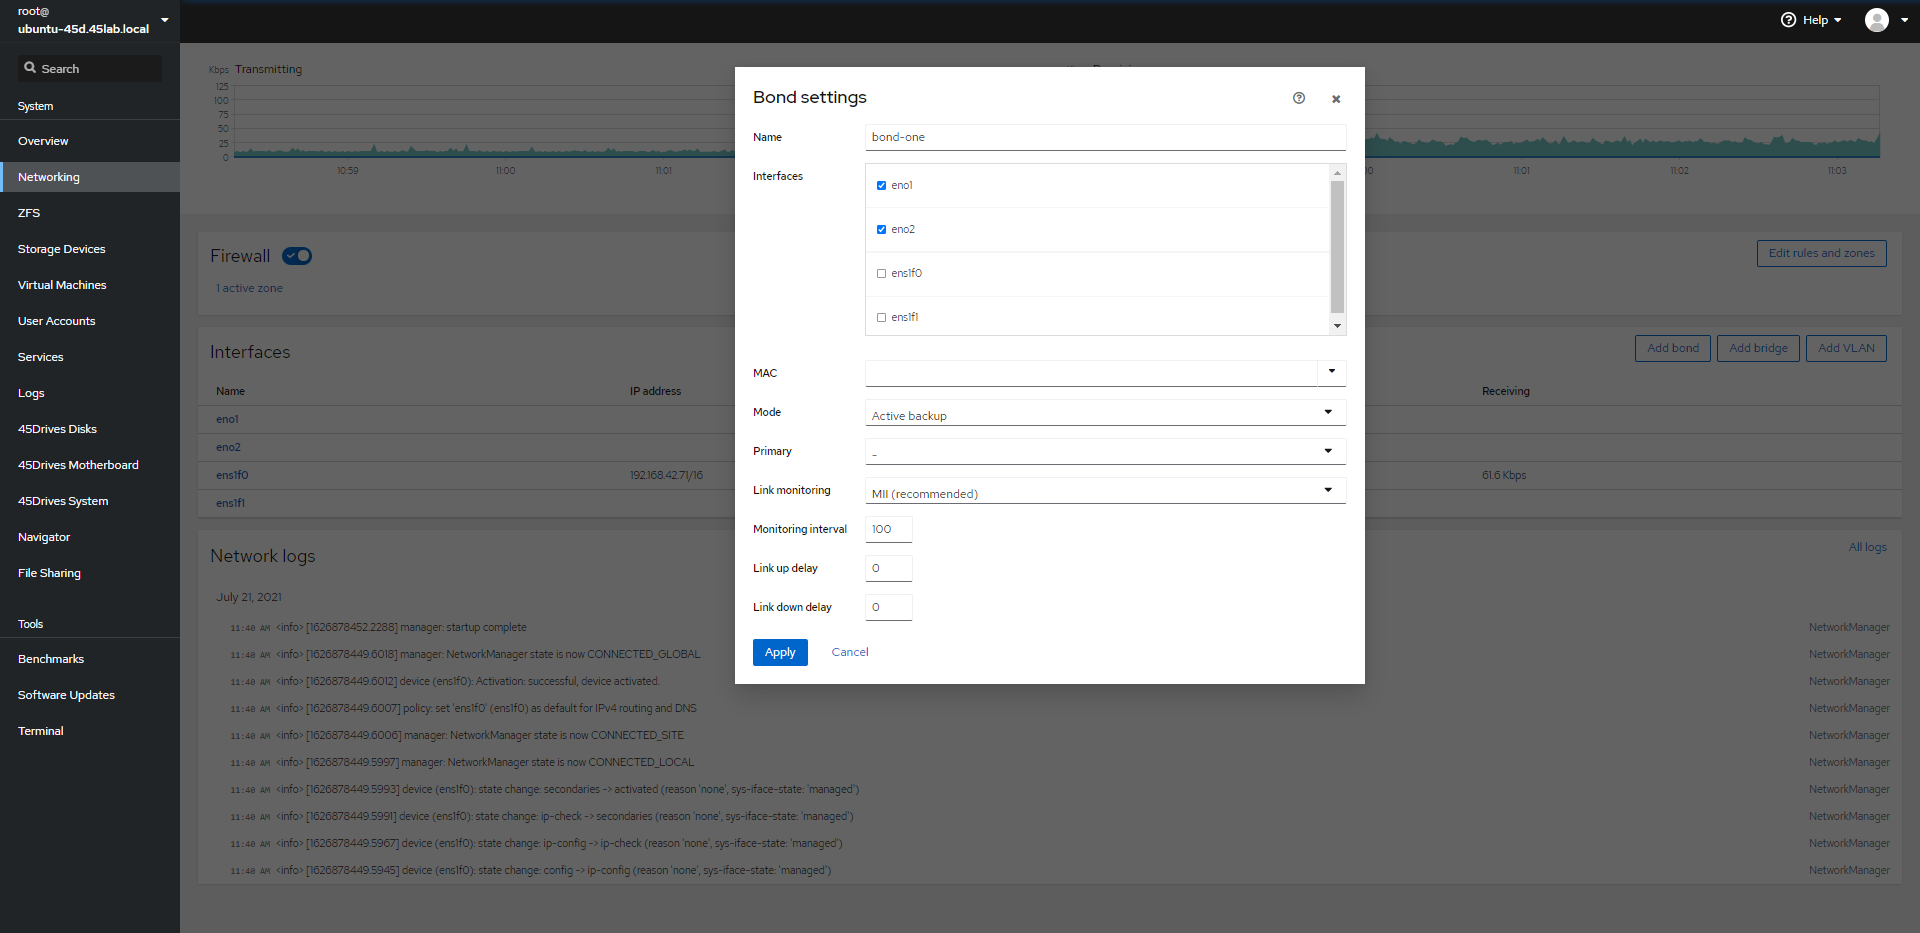
- We can also configure a bond by selecting the Add bond. Here we’re bonding interface eno1 and eno2 together within a Active backup bond.

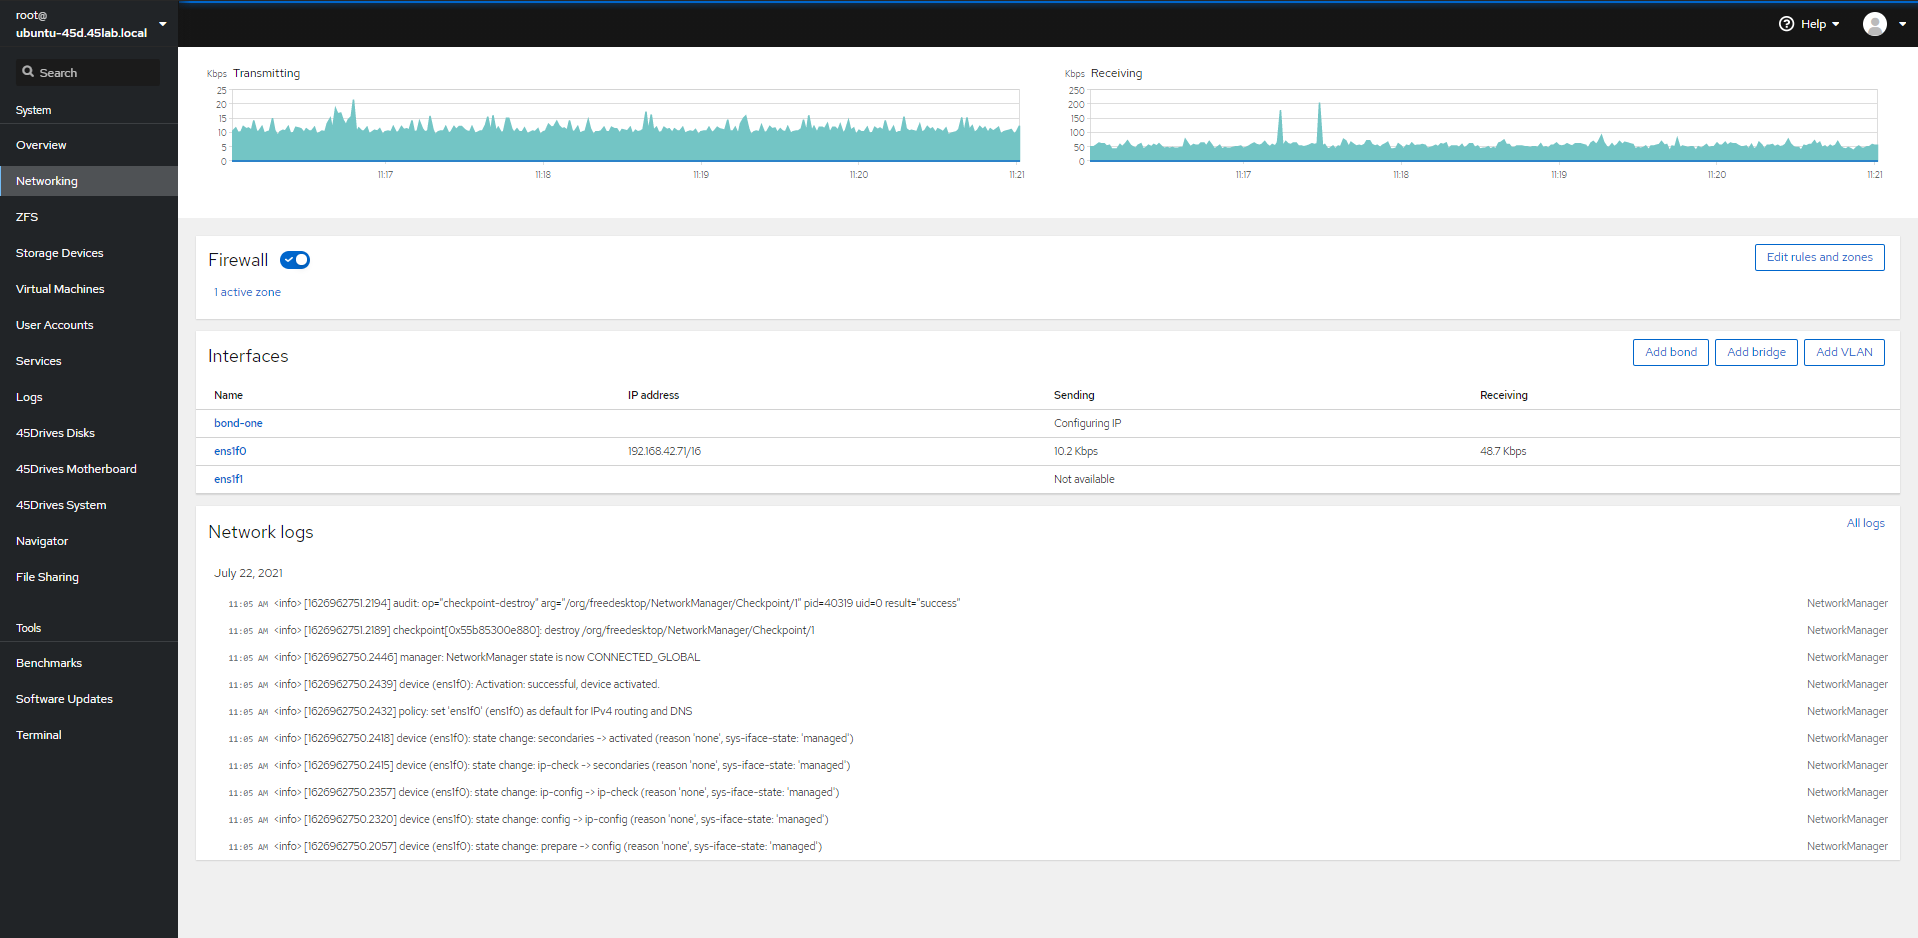
- Here we can see our bond is created.

Verification
- Verify the network interface(s) have been configured correctly in the UI, or by running “ip a” in the terminal.
root@ubuntu-45d:~# ip a
Troubleshooting
- Ensure you have Network Manager installed and configured.
Views: 1180