Scope/Description
This article details the process of configuring Veeam as a backup repository
Prerequisites
This guide explains how to set up a Storinator running CentOS 7 as a backup repository for Veeam. This guide assumes Veeam is already up and running on the Host Windows machine and that the Storinator CentOS install has a mounted volume of some sort ready to be backed up to. There are a few prerequisites to get out of the way on the Centos 7 side, beginning with package installation.
NOTE: Be sure to do a reboot on both the Backup Repository as well as the Veeam server once all steps are completed to ensure full transfer speeds
First, install Perl, and Perl data dumper and then open the ports that will be needed to communicate with Veeam. Finally, set SELinux to permissive mode.
[root@localhost ~]# yum install perl -y
[root@localhost ~]# yum install perl-Data-Dumper -y  **Command is case sensitive**
[root@localhost ~]# firewall-cmd --permanent --add-port=2500-5000/tcp
[root@localhost ~]# firewall-cmd --reload
Steps
Veeam Configuration
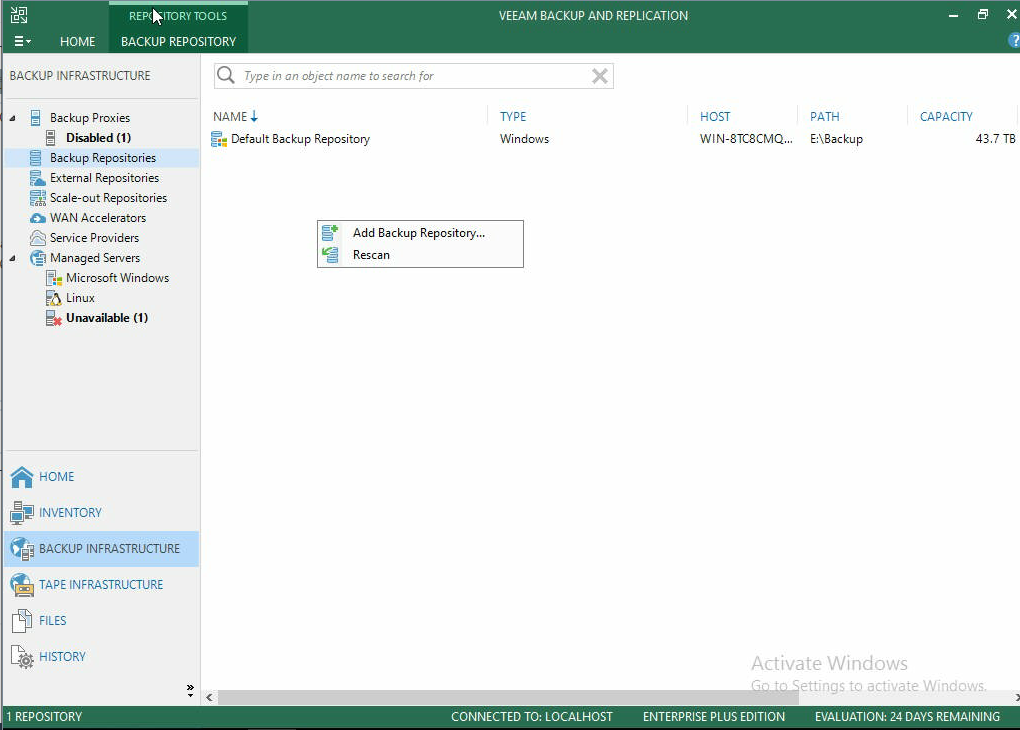
- Begin by opening Veeam Backup and Replication, and inside the backup repositories window right-click in the whitespace and then click on “Add Backup Repository”
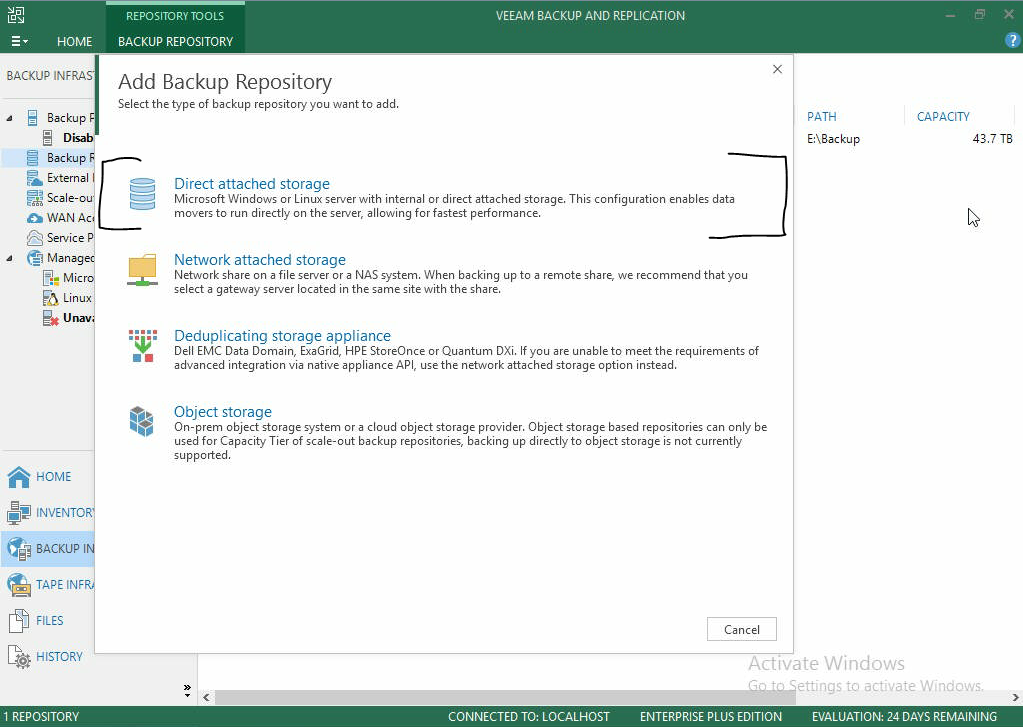
- Although the Storinator will be backing up over the network, select Direct attached storage. This will use the SSH and SCP modules to backup data to the Storinator.
- Select Linux.

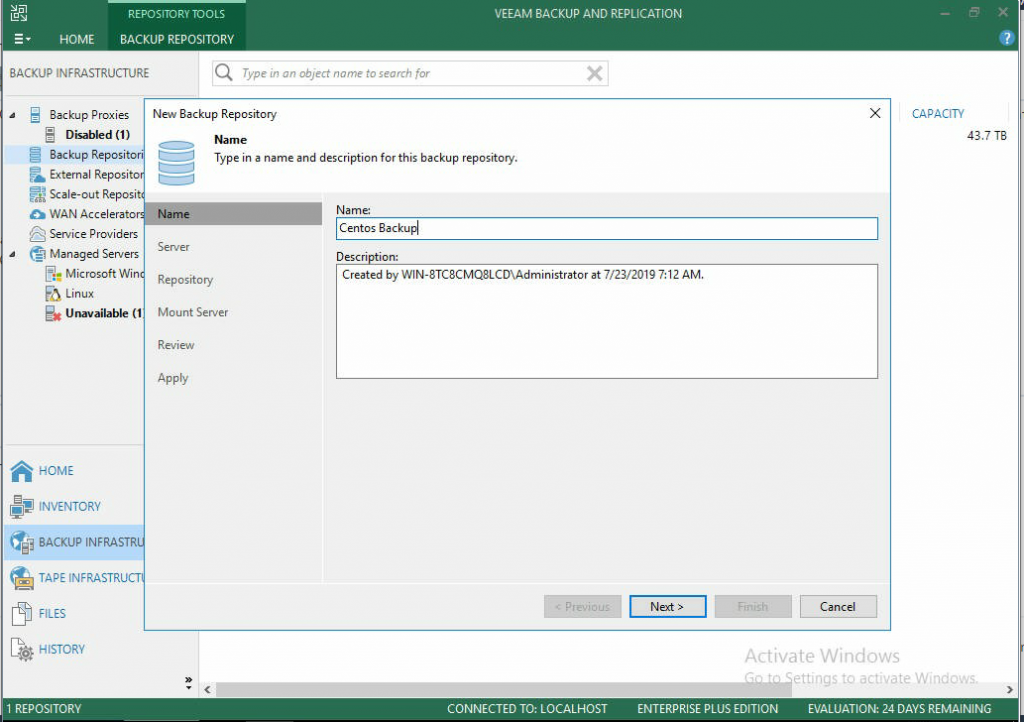
- Give your new backup server a name to be used within Veeam.
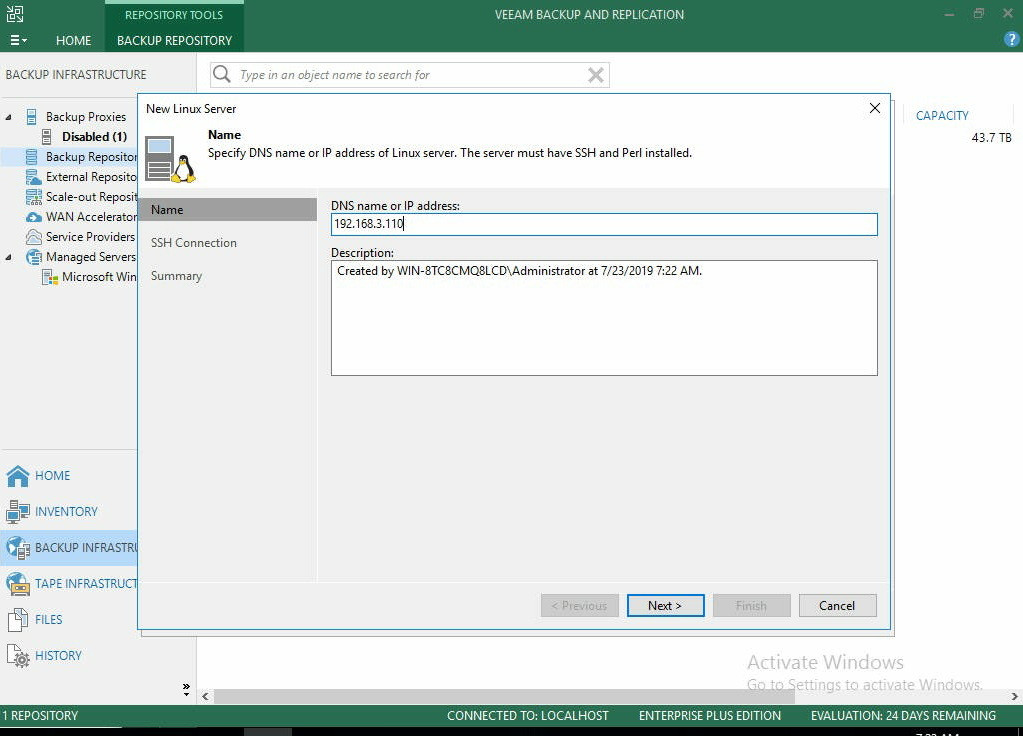
- Select Add New to find a new Repository server to connect to.

- Set the IP address, or the hostname if your DNS is set up to resolve correctly.
- Next, click Add, and then click Linux account. This is where you will give Veeam access to the user.
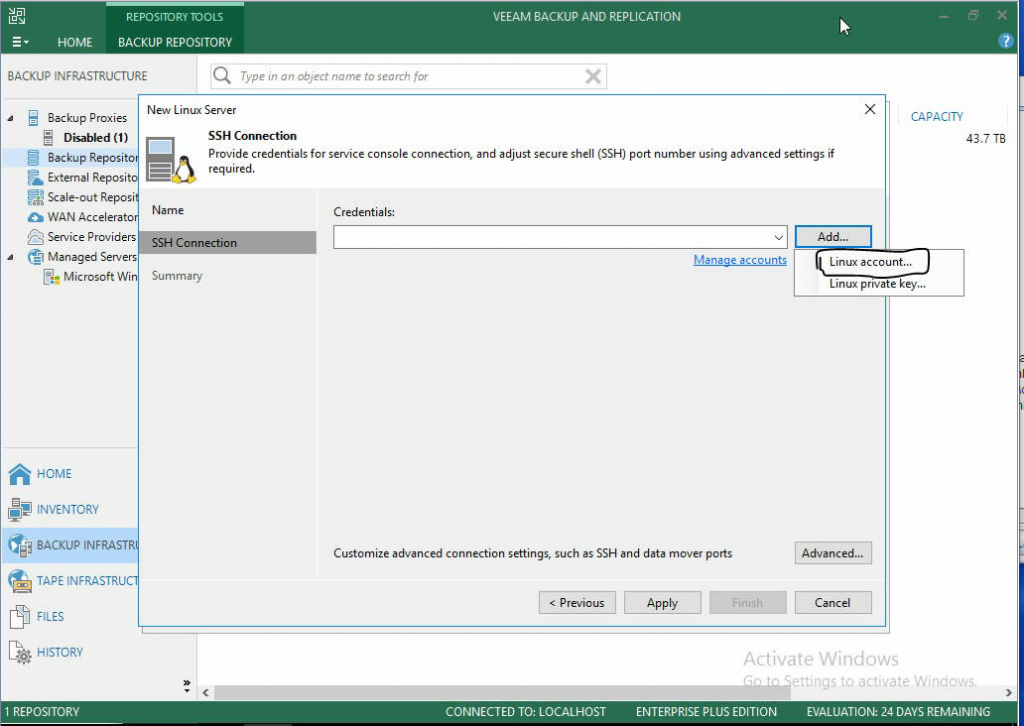
- For this guide, user root is used. If you want to use a different user, just be sure they have the correct permissions to be able to read and write to the proper directories.

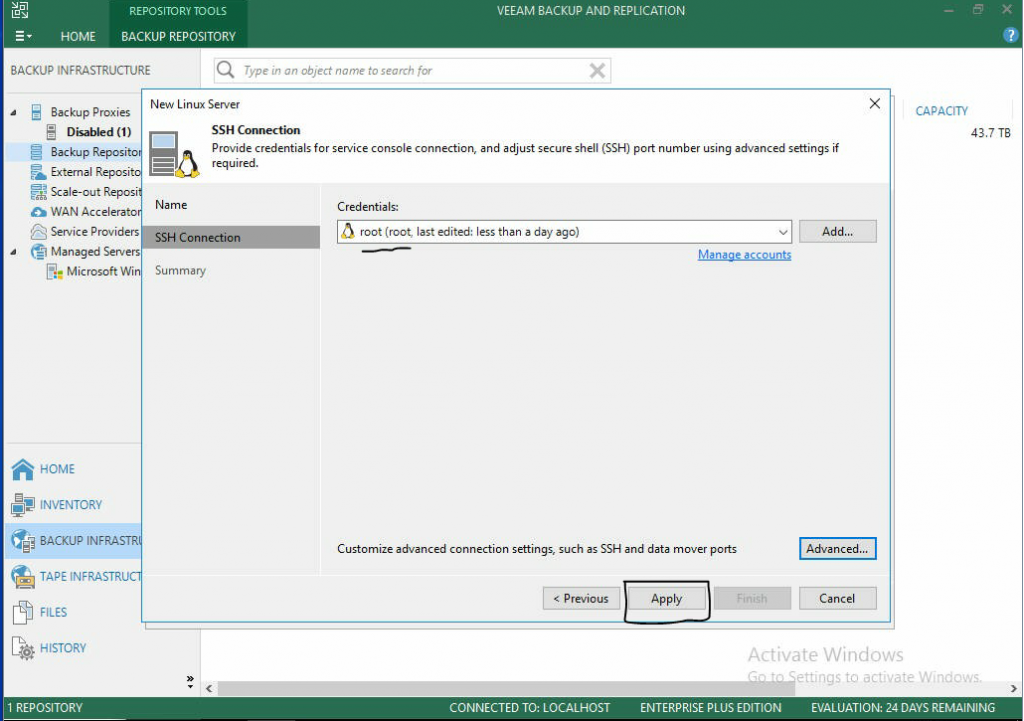
- Once you are sure the correct credentials are entered, click apply.
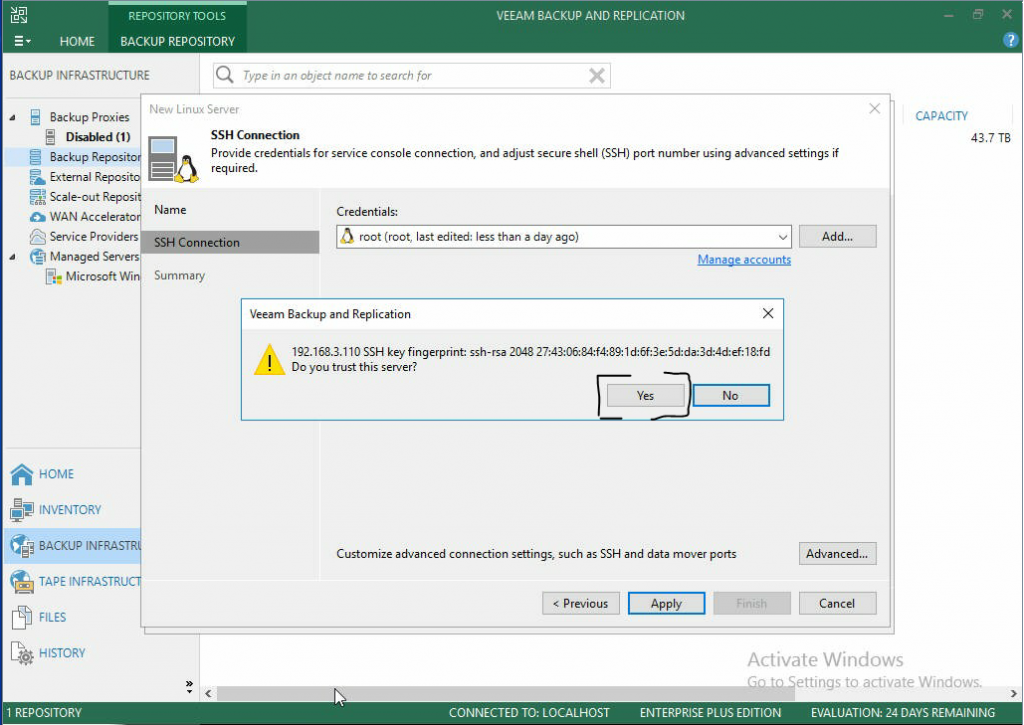
- Since this is the first time this machine will have connected to the Linux server, Veeam will ask if you trust the server.
- If the credentials were entered correctly, you will get a Summary showing success. Click Finish.

- Once you click Finish, a new screen will pop up. Under the Repository Server: dropdown, be sure your new repository is selected. Then click Populate to find the mounted volumes. It is here that you will select the default location for data backup.
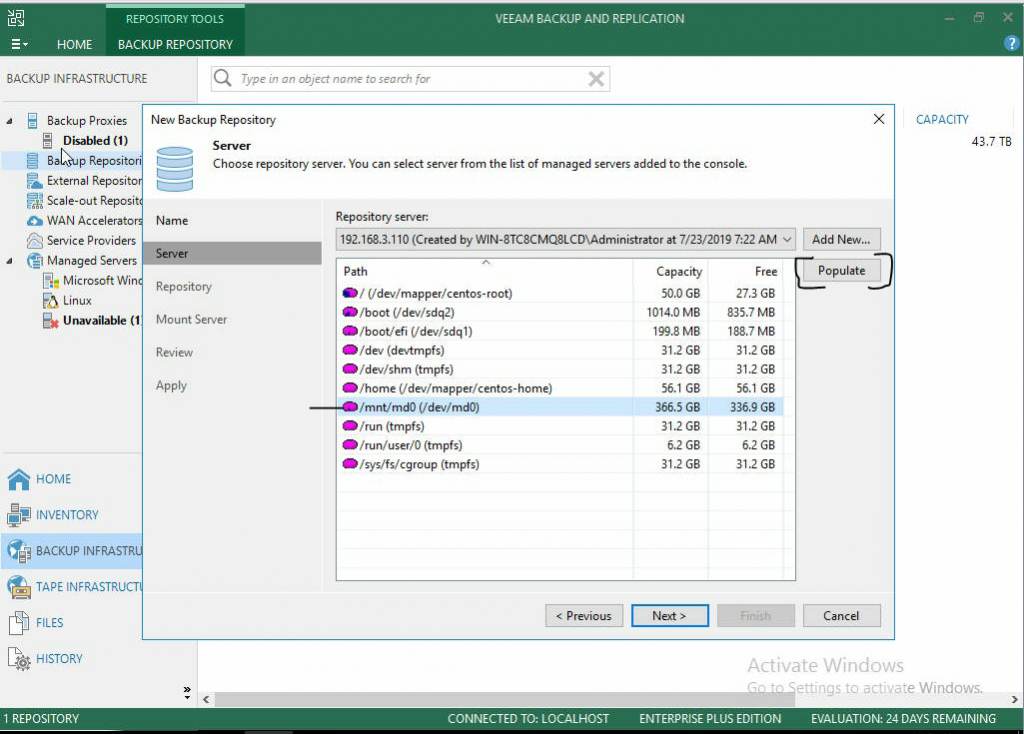
- If you chose a volume in the previous screen, it will be entered in the Path to folder: section. If you click Populate, you can find the exact amount of capacity and free space you have to work with. From here you can also limit the number of concurrent tasks as well as limit the read and write speeds to and from the new backup repository.
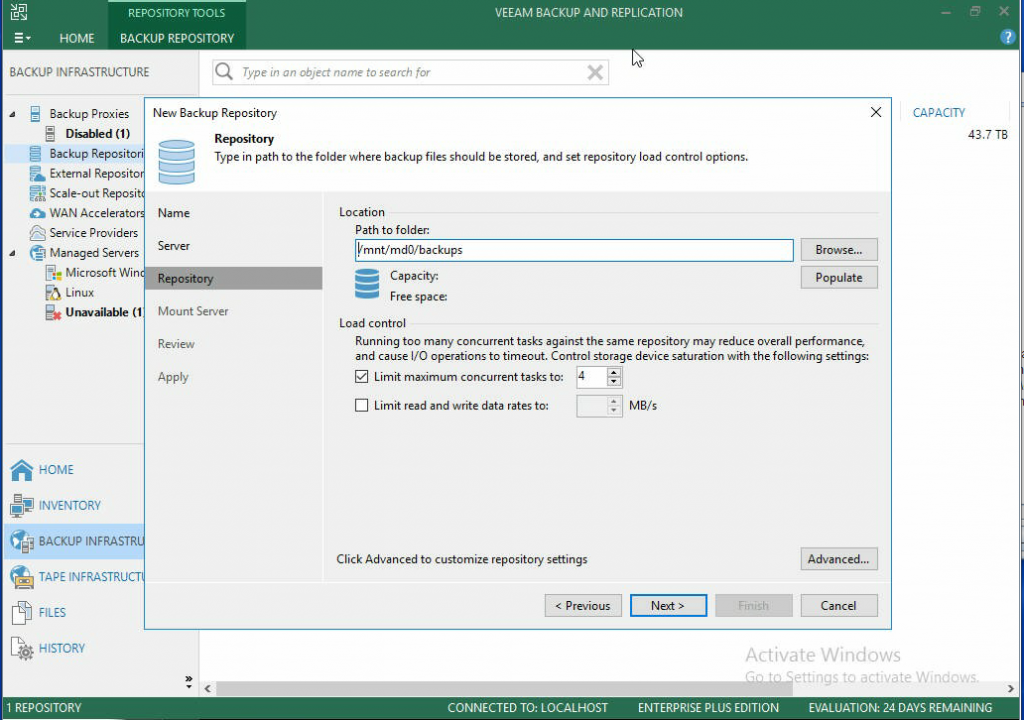
- This next screen allows you to specify a server to mount backups for file-level restores. Setting this up (vPower NFS) allows the ability to run VM’s directly from backup files which brings some extra functionality to the Veeam services such as instant VM recovery and on-demand Vm sandboxes. If this is not something that is necessary for the users purpose, disable it.

- Now review all settings to be sure setup is correct, then click Apply.

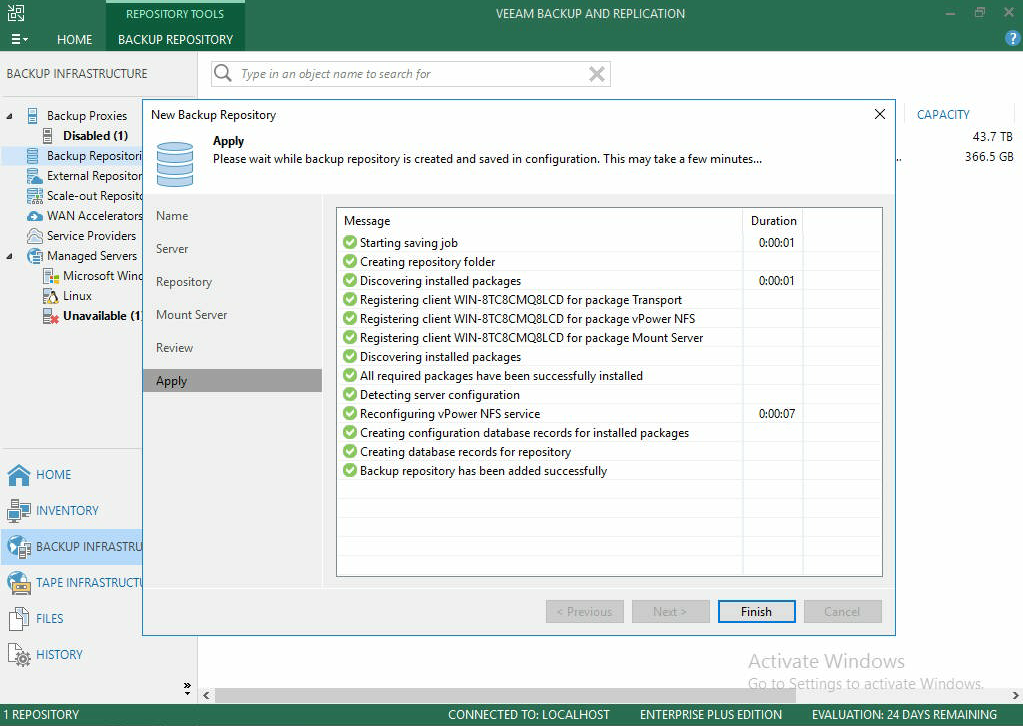
- If the configuration succeeds, you will see a screen like this:
- You are now ready to begin setting up back ups which can be done on a schedule, or at any time. You can also back up individual files if necessary.
NOTE: Be sure to reboot both the Backup Repository and Veeam Server prior to beginning backups to ensure full transfer speeds