Table of Contents
Scope/Description
- This article will show how to set static IPs and create bonds in Network Manager (NMTUI).
Prerequisites
- 45Drives setup script installed.
Steps
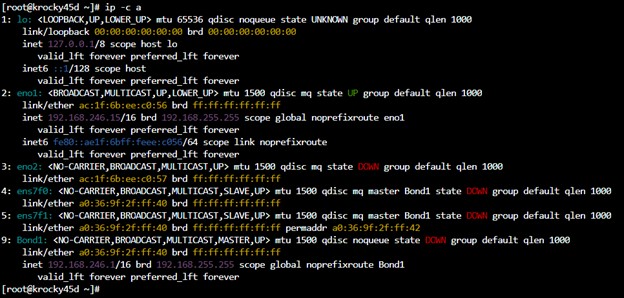
- To see your interfaces currently on your server, run an “ip a” command. You can run “ip -c a” to show your interfaces with colored IP addresses. This helps to distinguish what you’re looking at.
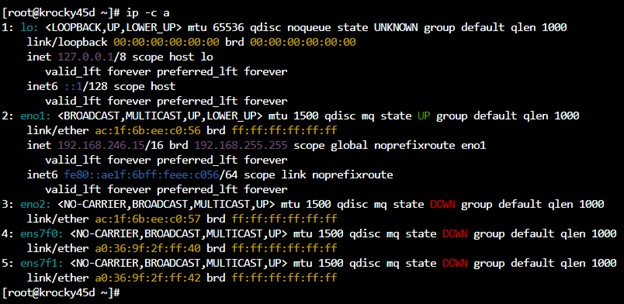
- From the output, we can see that we have one loopback address, and 4 available ports. The eno1 and eno2 ports are used by the motherboard of the system, while any other ports are NIC ports. Note that eno1 is the only active interface, as any port that is UP is an active connection. In this case, the network is already configured.
- Run the command “nmtui” to access NMTUI.
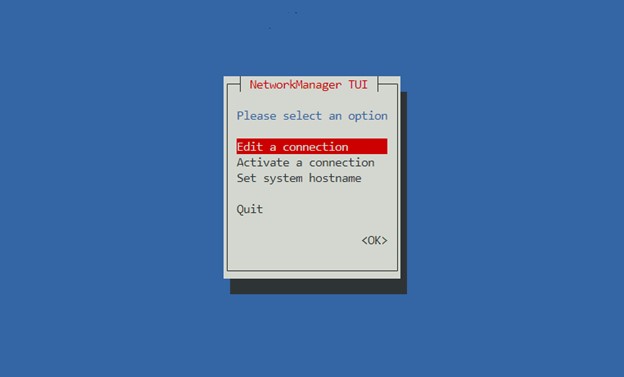
- From here, we can edit connections, activate and deactivate connections, and change the system hostname.
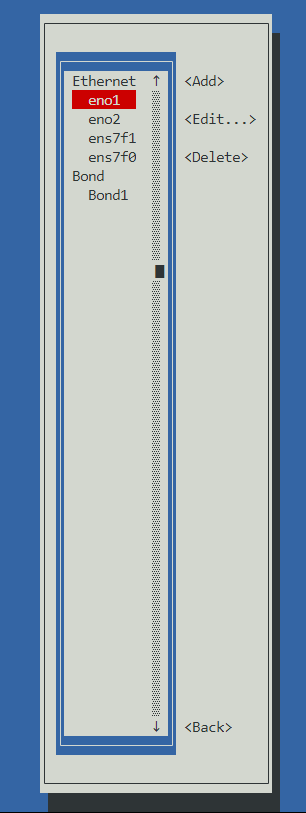
- First, we will set a static IP. Click Edit a connection.
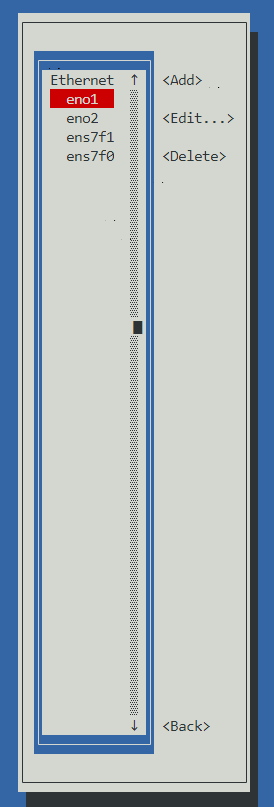
- In the earlier step, we noted that eno1 was UP. Click on eno1.
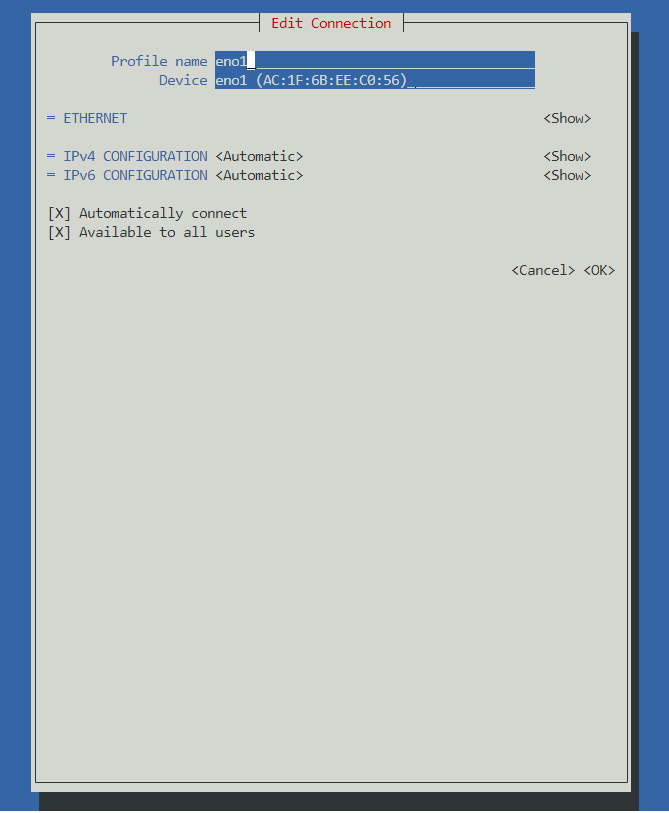
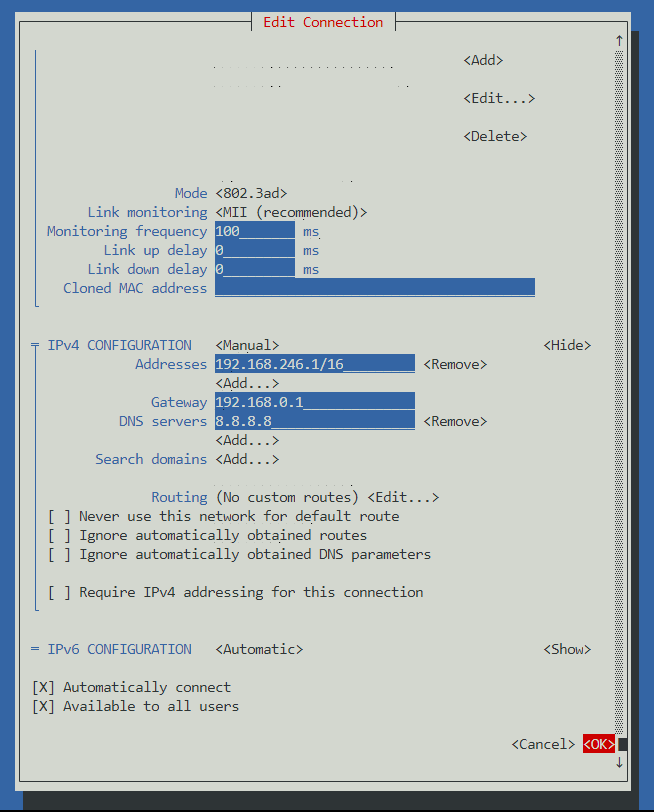
- Navigate to IPv4 configuration and change automatic to manual and then click show. Here we can enter our static IP information. Be sure to remember to add your subnet after your IP address. (Most common would be /24, which correlates to a subnet mask of 255.255.255.0) If you will be joining a domain, you can set your server’s DNS. Click OK. (Even if you aren’t joining a domain, if you want to be able to resolve internet addresses via names you will need to give a DNS whether its a public one or an internal one. Because were setting a static IP, if you don’t include a DNS at all you won’t be able to download packages or anything because it needs DNS.)
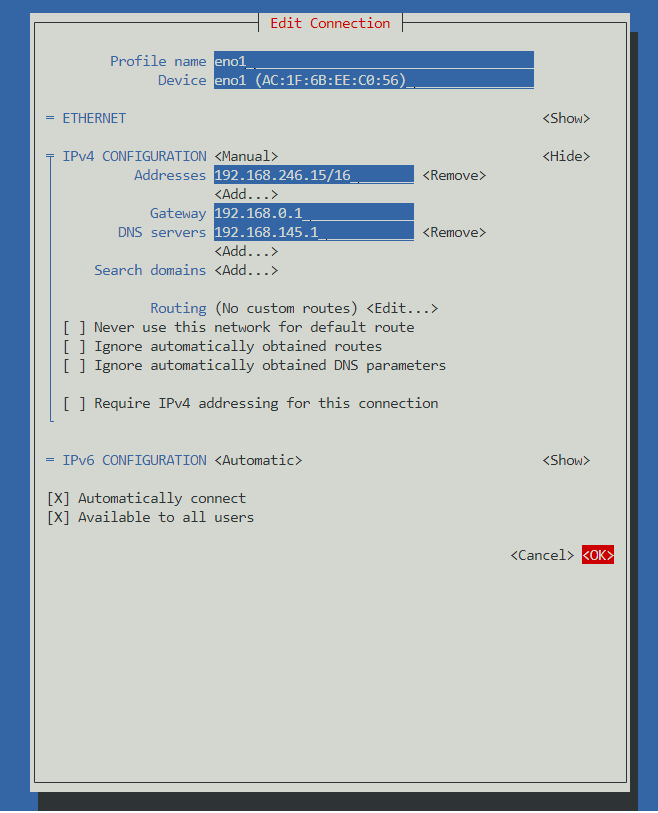
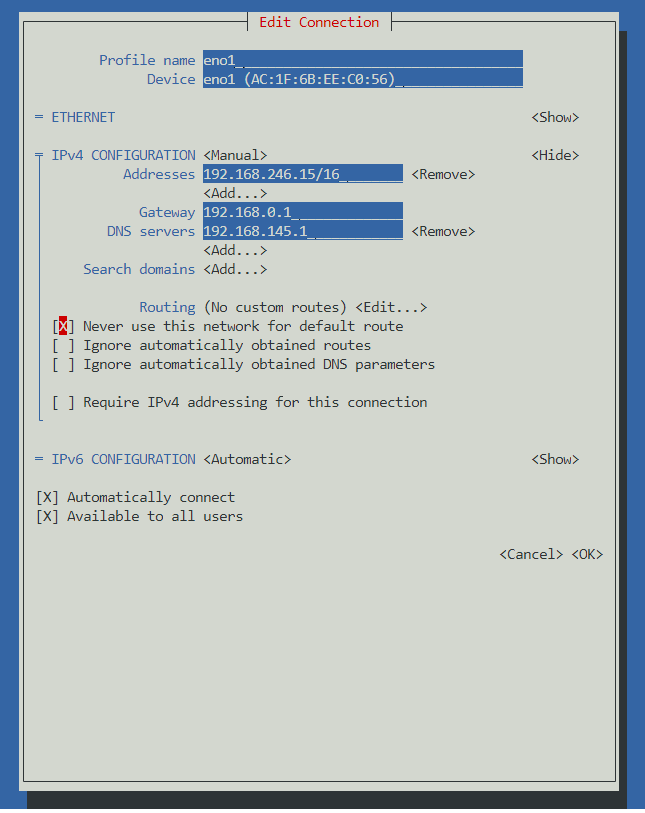
- For private networks, check the box for Never use this network for default route.
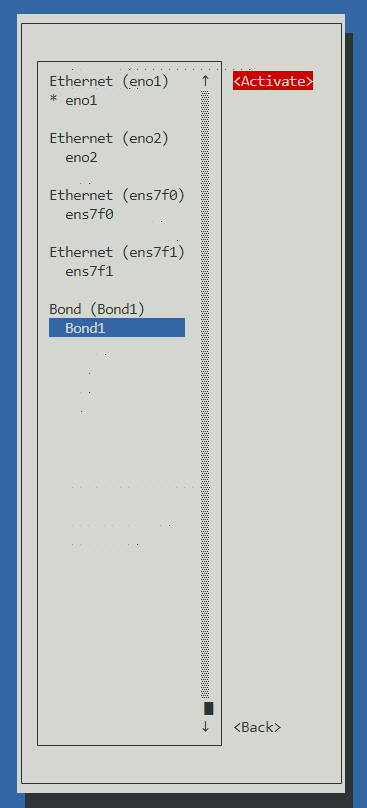
- Next, click Back and then click on Activate a connection.
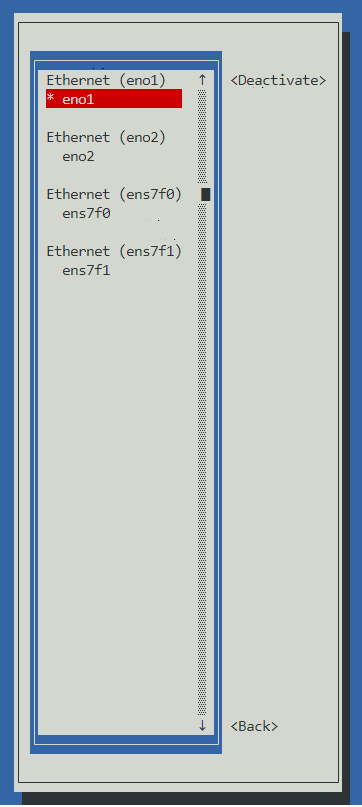
- Deactivate and reactivate eno1. This resets the connection and ensures proper communication. (If you as SSH’d over the interface that you are working on, deactivating will kick you out of your SSH session, so either doing this when you are physically at the server, or over IPMI will allow for you to be able disable and enable the interface.)
Setting a Bond
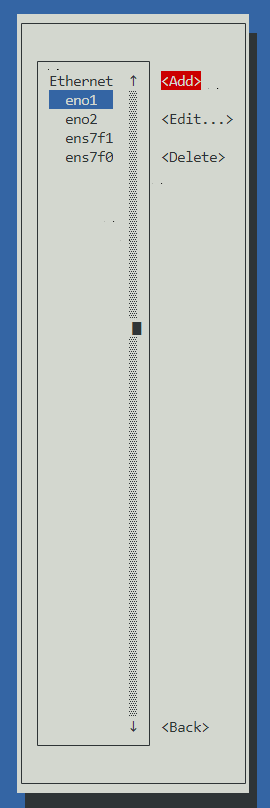
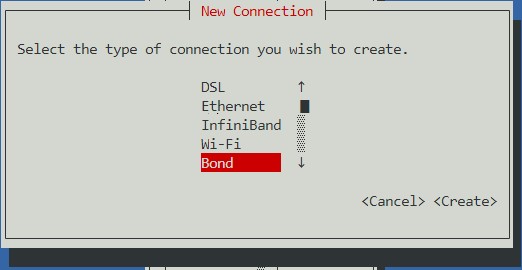
- Click Edit a connection, and click Add.
- For the type of connection, select Bond.
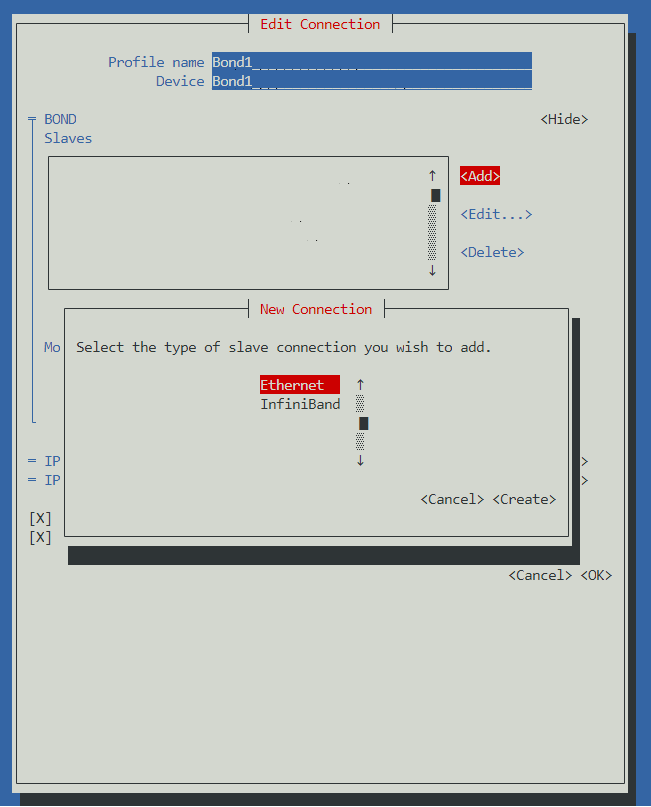
- Enter your Profile name and Device name. For this example, I used Bond1. Under Slaves, click Add and select Ethernet.
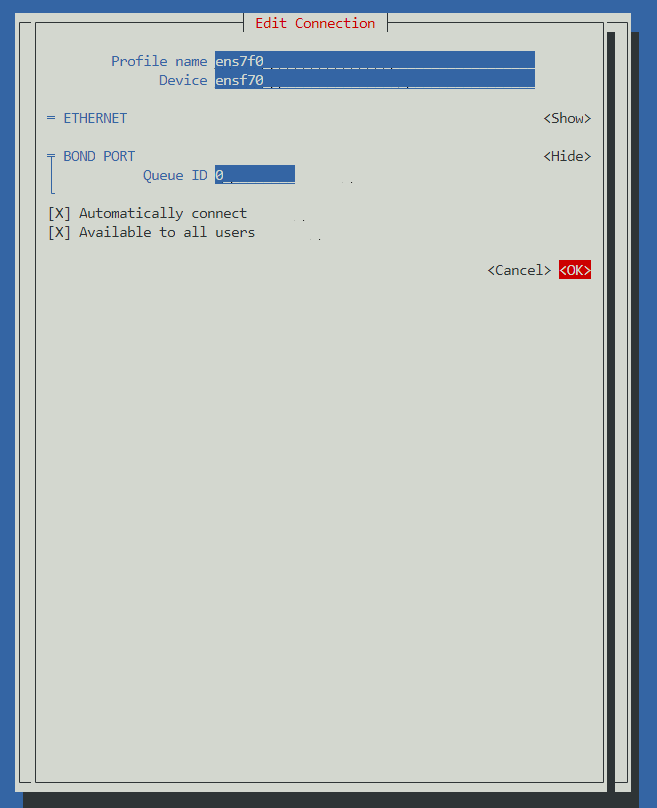
- For this example, we will be using the NIC ports. Enter your interface name under Profile name and Device, and click OK.
- Do the same for ens7f1. Your Slaves table should look like this.
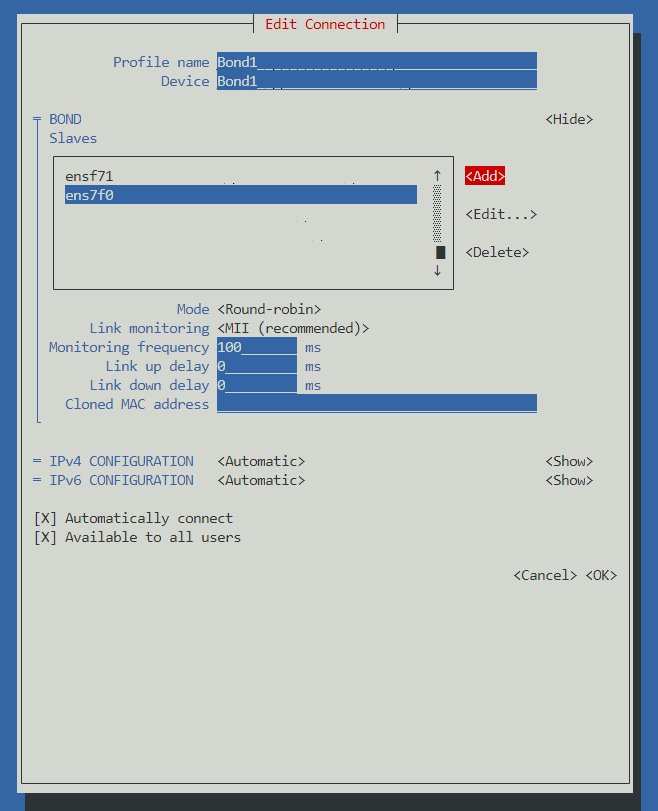
- Add your IP address info for your bond, and click OK.
- Here we can see our bond has been created.
- Click Back, and go to Activate a connection. Highlight Bond1 and Deactivate it.

- Now activate it. Make sure the two slave ports are deactivated.
- Now, run another “ip a” command. Your bond is now listed.
Views: 1794