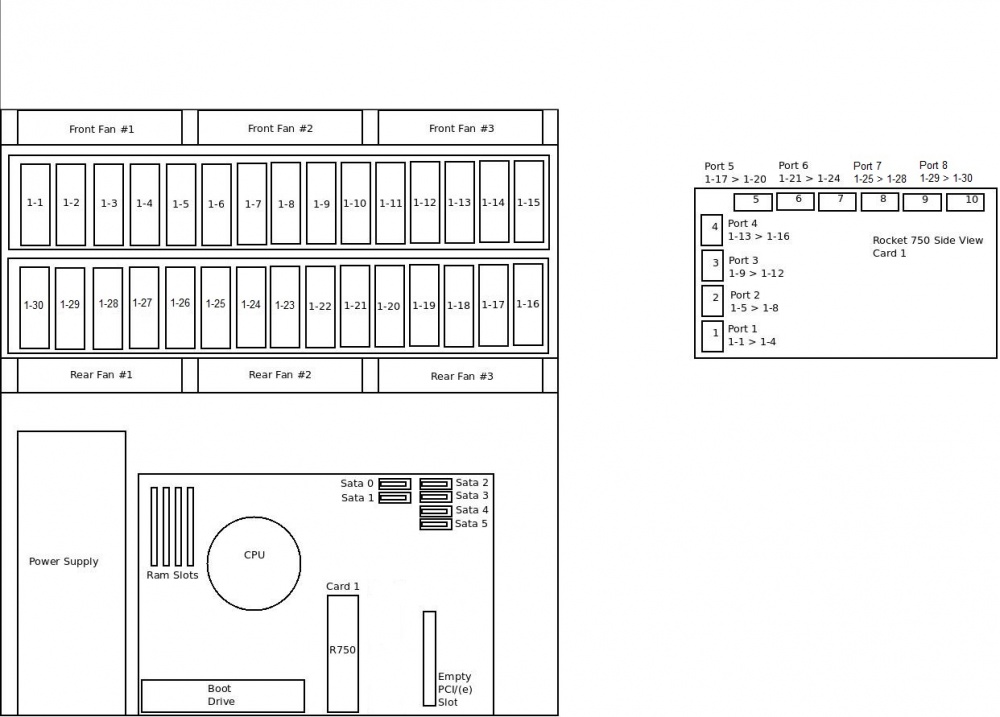
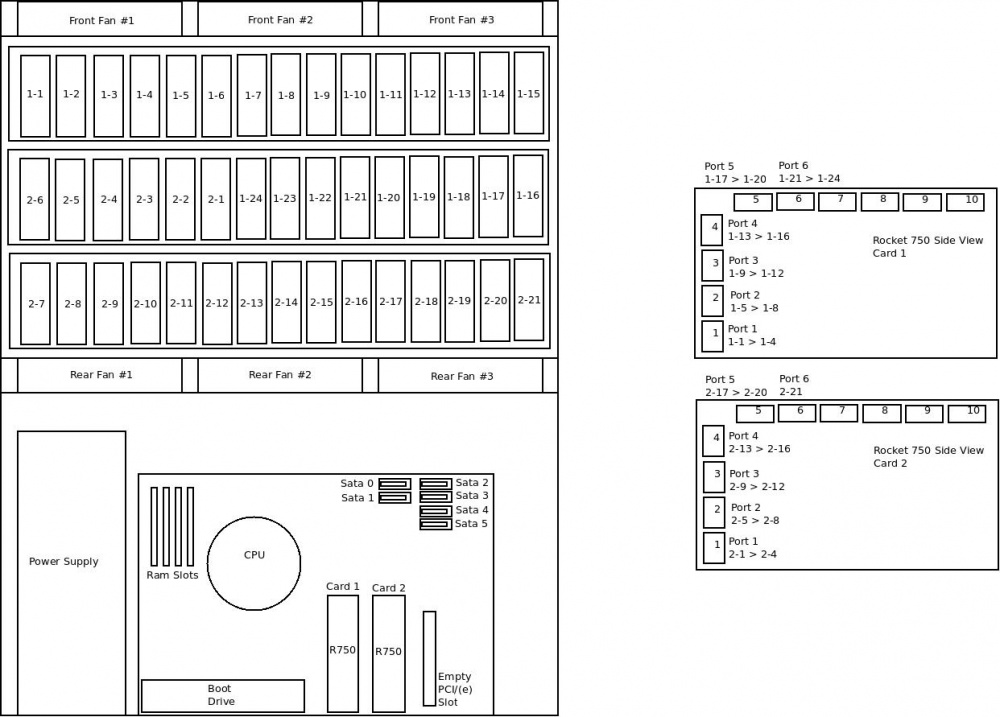
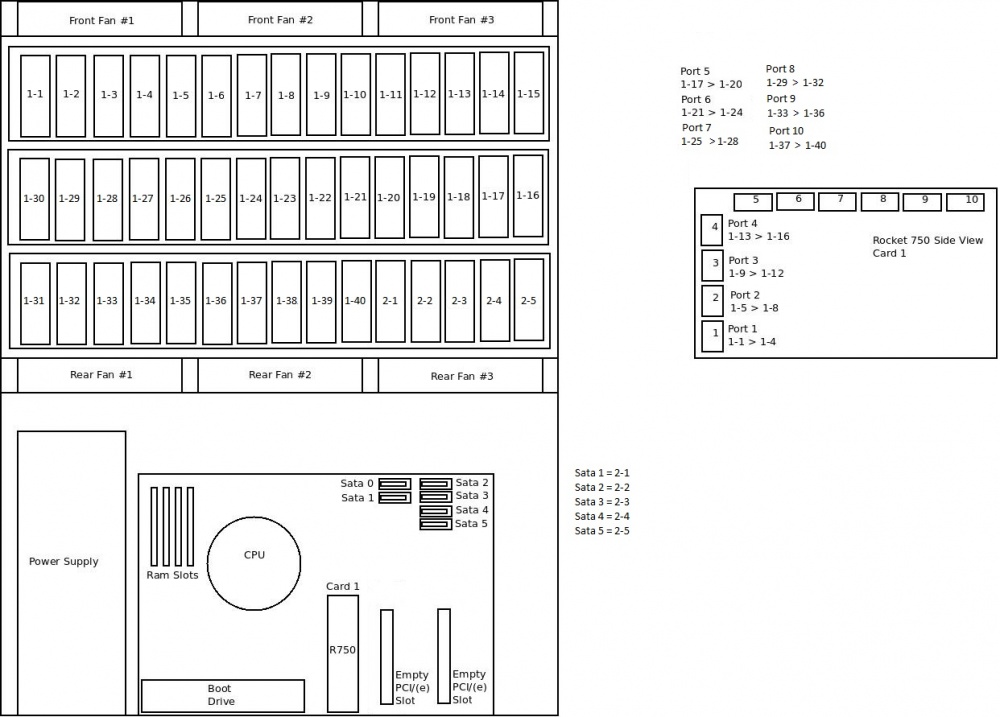
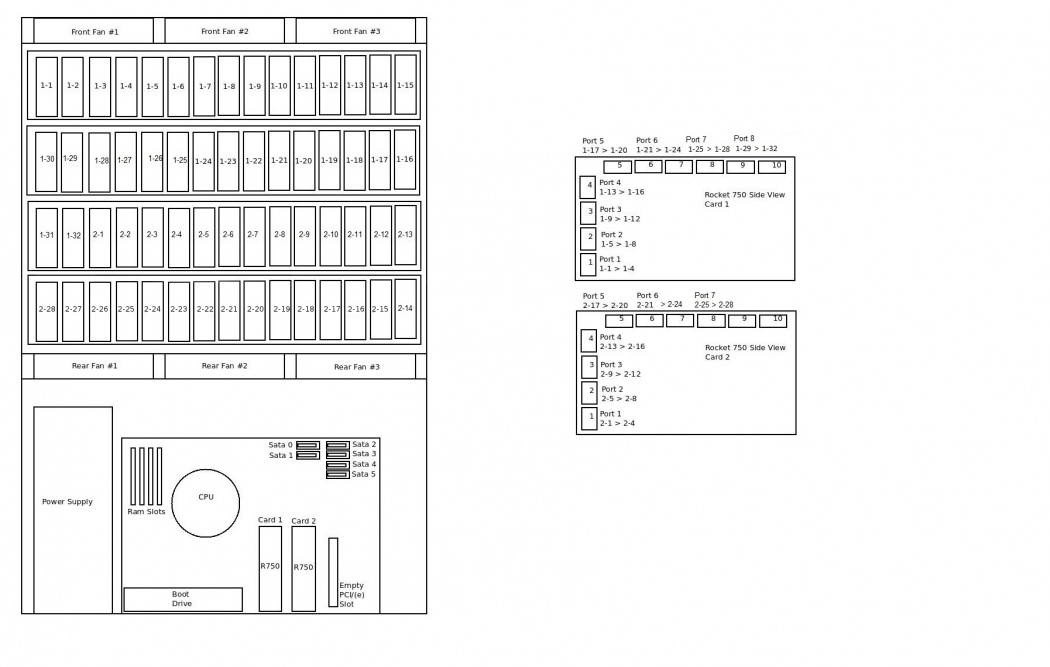
To identify where your drives are located when using the Rocket750 cards use the Highpoint webGUI and the following diagram.
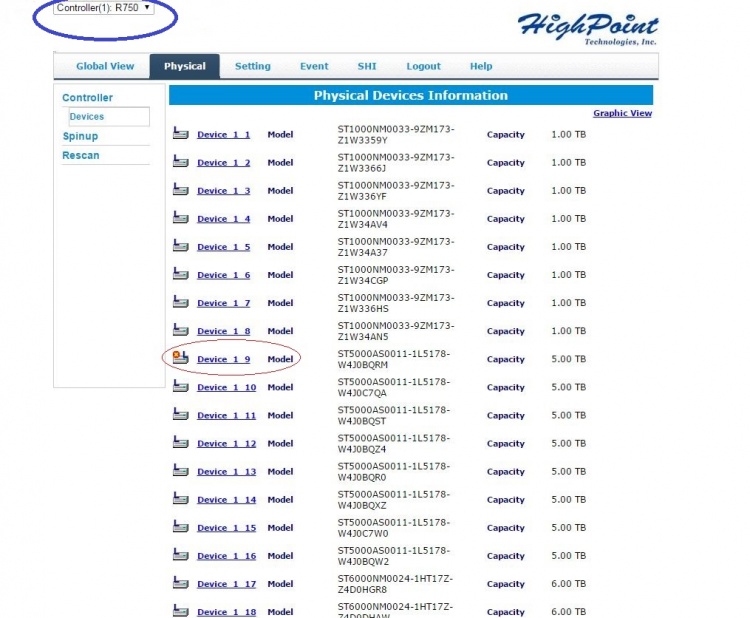
For example, as seen in the screenshot below, In the Highpoint WebGUI under Physical->Devices you can see all the drives numbered the same way as they are in the wiring diagram below.
Note circled in blue is the drop down menu to select your card. To see your drives attached to card 2 make sure you switch over using this menu.
Circled in red you can see I have a bad drive 1_9 (meaning drive number 9 on card 1). This tells me that this drive has failed and needs to be replaced.
Go to the diagram below find drive number 1_9 which is physical slot number 1-9. Now go to your Storinator and replace the drive in slot 9.
For your convenience the slot numbers are silk-screened onto the Storinator that purchased within . If your model is older than this contact info@45drives.com
