Table of Contents
Scope/Description
This guide details the process of installing FreeNAS using a USB or mounting virtual media.
Prerequisites
- Use this article to create a bootable USB with the FreeNAS ISO.
Steps
- With the installation media (USB or Virtual Media) inserted, boot the system from that media.
- The FreeNAS installer boot menu should be displayed like below.
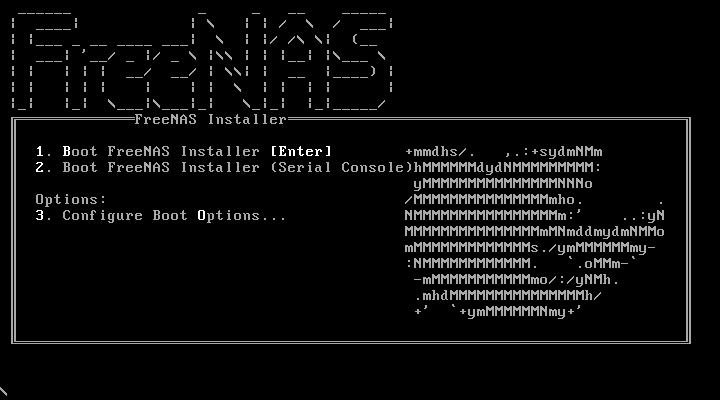
- The FreeNAS® installer automatically boots into the default option after ten seconds. If needed, choose another boot option by pressing the
Spacebarto stop the timer and then enter the number of the desired option. - Once the installer has finished booting, the installer menu is displayed
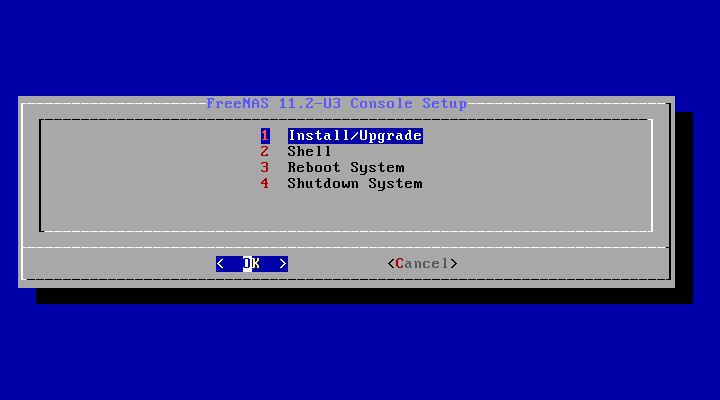
- Press
Enterto select the default option, 1 Install/Upgrade. The next menu lists all available drives. This includes any inserted USB thumb drives, which have names beginning with da. - In this example, the user is performing a test installation using VirtualBox and has created a 16 GiB virtual disk to hold the operating system.

- Use the arrow keys to highlight the destination (120,250,500)GB SSD Boot Drive. Press the spacebar to select the correct drive. To mirror the boot device, move to the second device and press the spacebar to select it also. After making these selections, press Enter. The warning shown below is displayed, a reminder not to install the operating system on a drive that is meant for storage. Press Enter to continue on to the screen.

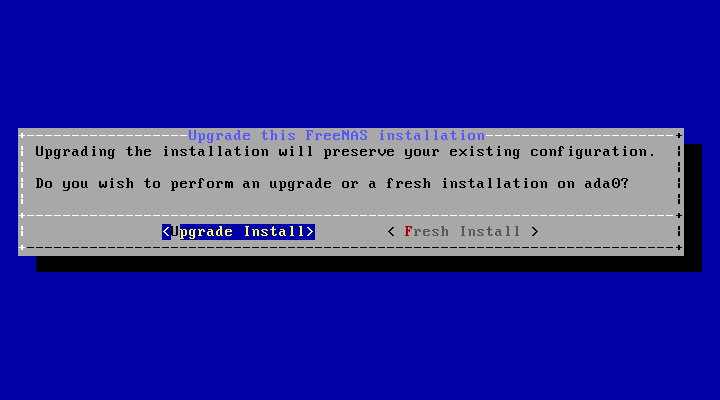
- Note: The installer recognizes existing installations of previous versions of FreeNAS®. When an existing installation is present, the menu shown below is displayed. To overwrite an existing installation, use the arrows to move to Fresh Install and press Enter twice to continue to the next screen.
- The screen shown below prompts for the root password which is used to log in to the web interface.
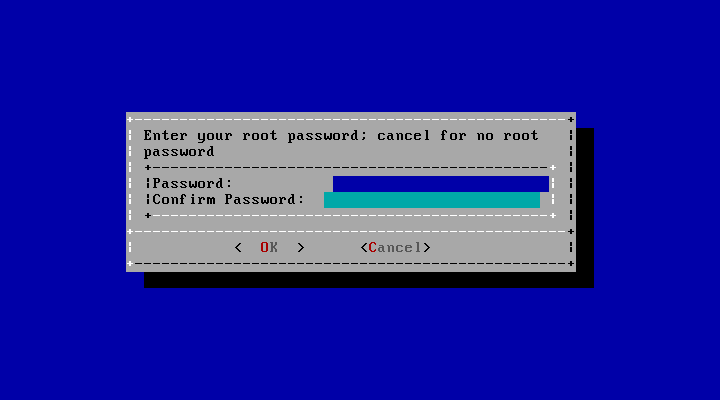
- Setting a password is mandatory and the password cannot be blank. Since this password provides access to the web interface, it needs to be hard to guess. Enter the password, press the down arrow key, and confirm the password. Then press Enter to continue with the installation. Choosing Cancel skips setting a root password during the installation, but the web interface will require setting a root password when logging in for the first time.
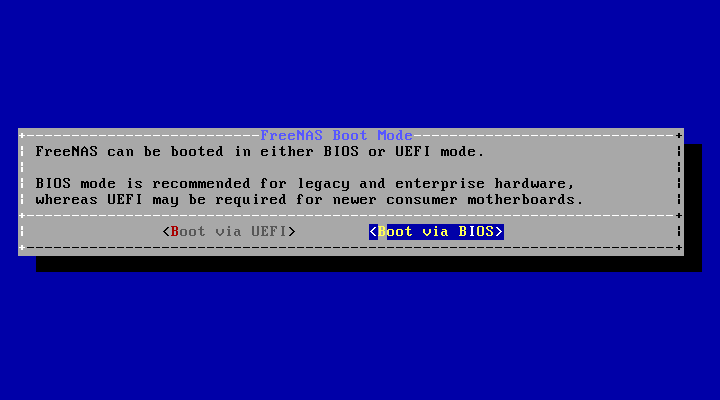
- Note: FreeNAS can be configured to boot with the standard BIOS boot mechanism or UEFI booting as shown below. BIOS booting is recommended for legacy and enterprise hardware. UEFI is used on newer consumer motherboards.
- After the installation is complete, you will see the following screen:
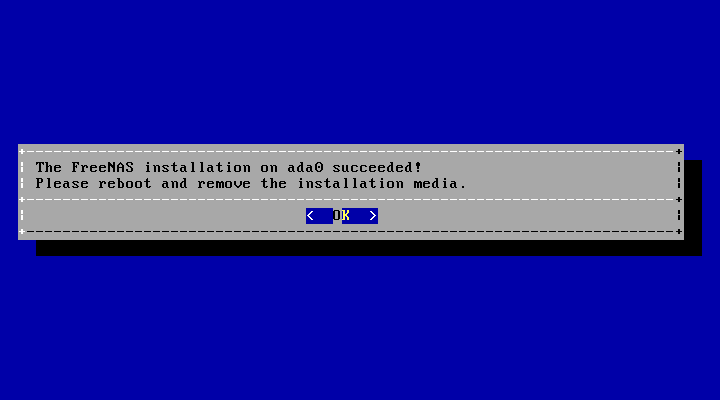
- Press Enter to return to Installer Menu. Highlight 3 Reboot System and press Enter. Remove the bootable USB. As the system reboots, make sure that the device where FreeNAS was installed is listed as the first boot entry in the BIOS so the system will boot from it.
Views: 1219