Scope/Description
- This guide will explain how to set up and configure iSCSI gateways to serve out RBD’s on your Ceph cluster. The prerequisites are important because we manage our own Ceph-iSCSI repository that is needed to ensure smooth deployment using this guide.
Prerequisites
- Ceph Cluster
- RBD Pool configured
- 45 Drives Ansible playbooks 1.3 and above https://github.com/45Drives/ceph-ansible-45d.git
- At least 2 nodes to host iSCSI gateways (can be virtualized or co-located)
Steps
Edit the hosts file to include your iSCSI gateways
- The hosts file can be found in /etc/ansible/hosts or if you have a symlink to /usr/share/ceph-ansible/hosts you can edit it from there.
- add [iscsigws] to your hosts file and underneath add either the FQDN of your iSCSI gateways if you have DNS records or hosts files set up, or just use the IP addresses for the iSCSI gateways if DNS records/hosts are not configured.
- It will look similar to this
[iscsigws]

iscsigw1.45lab.com

iscsigw2.45lab.com
OR
192.168.10.10

192.168.10.11
Run the iscsi.yml playbook from within the ceph-ansible directory
[root@cephADMIN ceph-ansible]# ansible-playbook iscsi.yml
- Even if the cluster is already standing, and you have the dashboard deployed, you will want to run the dashboard playbook once more to add the iscsi target to your dashboard.
[root@mhadmin ceph-ansible]# ansible-playbook dashboard.yml
- GWCLI should now be usable on all the gateways added to the hosts file. You will need to manually add these gateways to gwcli individually from the command line of the respective machines in order to continue.
- First log in either physically or through SSH to the first gateway. Once in the terminal, run the command gwcli then add this machine to the gateways list. By hostname and IP address. Once this is complete, do this exact process again physically from the other gateways remaining that were added.
It is necessary that these commands are run individually from the respective physical terminals of each gateway. Once this is complete, all remaining configuration can be done via the dashboard.
After running gwcli, once you type cd to move to the iscsi target directory, if you do not see an iscsi target as a path, you may have to exit gwcli, log into the dashboard, goto BLOCK, then ISCSI, then targets. If you do not see a IQN name under targets such as iqn.2001-07.com.ceph:1586801147283, you will have to click CREATE. It will make a pre-defined target name. Click the red CreateTarget button. It may fail, but it will now be accessible in gwcli and you can continue with the next steps.
- remove < > brackets when inputting any commands
[root@iscsi1 ~]# gwcli

Warning: Could not load preferences file /root/.gwcli/prefs.bin.

> cd / iscsi-targets/iqn.2001-07.*************/gateways

/iscsi-target...7283/gateways> create <Hostname> AND <IP-address-of-ISCSI-host>
EXAMPLE
/iscsi-target...7283/gateways> create iscsi1 192.168.2.10

Adding gateway, sync'ing 0 disk(s) and 0 client(s)

ok

/iscsi-target...7283/gateways> exit
Add RBD images to the newly added target from the dashboard so you can begin adding new initiators and add RBD images to them.
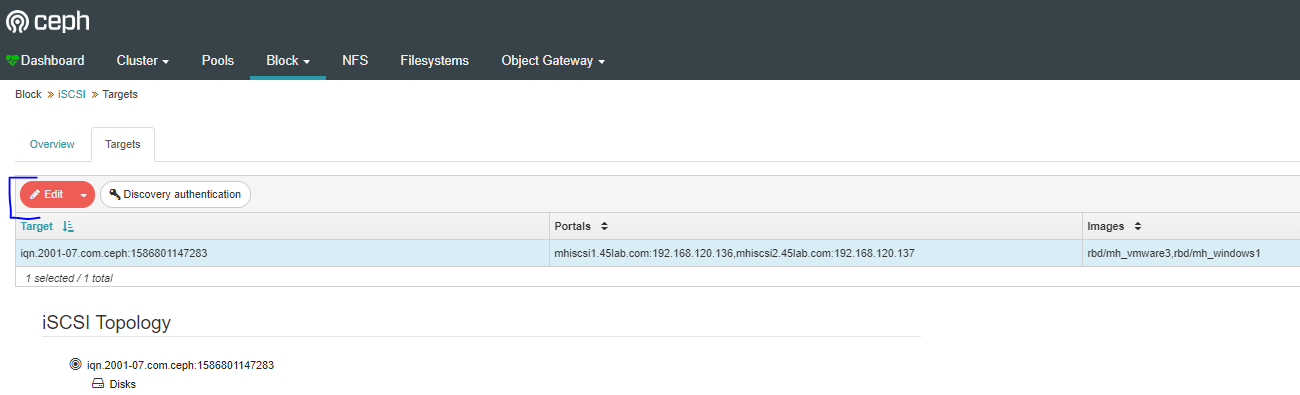
- From the Ceph Dashboard, go to the iSCSI tab from within the Block menu. Once in here, click on Targets sub-menu then click on your newly created iSCSI target and finally, click edit.
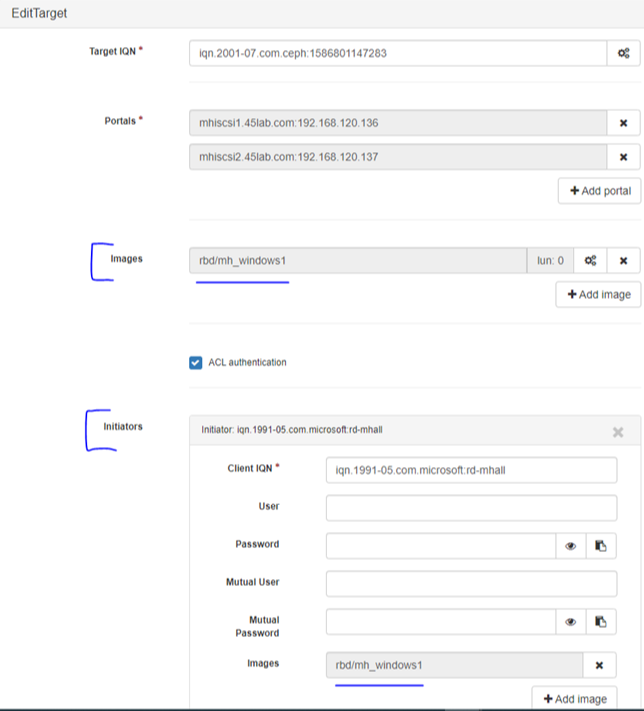
- From the Edit screen, be sure to add your newly configured Portals. These will remain added once you add them the first time. Then, begin adding all the RBD images you would like to use for your iSCSI target. You will need to add these images here first before you begin to add them to different initiators. Once you add your images, you can then begin adding different initiators you will be connecting with. If you are using CHAP, you may enter the user name and password from here, otherwise if you are using no CHAP you won’t add anything here. Finally, you will add specific images to each initiator.
Views: 3563