Scope/Description
- This article provides step-by-step guidance for migrating virtual machine disks from VMware ESXi into Proxmox VE using the built-in Proxmox Import Wizard. It covers prerequisites, preparing the source VM, and executing the import process to ensure a smooth migration with minimal downtime.
Prerequisites
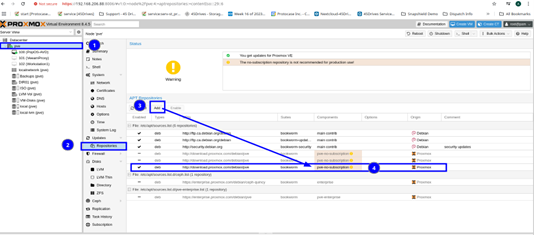
- Ensure the pve-no-subscription repository is added under Repositories.
- Your Proxmox VE must be on version 8 or higher with the latest system updates applied.
- These updates will install the necessary package: pve-esxi-import-tools.
Steps
Install Proxmox Updates
Before performing the update, go to your Proxmox node:
- Navigate to: Repositories → Add → pve-no-subscription
- Then perform the system upgrade:
- Node → Updates → Upgrade
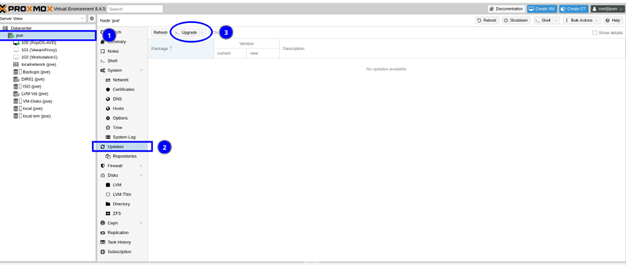
Verify that the correct version is installed:
- Run the command below
apt list | grep pve-manager

Note: You must reboot your Proxmox host after the update to enable the ESXi storage import option.
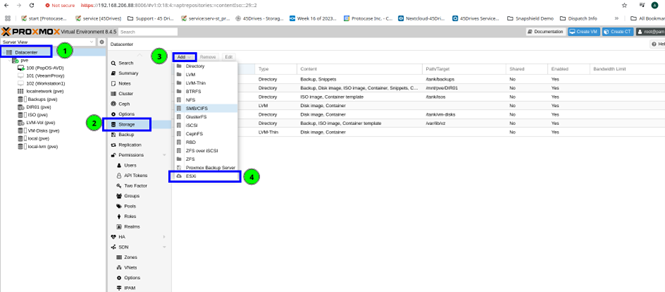
Adding VMware ESXi Storage to Your Proxmox Host
- Go to: Datacenter → Storage → Add → ESXi
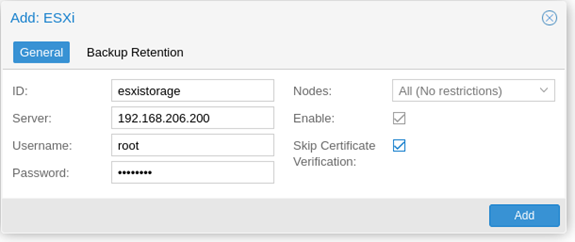
In the pop-up dialog:
- Enter the domain or IP addressof your ESXi host.
- Provide admin credentials.
- If your ESXi uses a self-signed certificate:
- Either add the CAto your system’s trust store, or
- Check “Skip Certificate Verification.”
Note: While one can also import through a vCenter instance, doing so will dramatically reduce performance.
Preparing a VMware ESXi Virtual Machine for Import to Proxmox VE
- Remove VMware Tools
Uninstall VMware Tools from the guest OS, as it may cause issues post-migration. - Record Network Settings
Document the VM’s network configuration, especially IP settings, so you can manually restore them if needed. - Windows-Specific Note
If the VM runs Windows and uses a static IP, remove the static IP settings before migration. Proxmox will assign a new network adapter, and Windows may show a conflict warning if the same IP is reused on a new adapter. - DHCP Reservations
If you’re using DHCP reservations, either:- Update the reservation to the new MAC address of the VM in Proxmox, or
- Manually set the VM’s NIC MAC address in Proxmox to match the original.
- Disk Encryption and vTPM
If full disk encryption is enabled and the keys are stored in a virtual TPM (vTPM), disable encryption before migrating. Proxmox cannot import vTPM state. Ensure you have access to any manual encryption keys. - Shutdown Required
Power off the source VM before starting the import process. This step is mandatory.
Importing a VMware ESXi VM in Proxmox
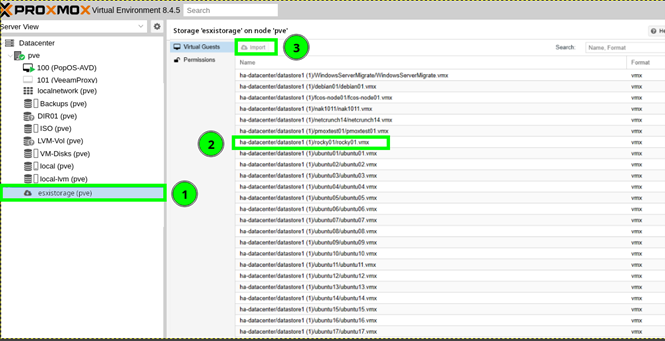
- Go to your Proxmox VE server and select the ESXi storage.
- You will see a list of VMs in the ESXi datastore.
- Select the VM you wish to import and click Import.
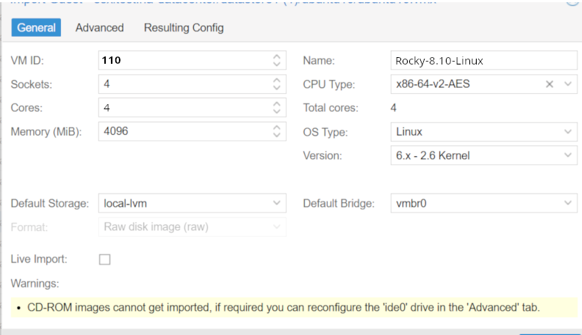
Import Wizard: General Tab
You will see details such as:
- VM ID
- Sockets
- Cores
- Memory
- Default Storage
- Name
- CPU Type
- Total Cores
- Type
- Version
- Default Bridge
Import Wizard: Advanced Tab
This tab shows:
- SCSI Controller
- Network Interfaces
- Other network-related settings
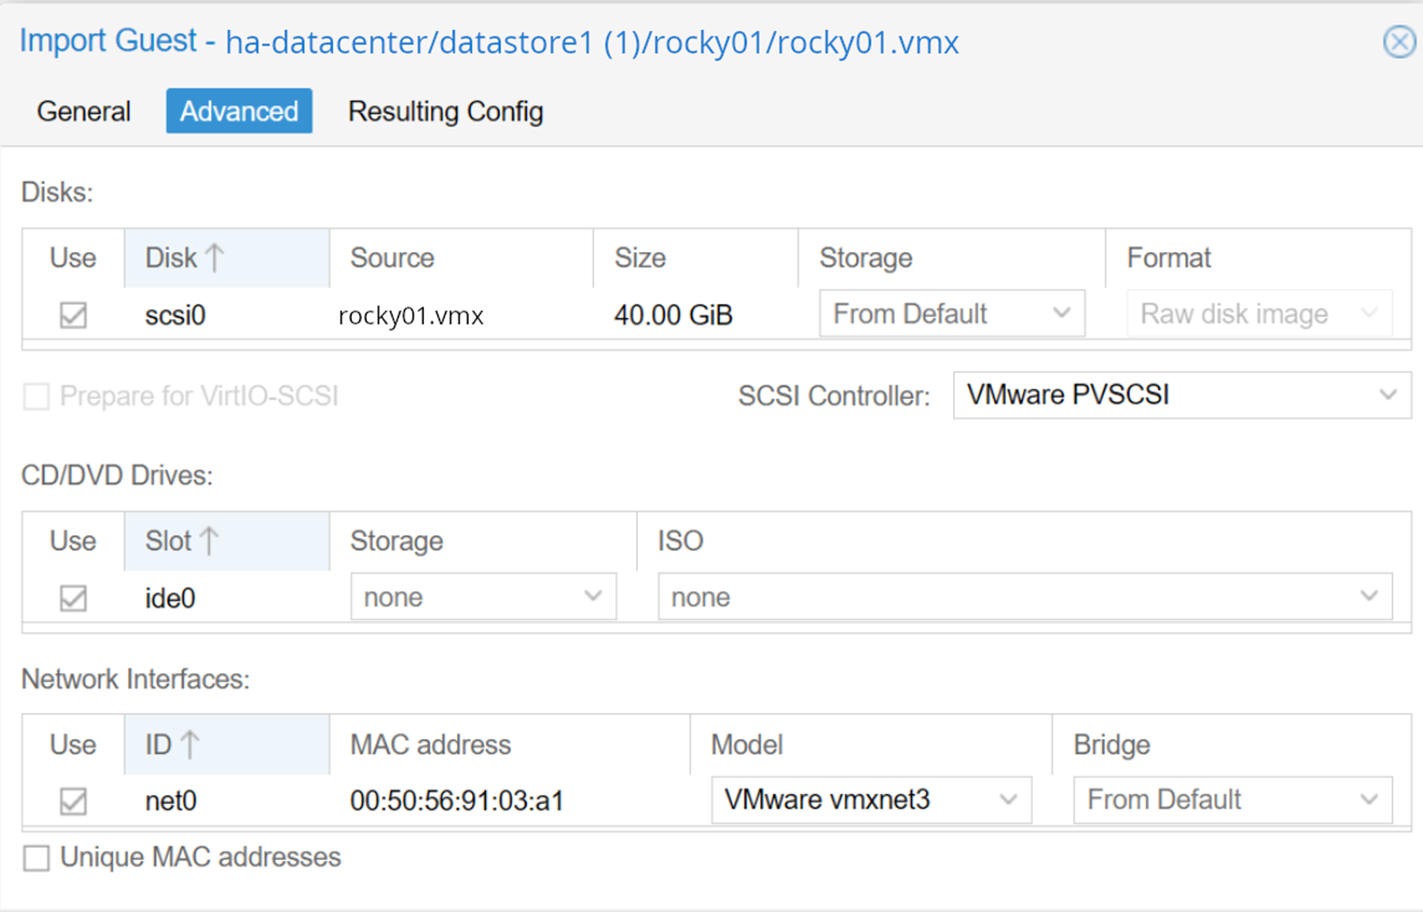
Example: You can keep VMware PVSCSI and VMXNET3 devices during the import. Proxmox supports these VMware-specific hardware devices.
Once import is configured:
- A summary of the virtual hardware will appear under *Resulting Config*.
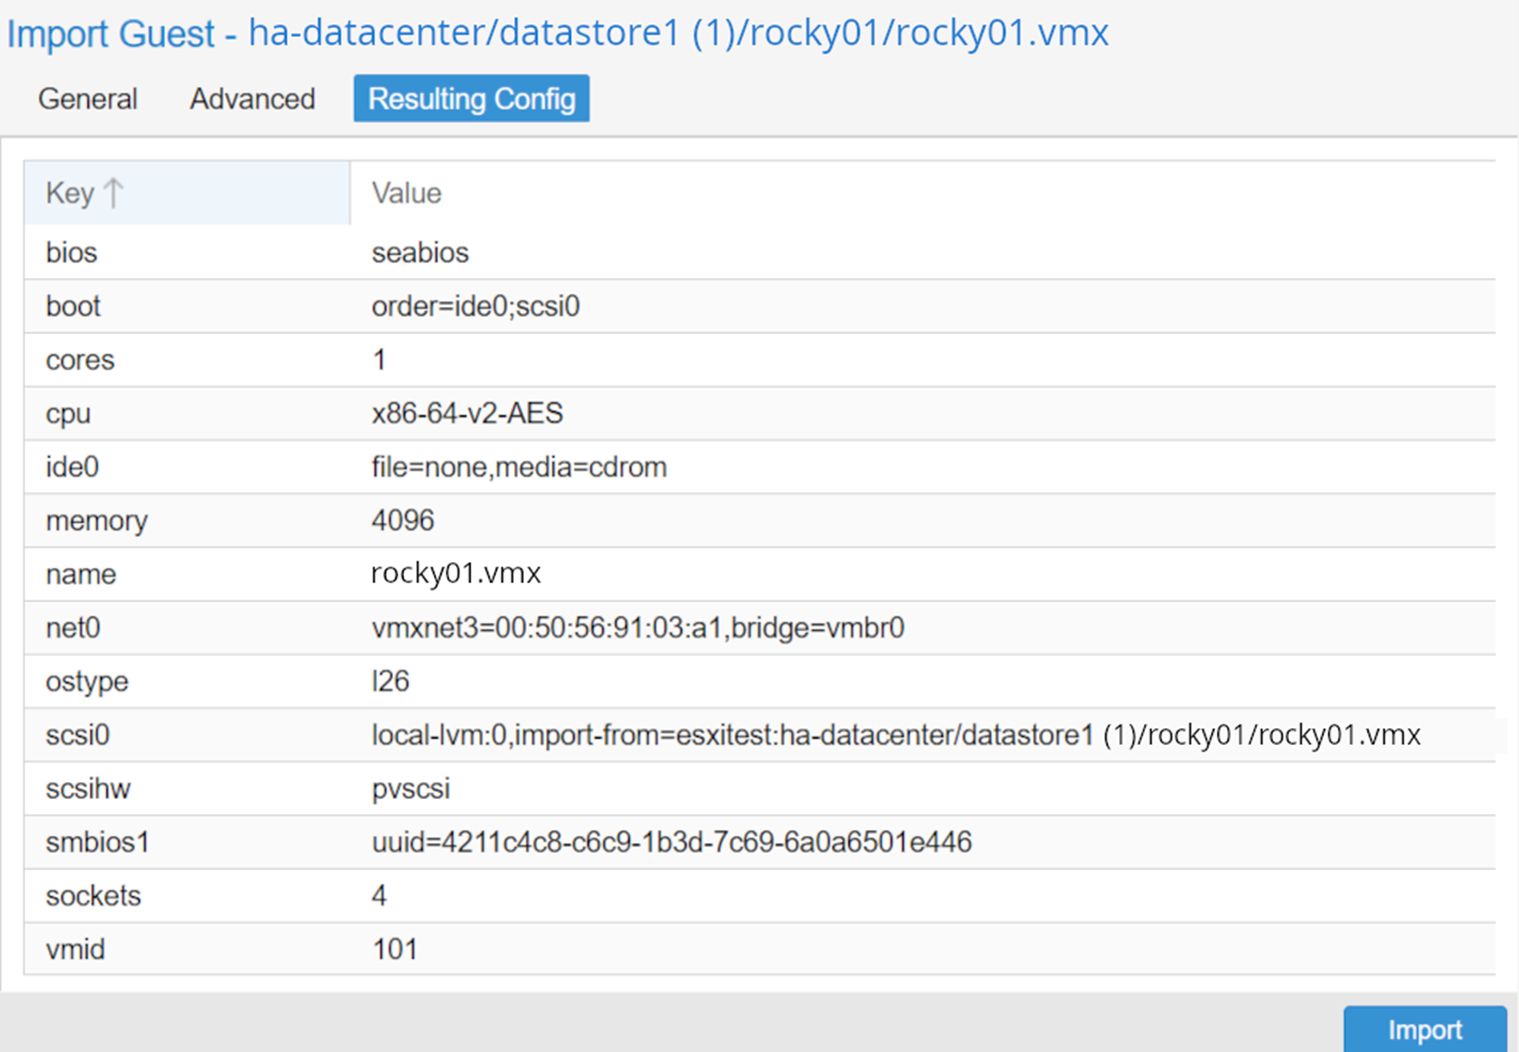
- The import process will begin.
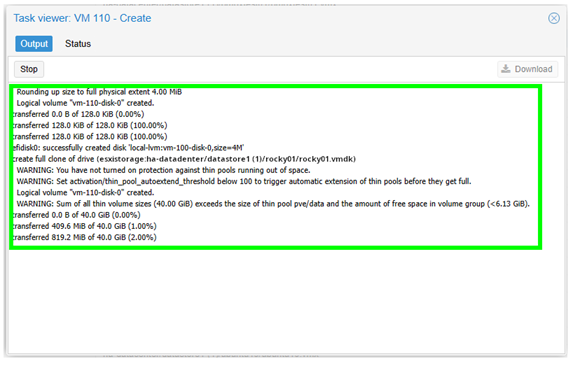
- When complete, you’ll see TASK OK.
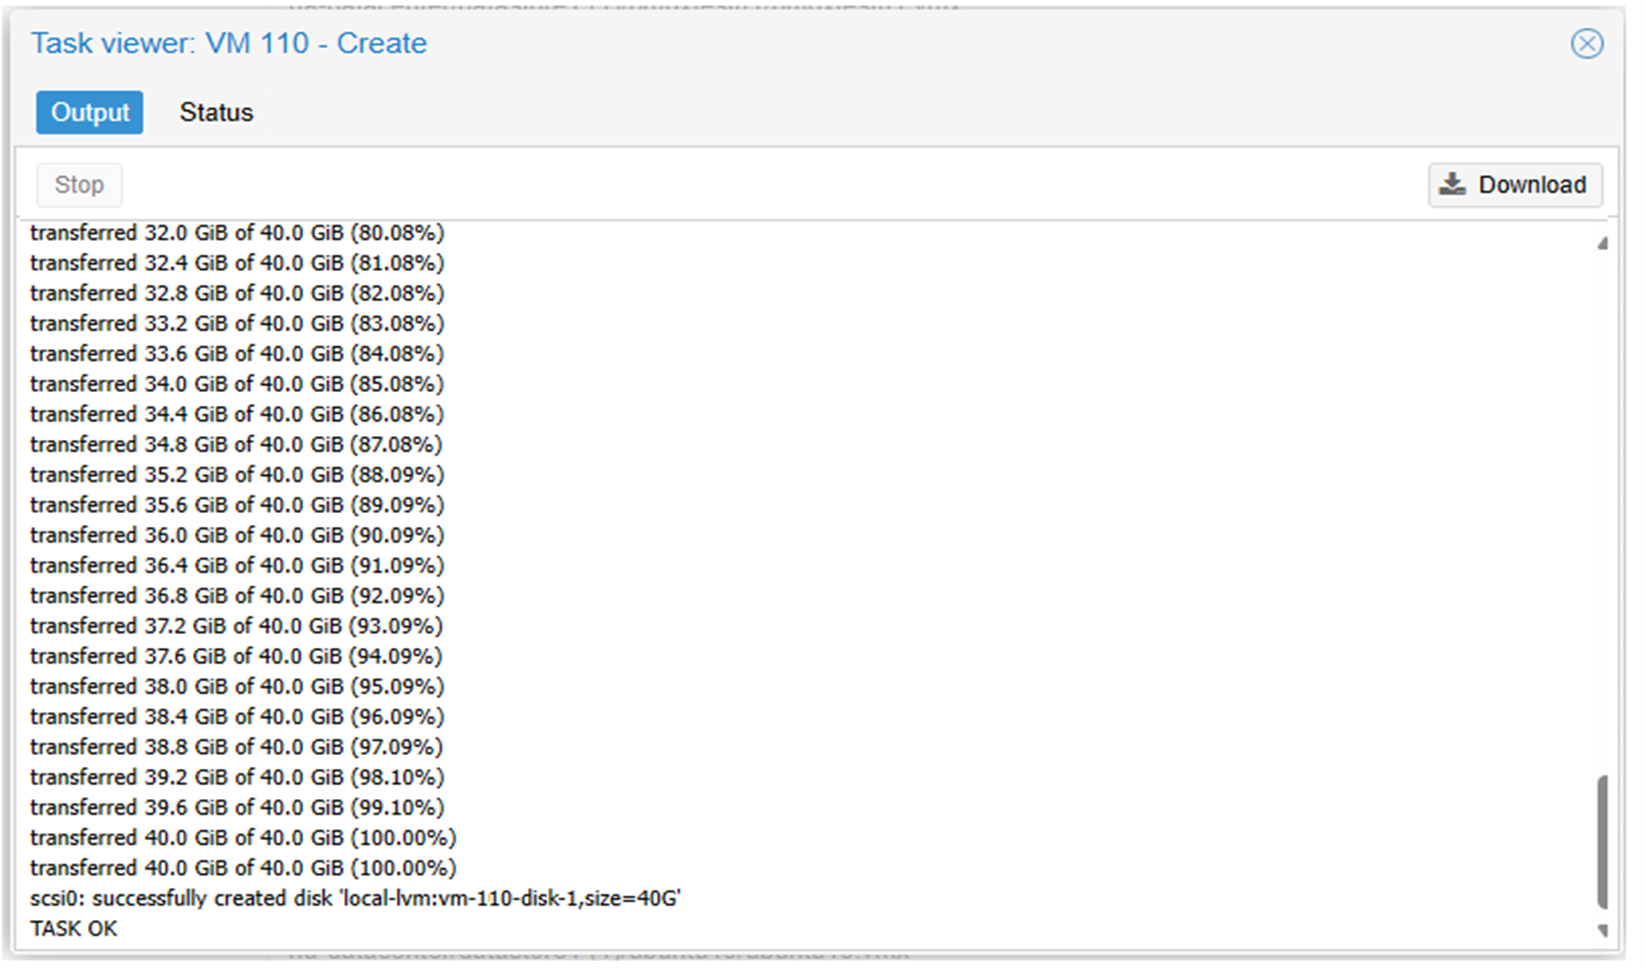
The virtual machine is now imported into your Proxmox environment.
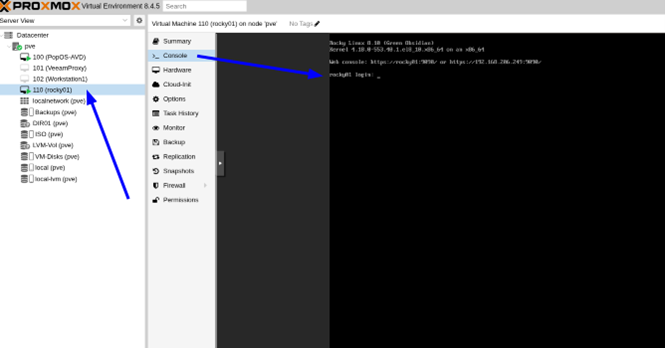
Starting the Imported VM
- Right-click the imported VM (e.g., `VM-110`) and select Start.
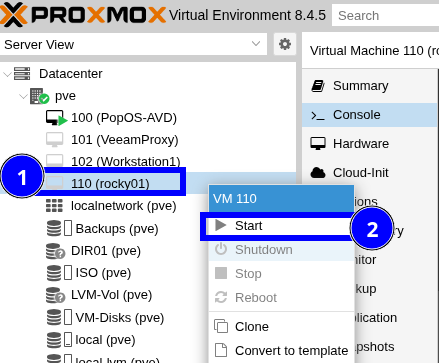
- The VM should boot successfully with the imported configuration.
Live Import Option ( Optional but not recommended )
Proxmox provides a live import option, but it’s not what it might seem.
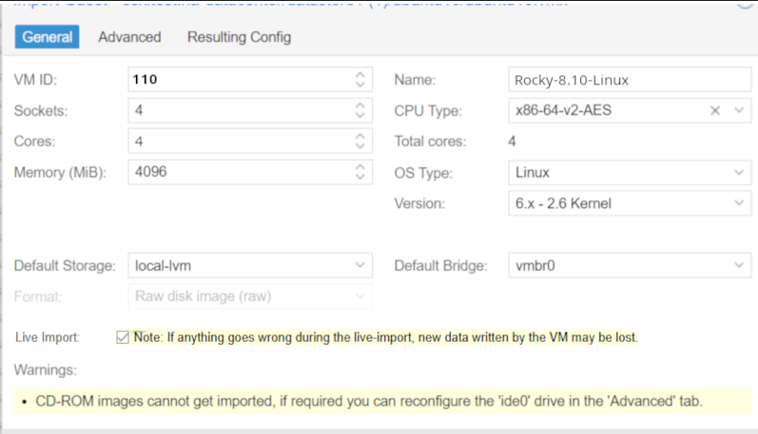
- It does notmigrate a currently running VM in real time.
- Instead, it begins copying the VM data and powers on the VM once enough data has been transferred.
- Remaining data is copied asynchronouslyin the background.
Verifications
- The source VM must be powered off before starting. There will still be some downtime.
- Avoid using this on low-bandwidth or unstable networks.
- If the process fails, partial data is lost and the entire import must be restarted.
- Test this process on non-critical VMs before using it in production.
Troubleshooting
If applicable:
- If the VM fails to boot after import, confirm that VMware Tools were removed prior to migration.
- For Windows VMs with static IPs, reconfigure the adapter or match the old MAC address to restore networking.
- If you encounter certificate errors when adding ESXi storage, either add the CA to the trust store or enable Skip Certificate Verification.
- If an import fails midway, restart the process from the beginning (partial transfers cannot be resumed).