Table of Contents
Scope/Description
This guide will demonstrate the steps to create and configure your CIFS shares to allow Windows Domain Admins to manage user/group access.
Prerequisites
- PetaSAN cluster with CephFS + CIFS deployed
- Joined Active Directory
- Package “attr” is installed
Steps
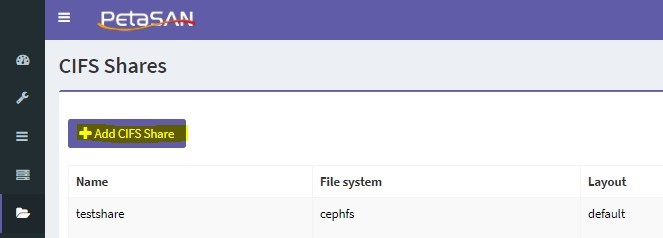
- Select “Add CIFS Share” from the CIFS shares page within the dashboard

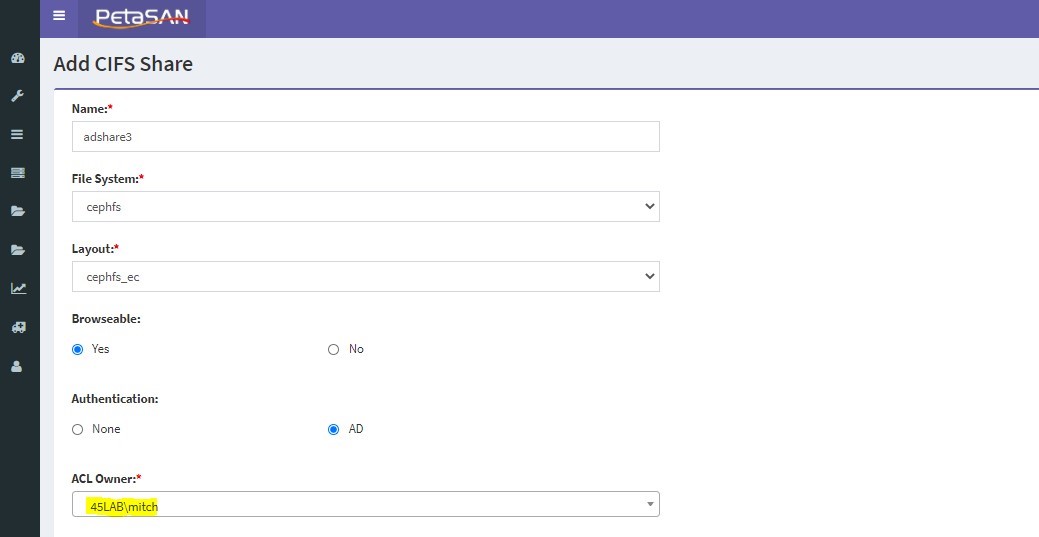
- Create your CIFS share name, and choose your preferred file system layout
- For Authentication, choose the user that is creating this share for reference – This will not be the owner of the share, however in the Petasan dashboard it will show this user name for reference in the future. Click save.

- SSH into one of the Petasan nodes that is serving CIFS shares to clients, and change directories to your CIFS directory from within CephFS.
- Note: the path may be different depending on the CephFS layout you have chosen for your shares.

- Give domain admins group rights to own the share with chown, and then give the group access with chmod.

- Grant the
SeDiskOperatorPrivilegeprivilege to the domain group that will configure share permissions
net rpc rights grant "45LAB\Domain Admins" SeDiskOperatorPrivilege -U "45LAB\administrator"
Enter 45LAB\administrator's password:
Successfully granted rights.
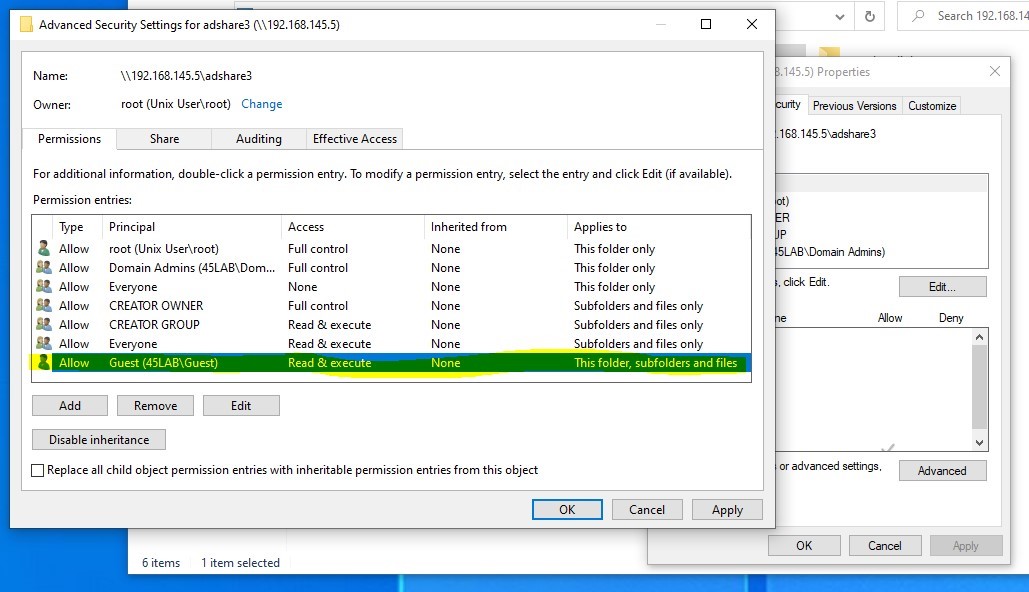
- Permissions can now be managed and configured via Windows from a Domain Admin account.

Verification
Troubleshooting
Views: 528