Table of Contents
Scope/Description
- This guide will detail the process to add storage drives to a cluster. Although, not necessary it is best practice to add the same amount of drives to each node and drives of the same capacity.
Prerequisites
- Ceph Cluster is in a healthy state
Steps
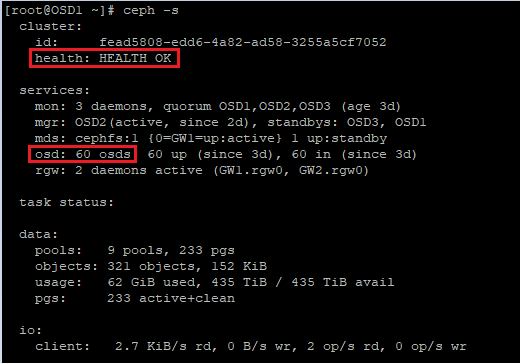
- First make sure the status of the cluster is in a healthy state, and mark down the current number of OSD’s for reference.
- Set the flags norebalance, norecover and noout on the admin node.
ceph osd set norebalance

ceph osd set noout

ceph osd set norecover
- Physically add the new drives to the cluster.
- Access each OSD node.
- Ensure disks are inserted and are showing up unpartitioned – you can use 45Drives Tools: lsdev or use lsblk
- Ensure the disks you are trying to add match the physical slots where you inserted the disks.
- Take note of the linux device name of the new disks you wish to add to the cluster for each node (ex. /dev/sdh /dev/sdi)
- Run a report for each linux device to ensure they’re free of any partitions. This will also test for any errors.
[root@osd~]# ceph-volume lvm batch --report /dev/sdh
- Run the command with all the necessary drives included to ensure it works properly.
[root@osd~]# ceph-volume lvm batch --report /dev/sdh /dev/sdi /dev/sdj
- If no errors appear, run the command without the –report function.
[root@osd~]# ceph-volume lvm batch /dev/sdh /dev/sdi /dev/sdj
- Wait for OSD’s to be picked up and Placement Groups to peer, which can be seen by running (OSD’s recorded for reference in previous step):
ceph -s
- To edit the rate the cluster distributes the data to the new drives, go to the ceph dashboard and edit the values for “osd_recovery_max_active” and “osd_max_backfills”. For the recovery setting, there is a global or per HDD/SSD option. Change these values for each use case/depending on the speed you want to integrate the new drives to the cluster.
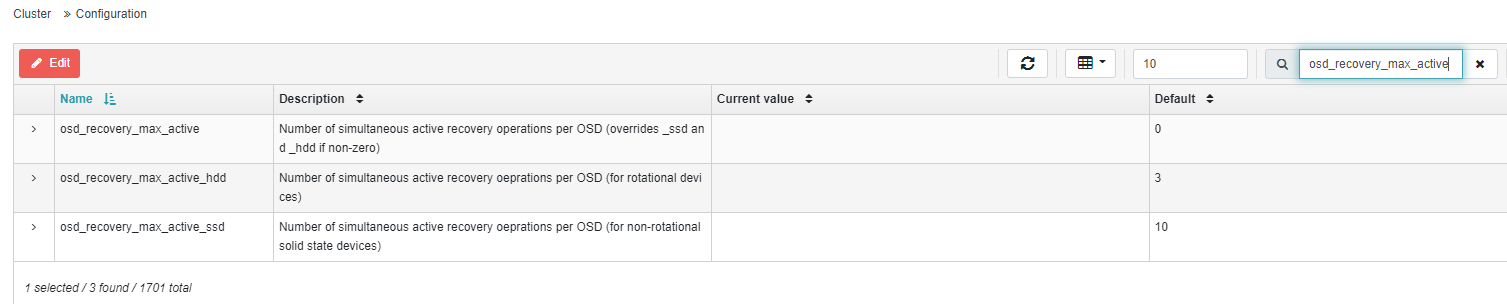
- As for the backfill see next image,

- Unset the flags that were previously set. This does not need to be done right away if you wanted to delay the backfill to a later time to have less IO on the system.
ceph osd unset norebalance

ceph osd unset noout

ceph osd unset norecover
Verification
Run a Ceph -s command to display the status of the cluster:
[root@osd~]# ceph -s
- If no issues appear and everything is running smoothly, run a ceph health detail and confirm all data has been redistributed and that backfills have been complete:
[root@osd~]# ceph health detail
- In the Ceph Dashboard check the OSD usage to ensure data is evenly distributed between drives.
- If data isn’t distributed look at the ceph balancer status, confirm that the mode is “ceph-compat” and active is “true”
[root@osd~]# ceph balancer status
- In the Ceph Dashboard check the PG’s on each OSD, they should all be between 100-150
- In the Ceph Dashboard check the Normal Distribution in the OSD overall performance tab
- Lastly, if the Dashboard is unavailable run a “ceph osd df” and check the PG’s:
[root@osd~]# ceph osd df
- Return OSD Backfill to the default value by navigating in the Dashboard to Cluster–>Configuration–>Search “backfill”–>OSD_max_backfill and set it to 1
Troubleshooting
- If there are already volumes present on the drives, be sure to use wipedev on them. Before running wipedev on drives, ensure you are targeting the correct drive and there is no critical data on the device. Example to wipe a specific drive.
/opt/45drives/tools/wipedev -d 1-1
Views: 4424