Replacing a Drive in a Degraded Array
This goal is to physically replace the disk in question and manually rejoin the disk to the degraded array, followed up by setting the disk into the rebuild state.
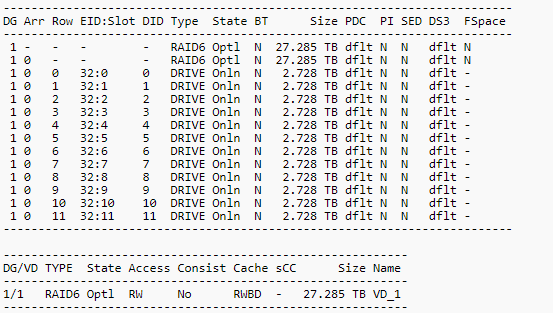
First: check the topology
storcli /c# show all
This command should produce a topology list. Here is an example:
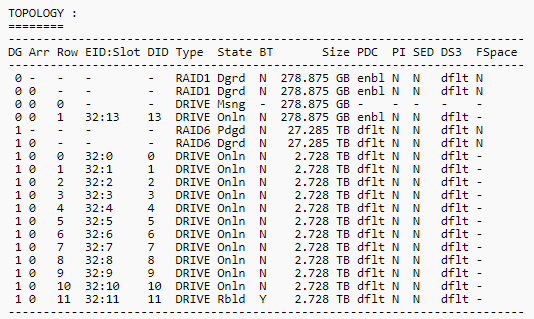
Further down the list displays all the disks present in the unit: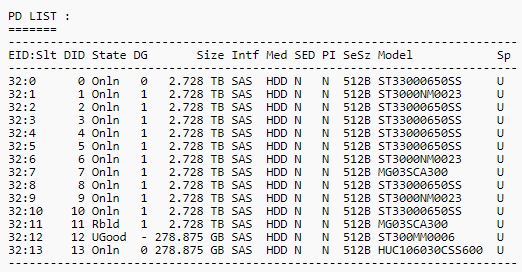
We can see here that disk 12 is in the UGood state. This state means “Unconfigured Good,” in that the disk is in a state that can be added to the array but is not currently doing anything.
Our goal is to add the disk to the degraded array.
Storcli /c0/e32/s12 insert dg=0 array=0 row=0
Breaking down this command piece by piece:
c# is the Controller number
e# is the Enclosure/Slot ID
s# is the Storage device number
dg=# would be the Drive Group number
array=# is the array number the device is part of
row=# is the row number of the device
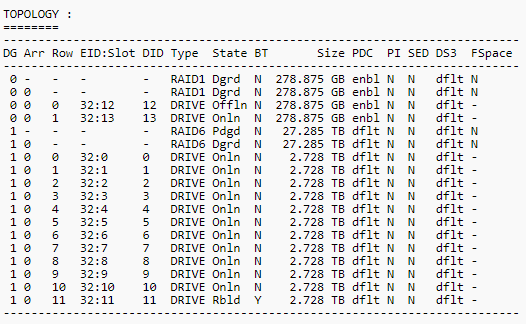
This command will insert the designated drive into the array, but will add it in the “Offline” state.
See EID 32:12
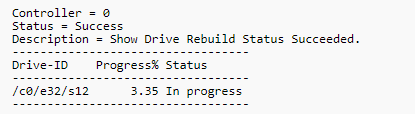
The next step is to start the rebuild on the drive.
storcli /c0/e32/s12 start rebuild
If the command is successful, storcli /c0 show will show that a rebuild is in progress:
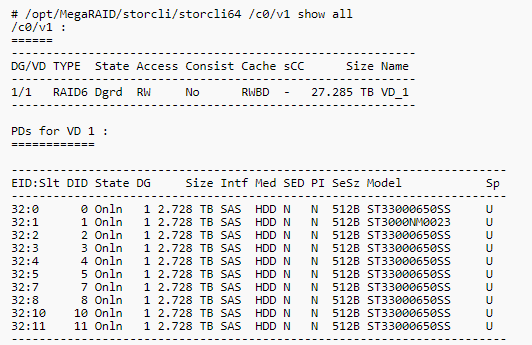
Replacing Drives in a Failed Array
Storcli /c0/v1 show all
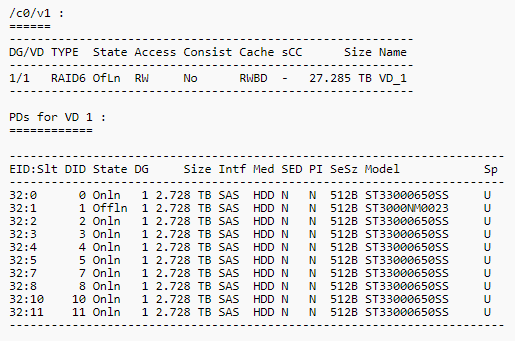
In this array, disks 6 & 9 are missing and disk 1 is offline.
The latter issue is easily solved by setting the drive as online:
Storcli /c0/e32/s1 set online
To view the drives that are missing and not showing up at all, use:
storcli /c0 show all | less
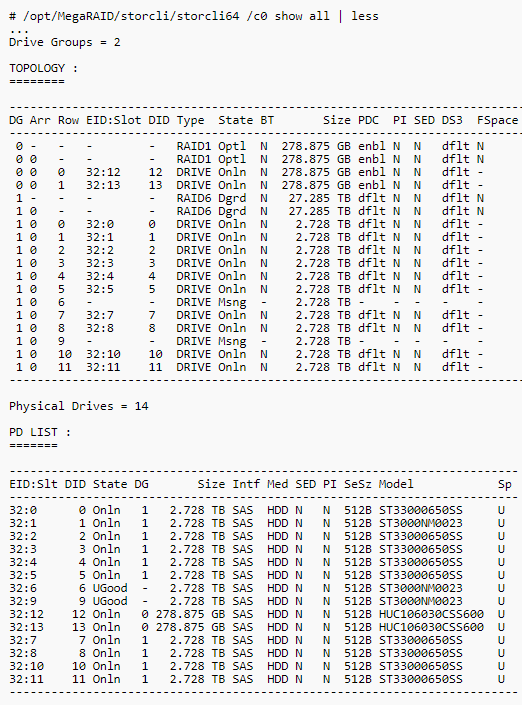
Here we can see that disks 6 & 9 are listed as “UGood.” This means they’re unconfigured but in a state in which they can be added to the array.
To do this, we’ll be using the insert function of storcli
storcli /c0/e32/s6 insert dg=1 array=0 row=6
And for the other drive:
storcli /c0/e32/s9 insert dg=1 array=0 row=9
This will bring the two drives into an Offline state:
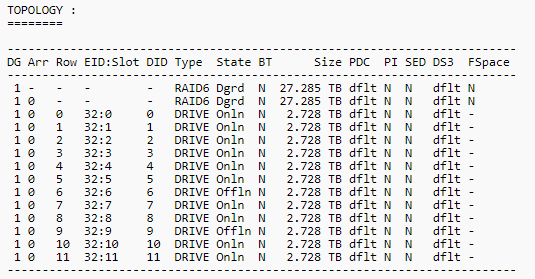 As we can see, disks 6 and 9 now show in the array, but are offline.
Storcli /c0/e32/s6 set online
Storcli /c0/e32/s9 set online
The output should be similar to the text below:
Controller = 0
Status = Success
Description = Set Drive Online Succeeded.
The array should now be in optimal state.
*Important*
If this step fails, and the replacement drive shows as “UGood” with an “F” under the ‘Arr’ value, it means the drive is designated as “Foreign” to the array.
Foreign disks have data from previous arrays on them, and as such, will need to be cleared before they’re added back to the array.
To clear the foreign data, use the following command:
storcli –CfgForeign –Clear –aALL
This will clear the device of all foreign data and allow it to be added back to the array. The array should reflect an “Optimal” state or “Rebuilding” state. From here, the drives can be brought back into the array by setting them as online.