Table of Contents
Scope/Description
This article will walk through the process of creating an Erasure Code Pool in PetaSAN along with creating the rules you will need for your pool.
Prerequisites
- A minimum of 3 nodes active and running
Steps
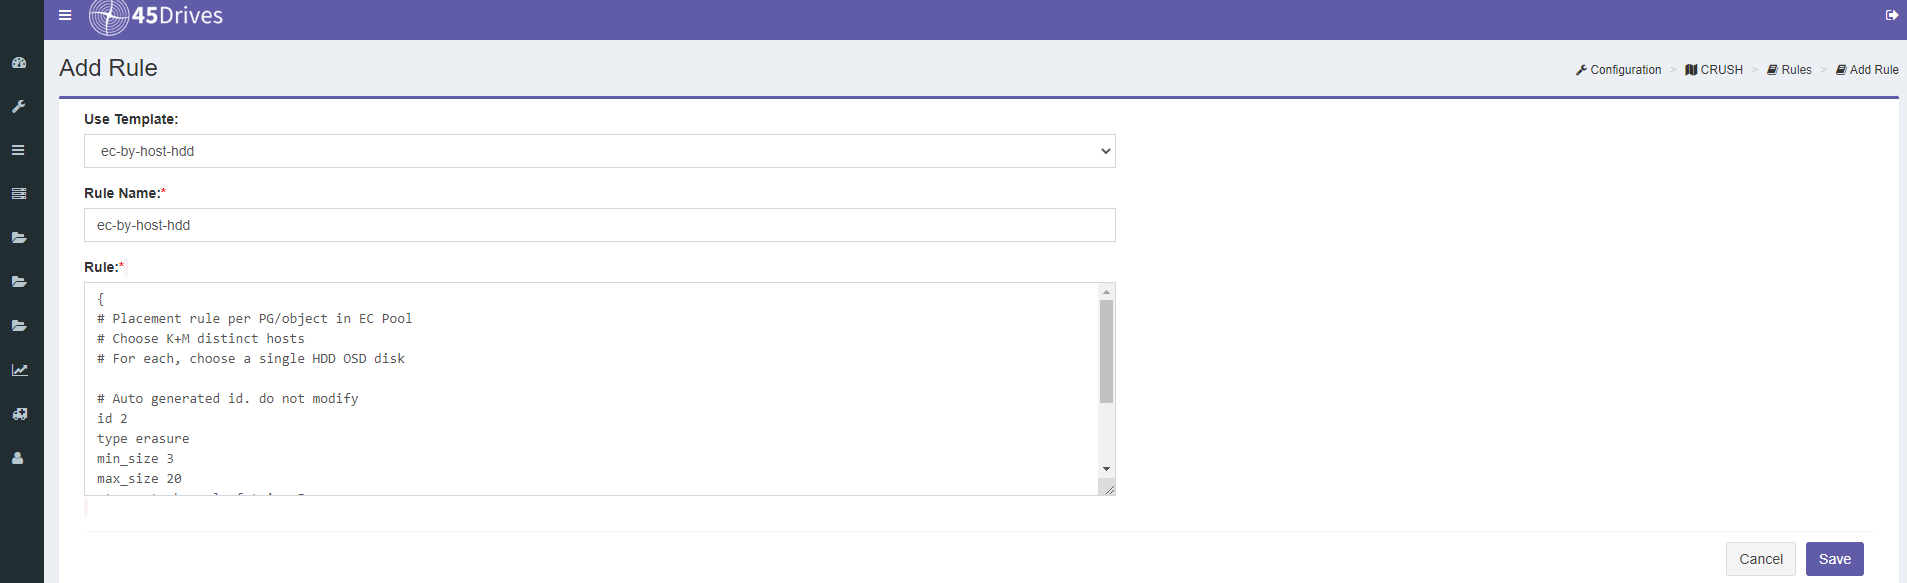
- The First step is creating a rule for the type of redundancy you want for the pool and the failure domain. In the top left of the screen, click on: wrench icon –>CRUSH –>Rules. For our example we are going to choose our failure domain at the host level, and it will have erasure code redundancy. we want this pool to only utilize the HDD’s so our option is ec-by-host-HDD. Press Save when finished.
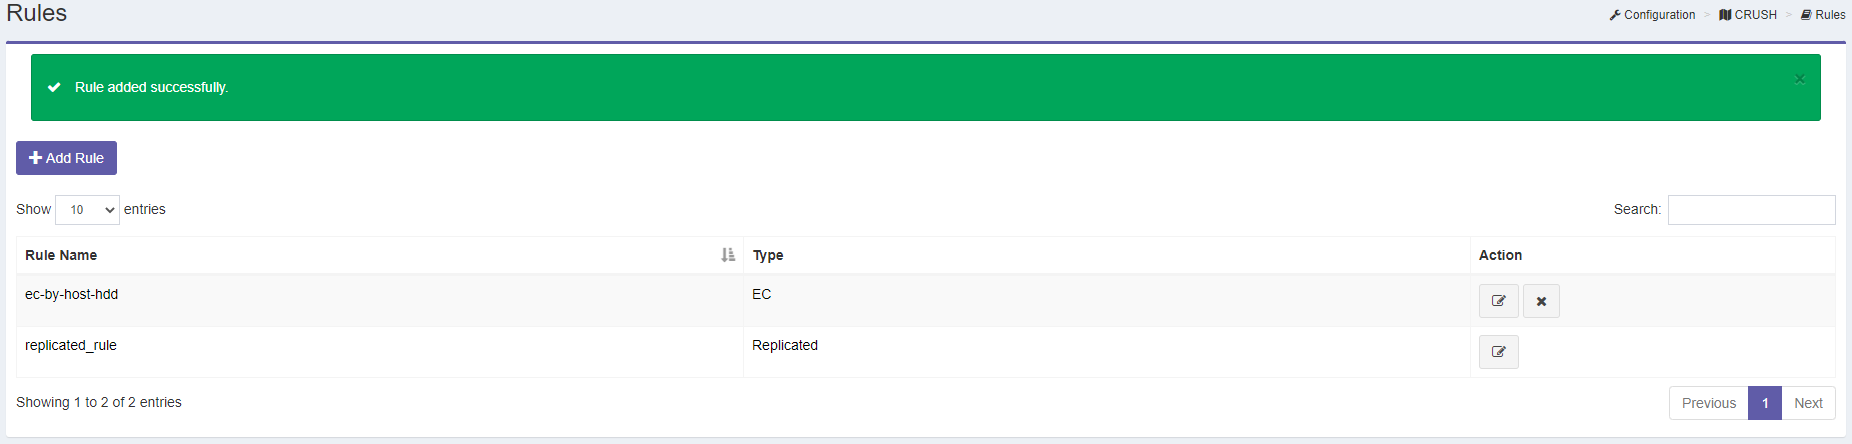
- You will now see your new rule has been successfully created.
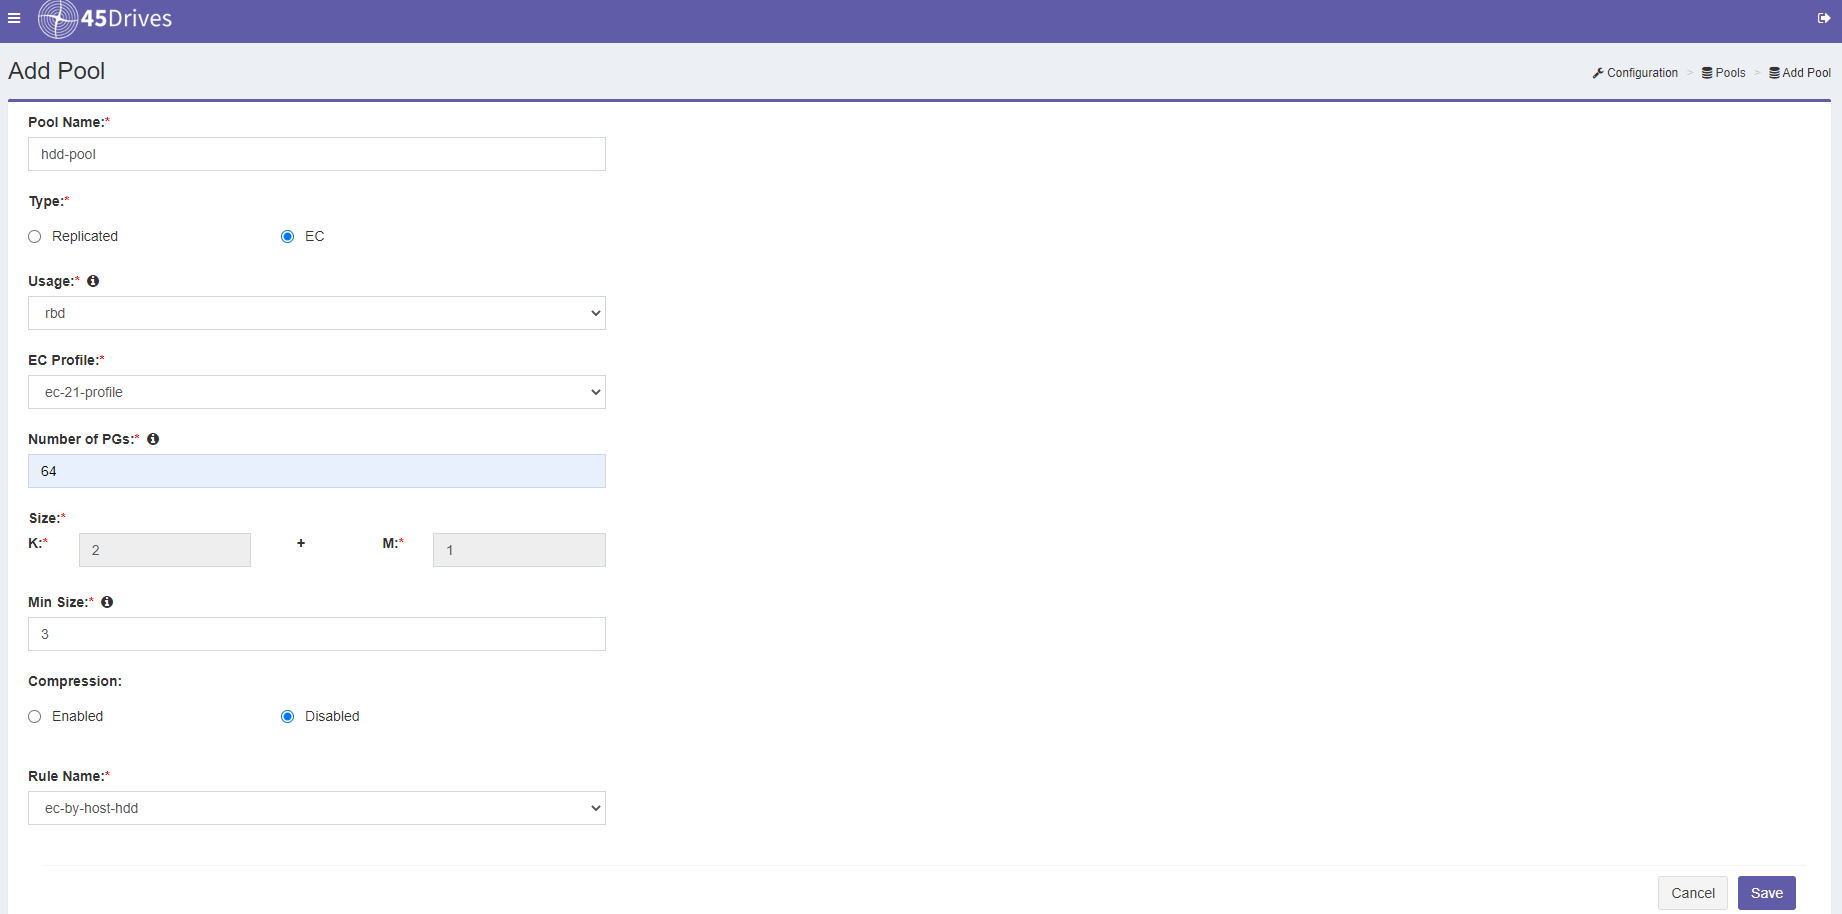
- At this point we are good to go ahead and create our pool. Go to the wrench icon –> pools. On this page, in the top left click “Add Pool“. Give a name for your pool, we named ours “hdd-pool” for reference. We’re going to select “EC” for this example we want the pool to serve out iSCSI disks. So, for usage we will select “rbd” . Next, we select out EC Profile, and we will be selecting “ec-21-profile“which will give us our 2+1 erasure code. We then select our number of PG’s. The PG number is reliant on the size of your cluster in regards to number of OSD’s and the density of those OSD’s. We will choose 64 since this is a very small cluster. The Size is automatically taken care of, which brings us to min size, (This should be greater than or equal to K and less than or equal to K+M) since we set up a 2+1 EC the default is set to 3. Lastly, we must select a rule name, since we created it earlier it’s just a simple matter of selecting “ec-by-host-hdd” and clicking on “save“.
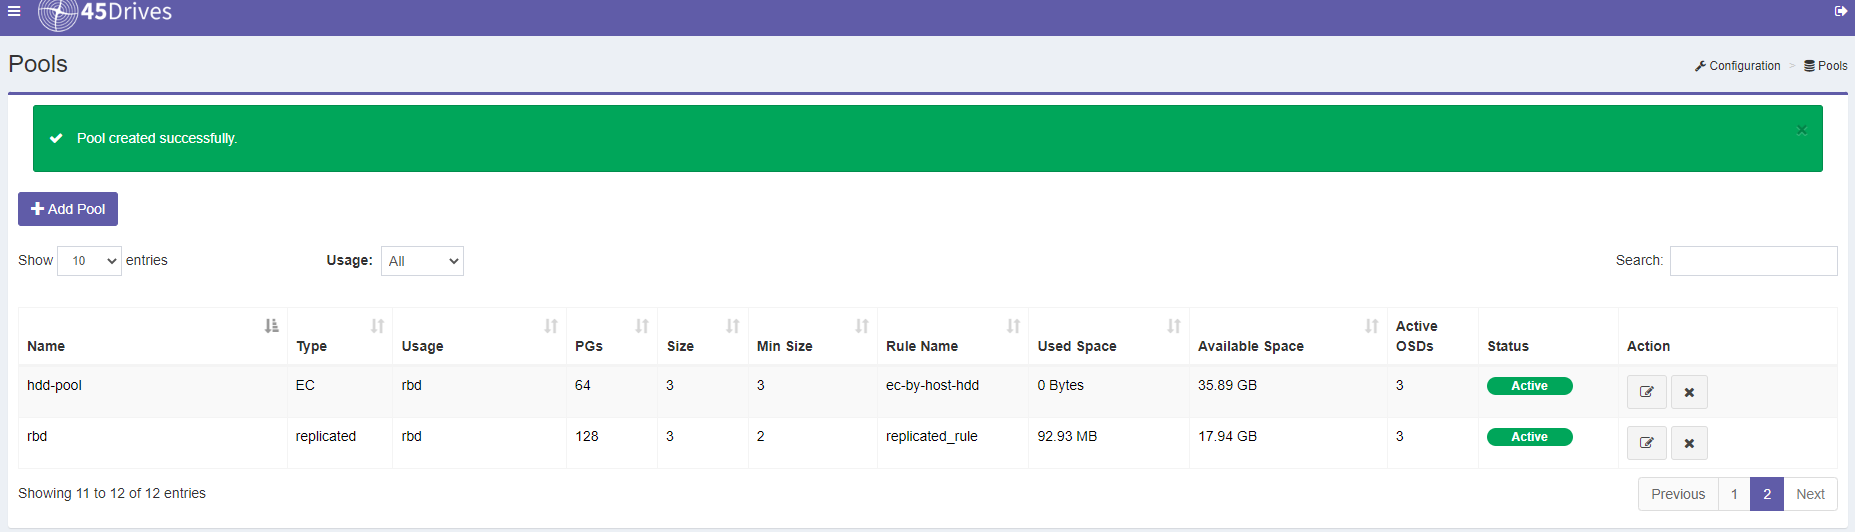
- Once the pool successfully created, you will have a screen similar to the following to verify the pool has been created.
Verification
- If you receive the previous post “Pool created successfully“
- you can also ssh into a PetaSAN node and run “ceph osd pool stats”
Troubleshooting
- If you do not see an option for an EC Profile or Rule Name ensure they were saved.
Views: 763