Scope/Description
- This article will walk through the process of installing and configuring automated zfs snapshots and replication.
- The following process works with Ubuntu20.04 and Rocky Linux 8.
- The tool used to achieve automated snapshots and replication is a open source project called znapzend.
Prerequisites
- 45Drives repository enabled
- ZFS installed and configured
- mbuffer installed on all Storinators
- zfs-auto-snapshot package removed if installed
Steps
Installing Dependencies
- Make sure to install mbuffer and remove the old auto snapshot service on all Storinators you wish to use snapshots to use with znapzend.
apt install mbuffer
apt purge zfs-auto-snapshot

systemctl restart znapzend
- If on Rocky Linux, zfs-auto-snapshot is not present so we only need to verify that mbuffer is installed and restart znapzend.
dnf install mbuffer

systemctl restart znapzend
- In the Houston UI, go to the ZFS tab.
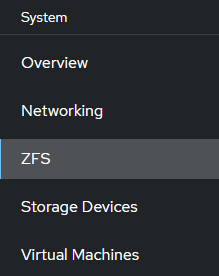
- Select the Dataset you wish to backup. Click the drop down on the left and select “Configure Replication Task”.

- Depending on your use case, you may have different selection in this step. For example, if you are storing the snapshots locally on the system, sending to another pool locally, or sending it to an external location. Each setup is detailed below.
Configuring Snapshots on ZFS Dataset
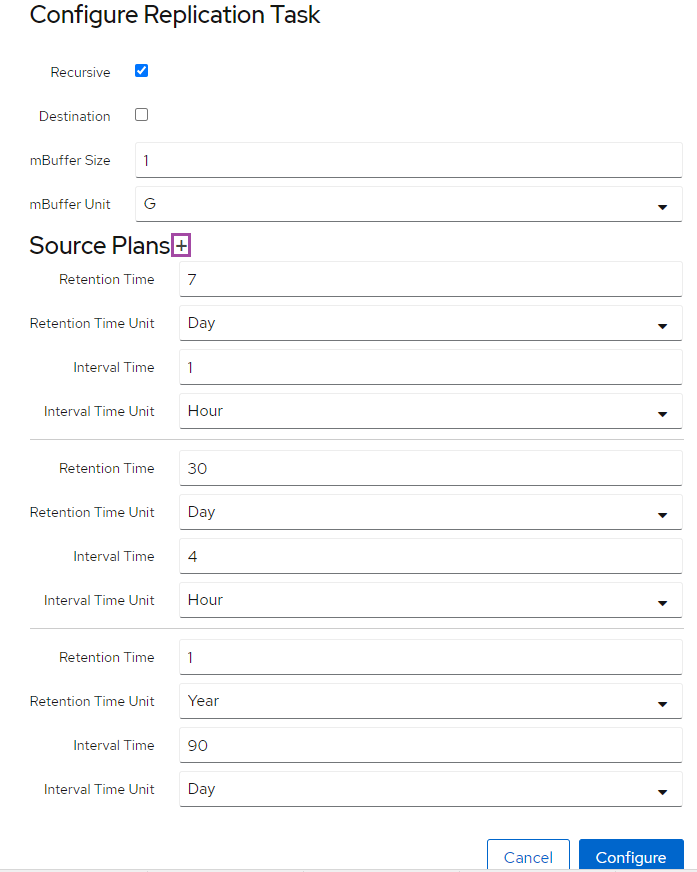
- The screenshot below details a task that takes a snapshot once daily, and retains the snapshots for 1 month. This can be customized to your use case. Also, you can add multiple rules by clicking the +, for example a standard setup would be every hour for 7 days, every 4 hours for 30 days, and every 90 days for a year.
Make sure to restart the znapzend service after any change has been made to snapshot tasks
Configuring Snapshots on Separate Local ZFS Dataset
- Refer to “Configuring Automated Snapshot Task” for Snapshot time configuration.
- Check the “Destination” checkbox at the top of the replication task tab.

- To send a snapshot to another local dataset. Choose your preferred interval/retention times. At the bottom make sure to set a dataset you wish to send the snapshots to.
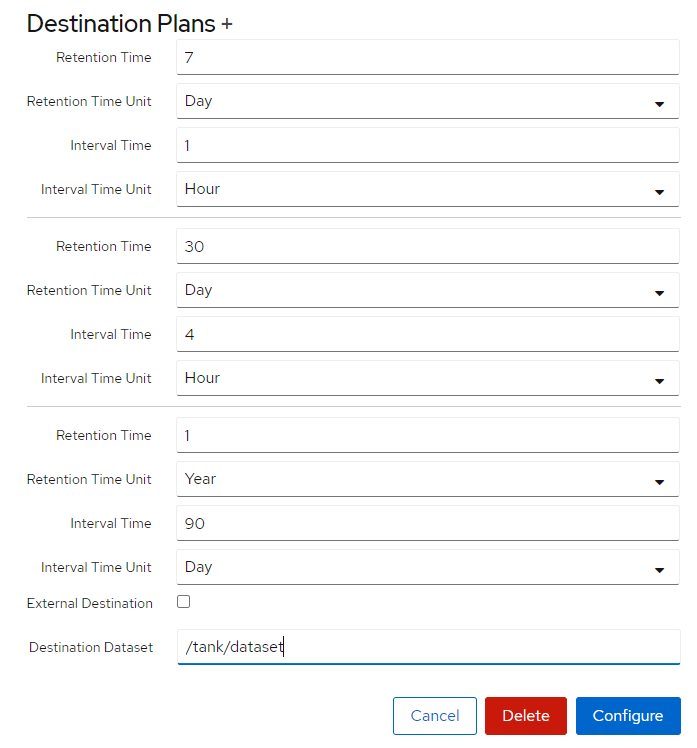
- The time intervals detail how often it will send the snapshot and for how long they will keep the snapshot stored.
Make sure to restart the znapzend service after any change has been made to snapshot tasks
Configuring Snapshots on Remote ZFS Dataset
- To send snapshots to another location, passwordless ssh will need to be configured. Run these commands on the server that has the data being snapshotted.
ssh-keygen (You'll be prompted with 3 questions, just press enter on all 3 until you're returned to the command prompt)

ssh-copy-id root@{Local-IP} (Local Host, You will be asked if you want to continue connecting, say "yes" and then enter the root password.)

ssh-copy-id root@{Remote-IP} (External Host)
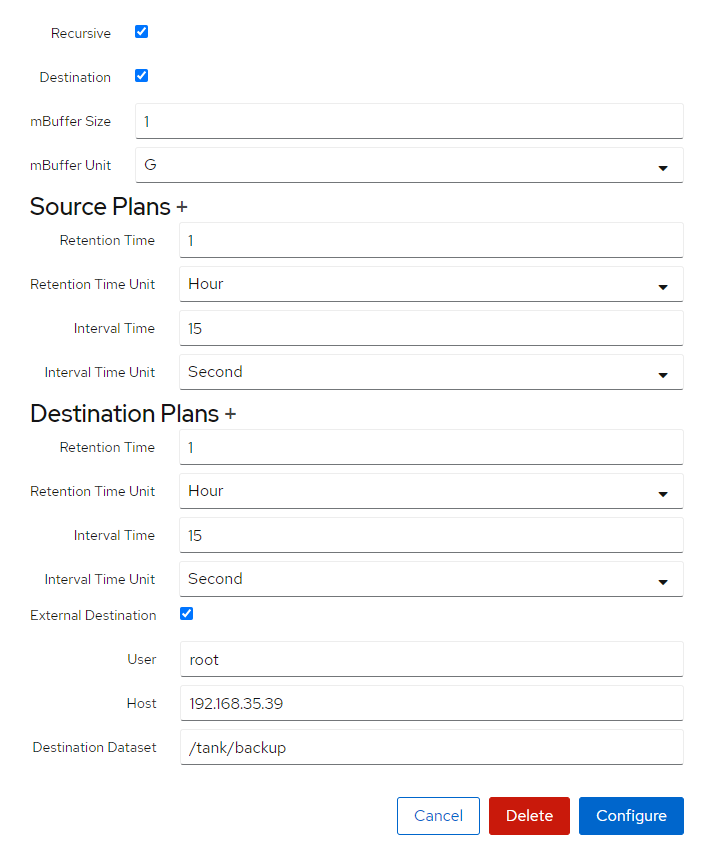
- Now you can configure the snapshot task. Set the interval/retention times as seen in the last two sections. Check the “External Destination” checkbox, and fill out the user and host IP where you want the snapshots to be sent to.
- Ensure the External Destination path is POOL/DATASET and not /POOL/DATASET, where this is a ZFS send/receive it looks for the name of the remote pool and dataset, not the mountpoint on the remote client.
Make sure to restart the znapzend service after any change has been made to snapshot tasks
Verification
- To ensure the snapshots are being created you can go to the Snapshots section of the ZFS to see all snapshots that were created.
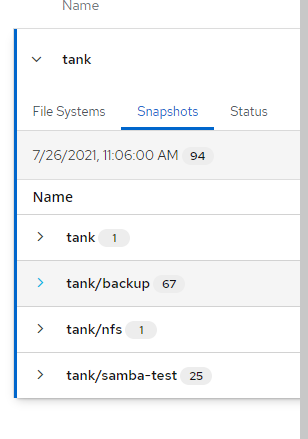
- Check this section on the external location to check if the snapshots are being sent over.
Troubleshooting
- To remove all old existing snapshots use the following:
zfs list -H -o name -t snapshot | xargs -n1 zfs destroy
- Ensure you restart the znapzend service after configuring your snapshot tasks to enable them.
- Ensure you have password-less SSH setup between the local and remote server if doing remote snapshots.
- Ensure the path to the remote dataset is POOL/DATASET and not /POOL/DATASET.
Views: 3096
