Scope/Description
- This article will help you create a ZFS pool and datasets in Houston UI using the ZFS module.
Prerequisites
- Access to Houston UI
- ZFS Module and Packages Installed
- Disk Aliasing Setup with “dmap” if using Device Alias for Disk Identifier
Steps
Accessing the ZFS Tab
- Once we’re logged into Houston, you should see a list of modules. You will see the ZFS tab. Click on this to continue.
Creating the ZFS Pool
- On the top right of the ZFS page you will notice Storage Pools. Click on this to begin creating your first storage pool. When we create a pool with ZFS, we select the drives we want to be part of the first virtual device. We recommend splitting the pool up into multiple vdevs of 15 drives or less for better performance and redundancy. Ideally, the vdevs would be the same amount of drives and the same capacity drives.
![]()
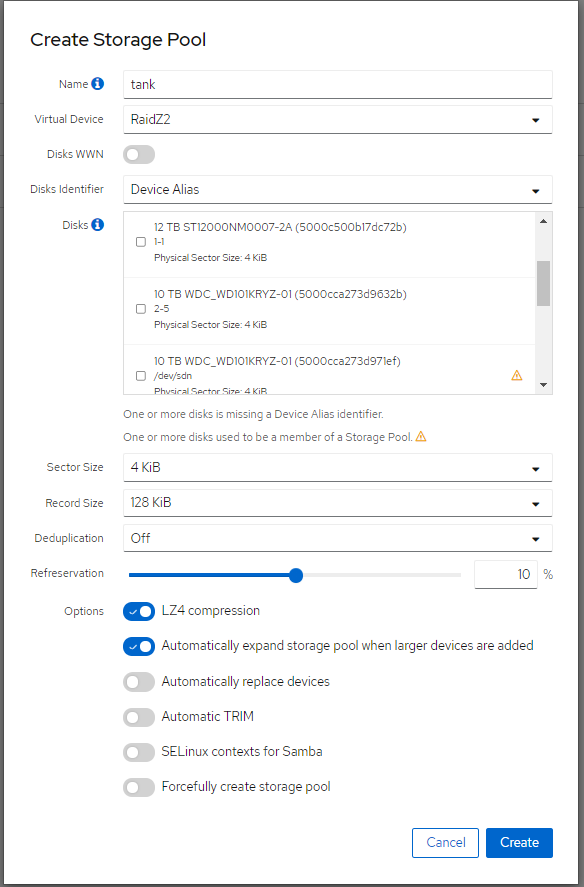
- Provide a name for your new storage pool, in this test environment we have named ours tank.
- Select which raid you would like to use under “Virtual Device“. If you have trouble on deciding on which raid to use, you can view information about the following here.
- Then select your hard drives and click on “Create” to finish. Ensure you uncheck Disks WWN, and then select “Device Alias” so the pool is created with the Disk Aliasing to easily identify drives (i.e 1-1, 1-2, etc.)
We do not recommend setting “refreservation” below 10%. With this disabled we can write to the ZFS Pool/Dataset and fill it entirely, at which point the pool may be unusable and data could be lost.
- Once you have your pool created with 1 vdev, follow these steps to add additional vdevs.
Creating ZFS Filesystem/Dataset
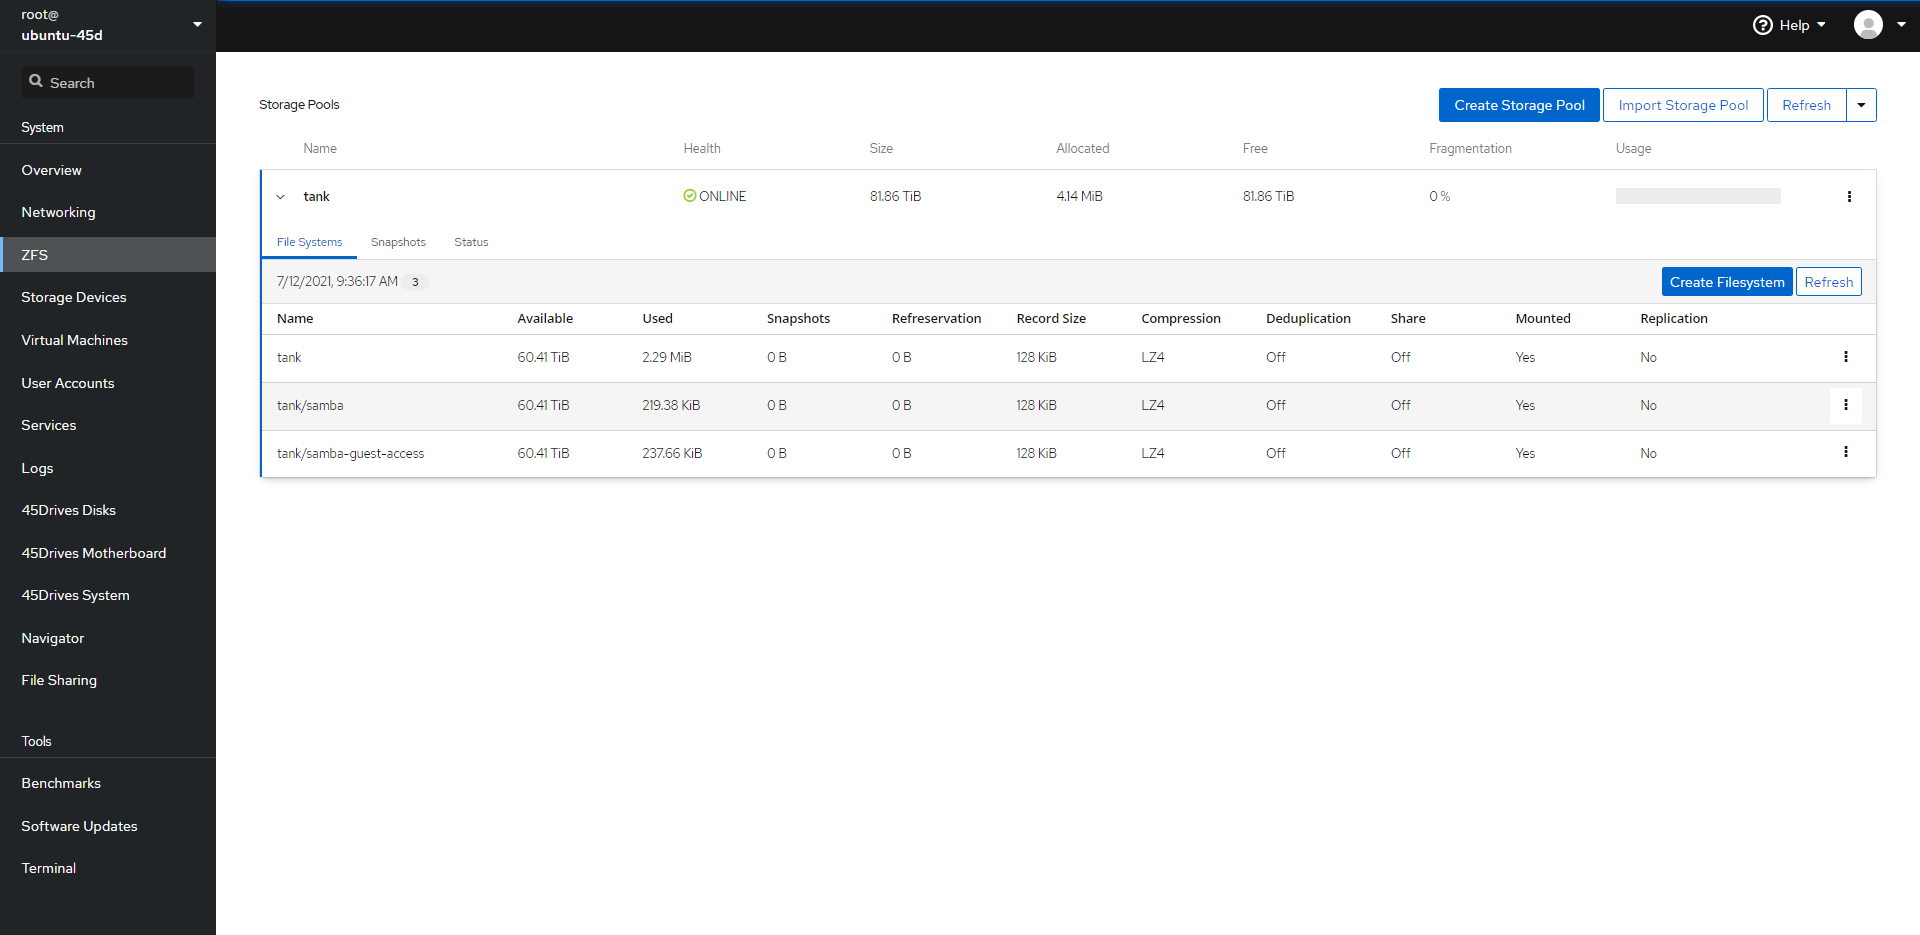
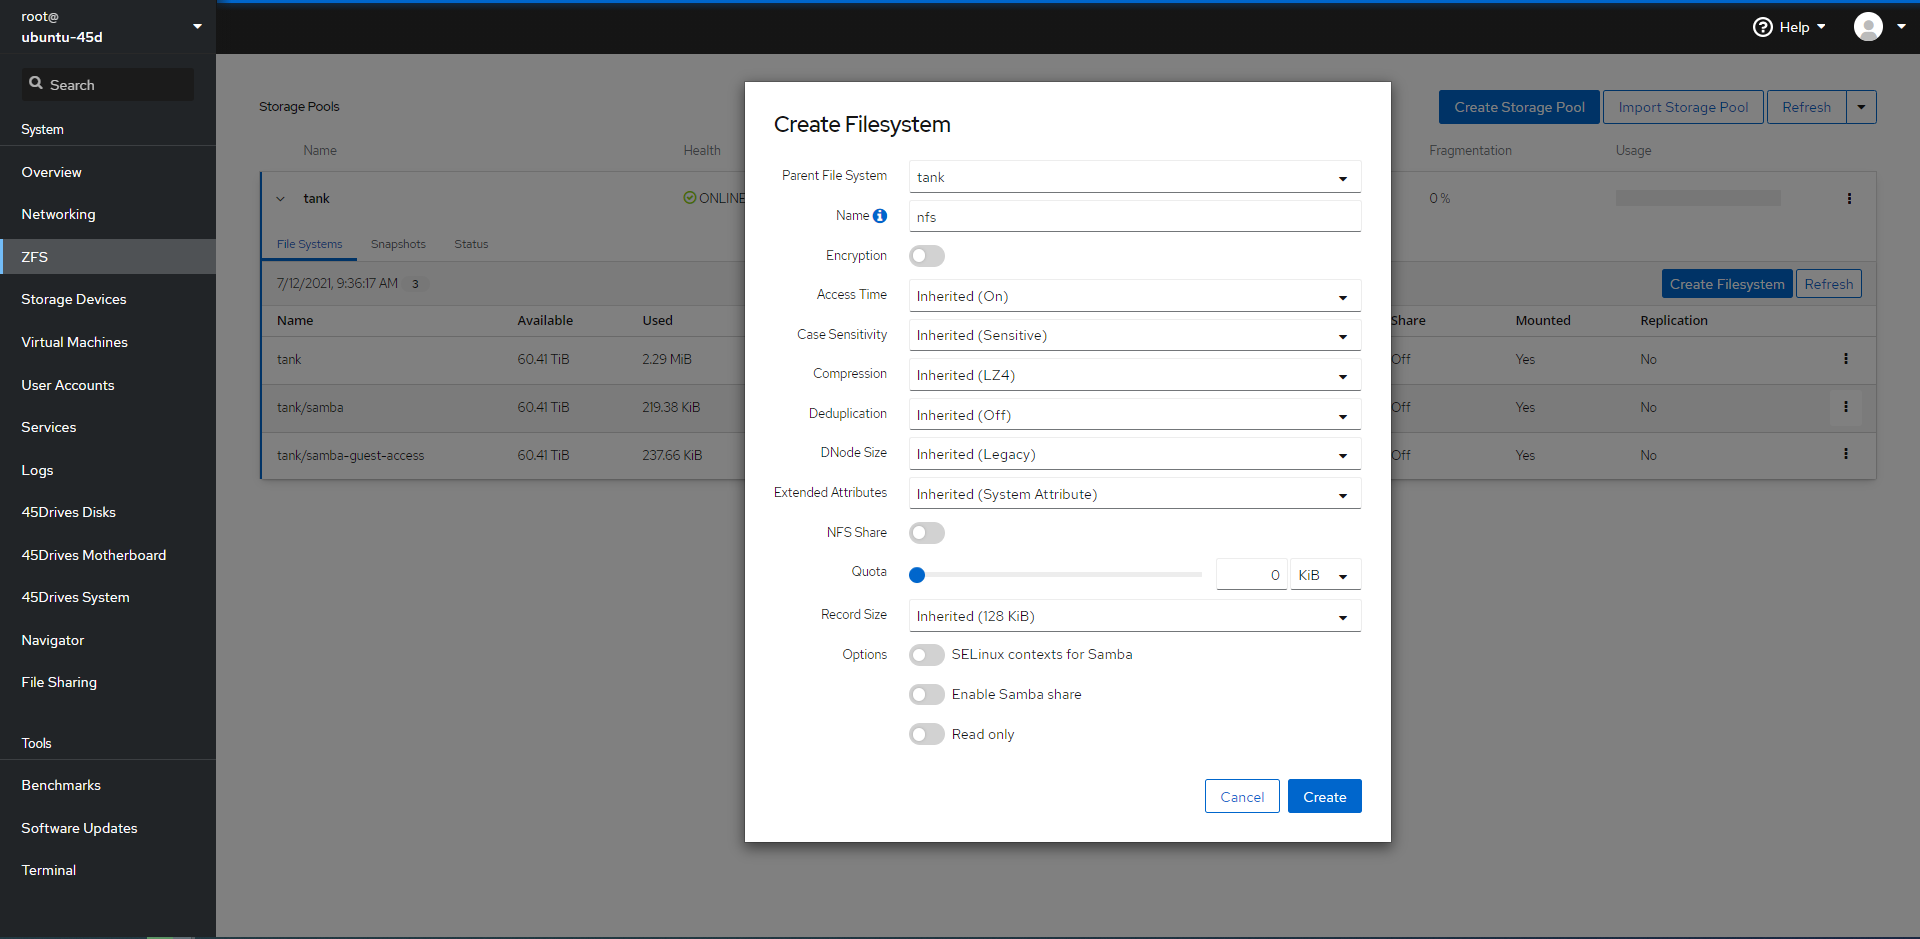
- With your new storage pool created, we can now create some datasets to share out. You will see Create Filesystem. Click on this to continue.
- In the new window that appears, give your new filesystem a name. We can leave all of the options at the default settings. In this example, we have used nfs.
- We can now see our nfs dataset is created.
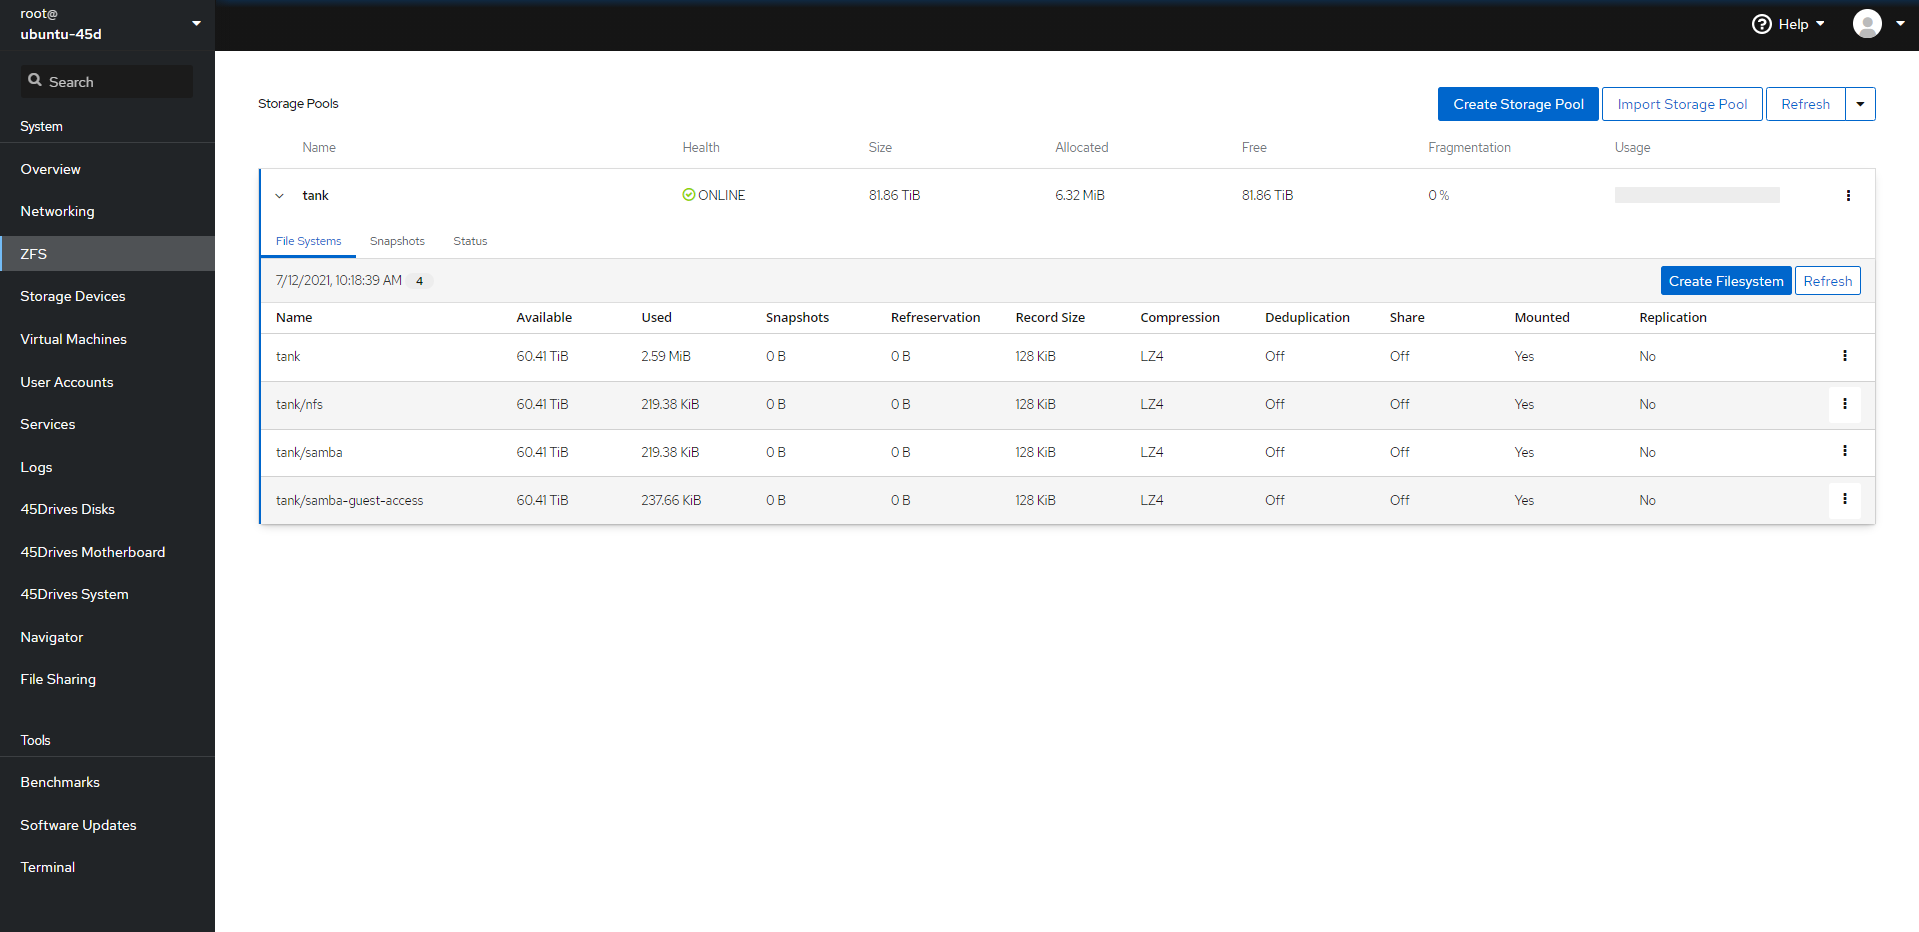
Verification
- You are able to see your ZFS pool, datasets, and drives within the File Systems Tab, and Status Tab within the ZFS module.
- If you are to run zpool status command within the Terminal you should see the output of the ZFS Pool, it’s VDEVs, and Disks.
Troubleshooting
- If you are unable to create the pool, ensure the drives you are using are free of any partitions.
- Ensure the disks you are using to create the pool are of the same size.
Further Reading
Views: 2432