Scope/Description
In this article, we'll run through how to install and setup a PetaSAN cluster specifically for iSCSI use. PetaSAN is a scale-out active/active storage solution offering massive scalability and performance.At the storage level PetaSAN relies on the Ceph storage engine. Ceph is a fault tolerant, self healing and self adapting system. Although PetaSAN uses different underlying technologies that are inherently complex, it provides an integrated end to end solution that is very easy to install and operate. PetaSAN can be operated by non-Linux admins through its easy to use graphical interfaces while still allowing Linux experts full control if they wish. The main use case for PetaSAN with 45Drives solutions is with a VMware vSphere Deployment (iSCSI).
Prerequisites
- PetaSAN follows the same hardware requirements as our standard CEPH offerings, minimum 3 nodes. There is no need for 2U gateway servers for this solution.
- PetaSAN requires at minimum 4 different networks:
-
- 1x Management network (this will run the PetaSAN Dashboard)
- 1x Backend network (replication & OSD Heartbeats)
- 2x iSCSI network (multipathing so you can run either 2 or 4 paths to each LUN)
- It is highly recommended to document the MAC address of all network ports in your system before the install to ensure you're assigning the correct ports to the correct network.
- PetaSAN solutions will leave the 45Drives facility with blank boot drives, as the installation process requires the management network configuration to continue. Either plug the ISO in as virtual media through IPMI, or have the ISO written to a USB stick and boot to that ISO to begin the install process. You’ll only have to do this for one of the nodes, the others will be added into the cluster through the WebUI.
Steps
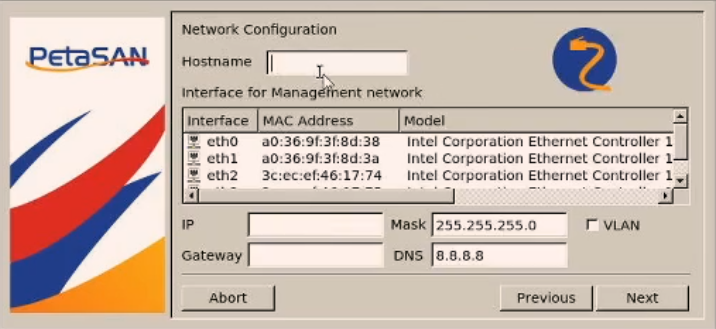
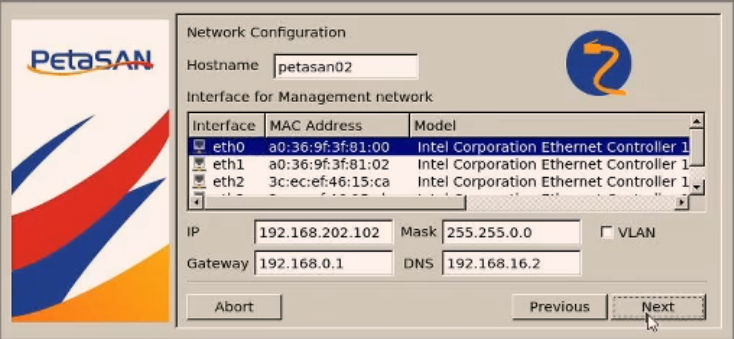
- Boot into the PetaSAN ISO to begin the installation process. Click “New Installation” and click “Next”.Next you’ll get the following screen where you need to set the node's host name, setup your Management Network and select the corresponding port (ideally an onboard port).
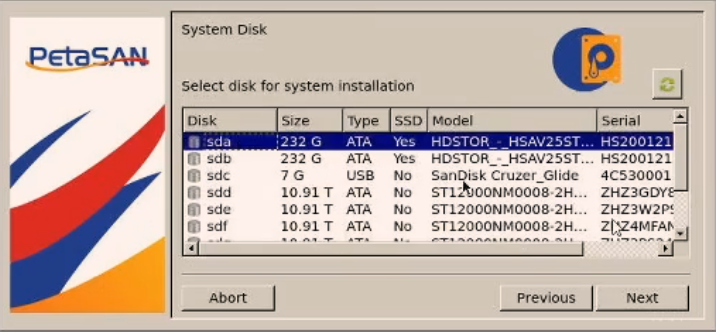
- Next, select one of the boot drives to have the system installed to.
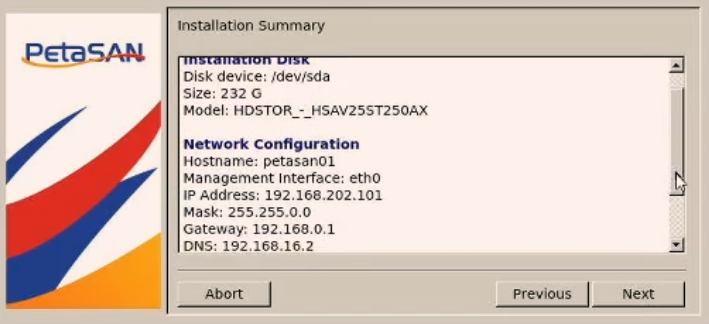
- Click Next, and then select the end user’s Time Zone. Then you’ll be provided an Installation Summary, make sure you verify all information before clicking Next to begin the installation.
The install will take a few minutes, you’ll be notified to remove the installation device upon completion.
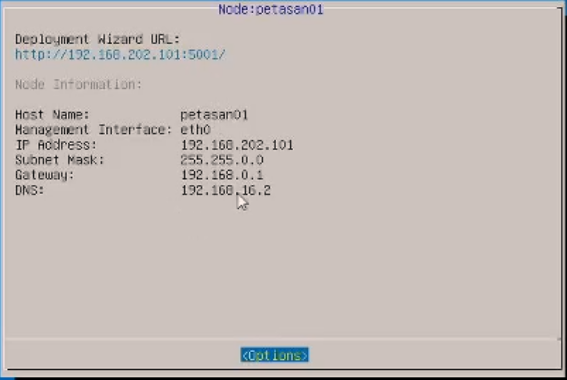
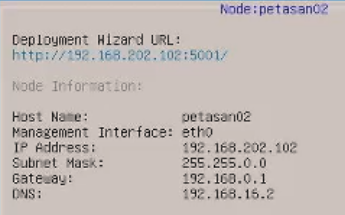
- After a reboot, you’ll see the following screen. Open a browser and enter the “Deployment Wizard URL” to begin configuring the cluster.
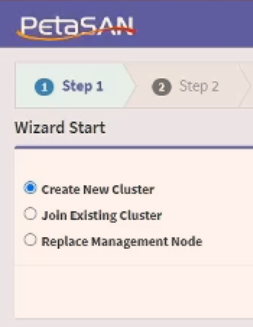
- Once you get to the Deployment Wizard webpage, Step 1 is to Select Create New Cluster and click Next.
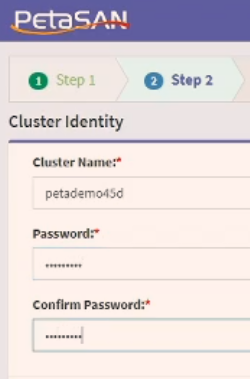
- In Step 2 you’ll be asked to pick a Cluster Name and Password
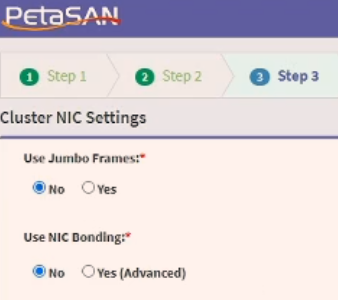
- In Step 3, you’ll be asked if you want to use Jumbo Frames and NIC Bonding, in this example we’ll choose No for both.
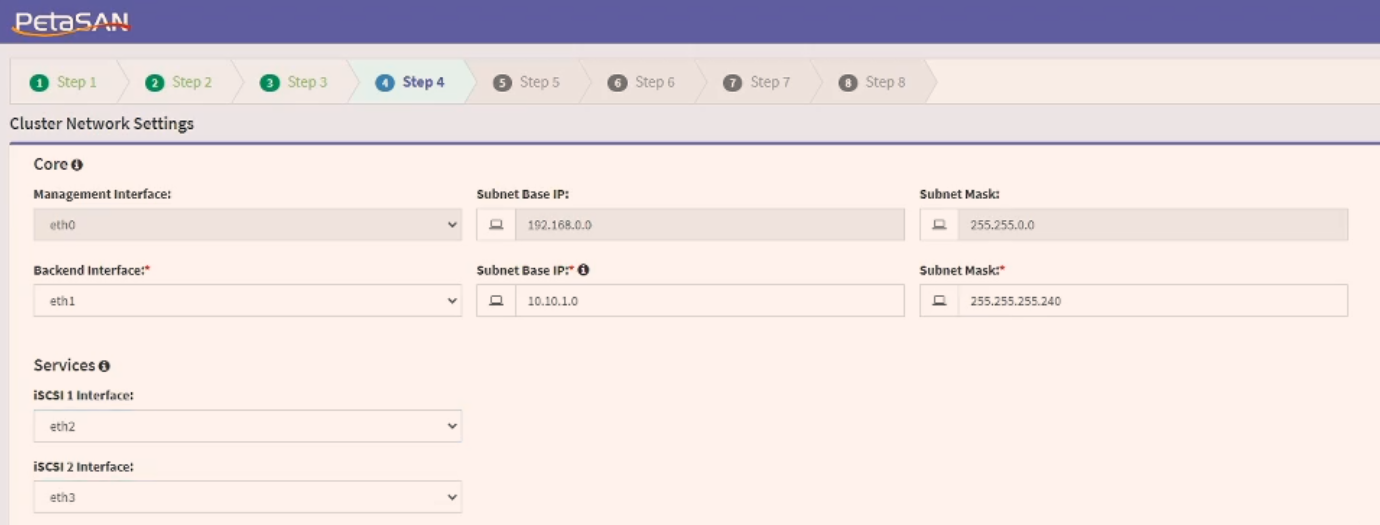
- In Step 4, you’re setting up some Network Settings. The Management Interface was set up during the initial install, now you’ll need to set up the Backend Interface as well as selecting the interfaces for iSCSI. The Backend network here is just an internal network setup as a /28 subnet.
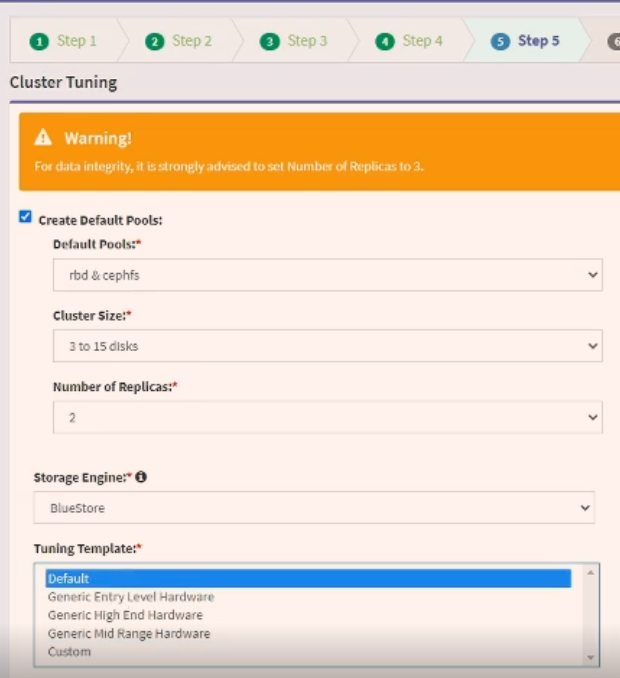
- Step 5 is the Cluster Tuning section of the set up. In there you’ll choose the following:
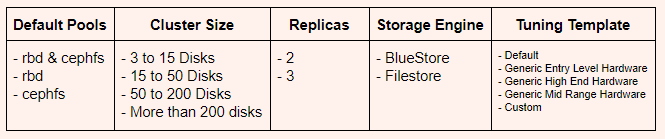
For this pointed iSCSI application, we will choose:
rbd & cephfs
3 to 15 Disks (This will vary depending on hardware being deployed)
2 Replicas
BlueStore
Default
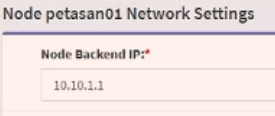
- In Step 6, you’re simply assigning the Backend IP address to the node you’re currently on, in this example it was 10.10.1.1 (remember in Step 4 we assigned the Backend network to be 10.10.1.0 /28)
- In Step 7, we’re selecting the Services we want this node to run, as well as which disks to include in the cluster (OSDs, Journal devices, and cache devices). The services are:
Management and Monitoring Services
Local Storage Service
Backup / Replication Service
iSCSI Target Service
CIFS Service
NFS Service
For this, Local Storage Service and iSCSI Target Service should be selected (Management and Monitoring Services will already be selected)
NOTE: The iSCSI Target Service only needs to be run on 2 of the nodes in the cluster.When it comes to disks, you’ll want to select the HDD’s to be your OSDs, an SSD to be your Journal device as well as another SSD to be your Cache Device. We have a 960GB SSD as our Journal Device and a 250GB SSD as our Cache Device here.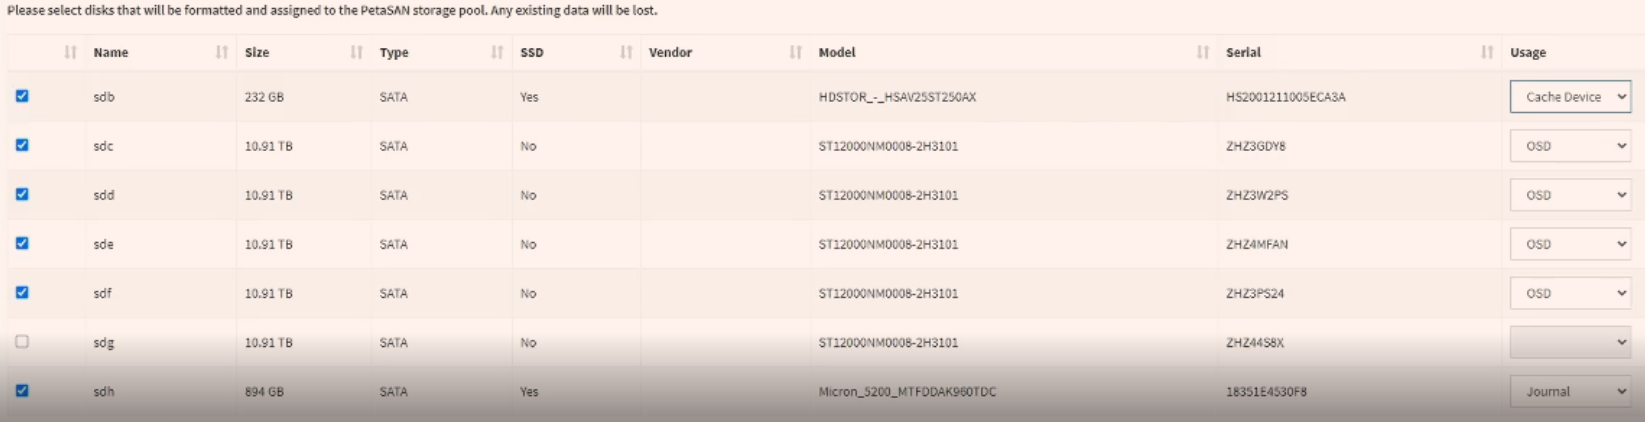
Note: When adding a journal device, the installer defaults to making 3 partitions max on that SSD. So if you have more than 3 OSDs, we can manually fix that up in the dashboard after the install is complete.
- Step 8 is the Final Deployment Stage where it just confirms all the settings picked. You’ll be given a note that says “Node deployment completed successfully. Another 2 nodes need to join for cluster to be built.” Now you’ll want to move onto the next node in the cluster to add it to this configuration.
- Boot to the same PetaSAN ISO that you booted to on the first node, you’ll go through the exact same initial installation of PetaSAN until you reboot and are given the web URL again. This time instead of creating a new cluster, we will select “Join Cluster”. Below is an example of what was chosen for node2:
- After you get through the rest of the steps and reboot, you’ll get to this screen with the Deployment Wizard URL for the corresponding node.
 Type the URL into a browser and select Join Existing Cluster.
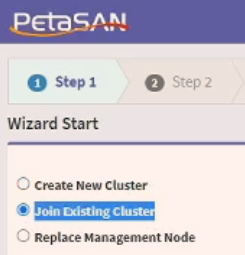
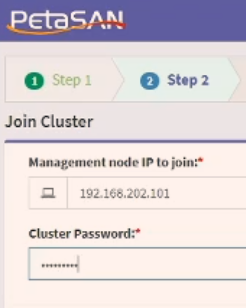
- In the next step, you need to enter the Management node IP of the first node you created the cluster with, in this example that was 192.168.202.101.
- Next we will assign a Backend IP for the current node being entered into the cluster. Note that we had originally set the Backend network to be 10.10.1.0 /28 .
Node 2 - 10.10.1.2
Node 3 - 10.10.1.3
- In Step 7, we’ll follow the exact same layout as on the first node. Select you Services as well as assigned your disks to their proper usage:
Management and Monitoring Services
Local Storage Service
iSCSI Target Service
NOTE: The iSCSI Target Service only needs to be run on 2 of the nodes in the cluster - so if you selected it on Node 1 and Node 2, do not select it on Node 3, 4, etc...
- Click Next, and the system will take a few minutes in its Final Deployment Stage. You’ll be given this message: “Node deployment completed successfully. Another node needs to join for cluster to be built.” Now you’ll want to move onto the next node in the cluster and follow the same steps to add it to this configuration.
- Once you get to the Final Deployment Stage on the 3rd node, this is when the cluster will physically be built - depending on the size of cluster (number of disks per node) it could take 30 minutes or more.
- Once it completes and the cluster is built , you’ll see this screen:
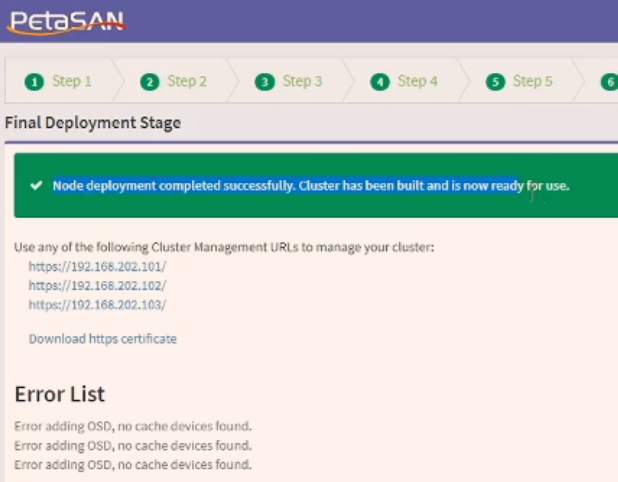 Click on any of the Cluster Management URLS to be brought to the login page for your PetaSAN Cluster.The default login account is admin and the cluster password was set during the installation.
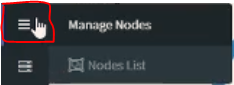
- Once logged in, navigate to the 3rd item in the side panel and then click on Nodes List.
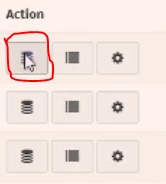
- Once you’re presented with the node list, under the Actions header, click on the button circled below to bring up the Physical Disk List.
- If you recall back to the original install, when you select a Journal device, it defaults to creating 3 partitions maximum on that SSD, so we only have 3 of the 5 OSDs up per node. This can be avoided by not selecting the Journal device during the install process and just manually adding it through the dashboard after the fact. This also would be avoided if there were more Journal devices per node. We need to manually add in the missing OSD on every node.
 For the OSDs that are not listed as UP, click on the little + button shown above and a window will open. Below is an example on how simple it is to add a disk to the cluster, since our Journal / Cache devices were only created with 3 partitions we’re going to add this OSD in with the Journal disk selected as Auto.
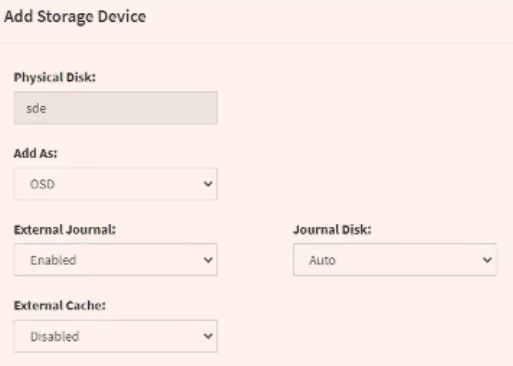
- Repeat this process for every OSD on each node that wasn’t added during the install process. It’ll take a few minutes to have those OSDs reporting as UP in the cluster.
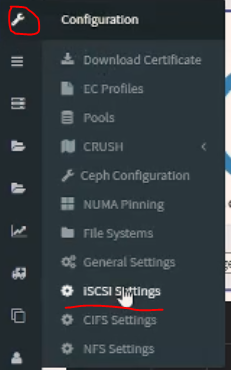
- To start the process of creating an iSCSI LUNs, click on the wrench, and go down to iSCSI Settings.
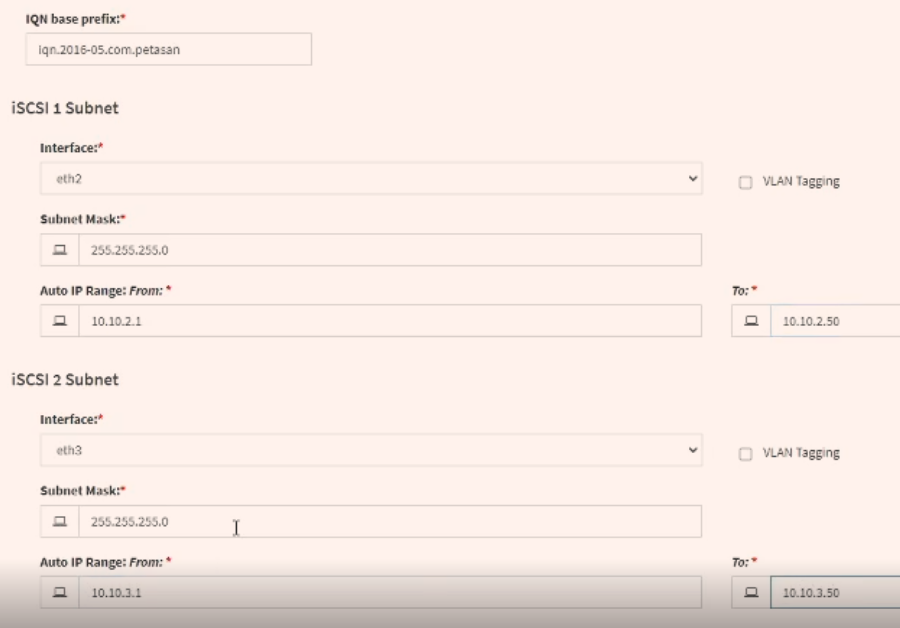
- Each iSCSI path can be on a separate subnet. You will have to add enough IP’s in the range to accommodate all of the iSCSI LUNs you want, and you can always increase the range later if needed. Once done here make sure it click Save.
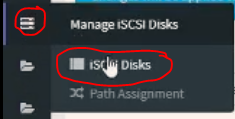
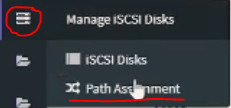
- To add an iSCSI Disk, navigate to the fourth option in the side panel, and go down to iSCSI Disks.
- Once there, click on the + Add iSCSI Disk. You’ll be brought to a new page where you’ll have some information to fill out. You’ll need to pick a Disk Name, Disk Size, Pool type, iSCSI Subnet (can choose both), If you want to enable Password Authentication and ACLs.
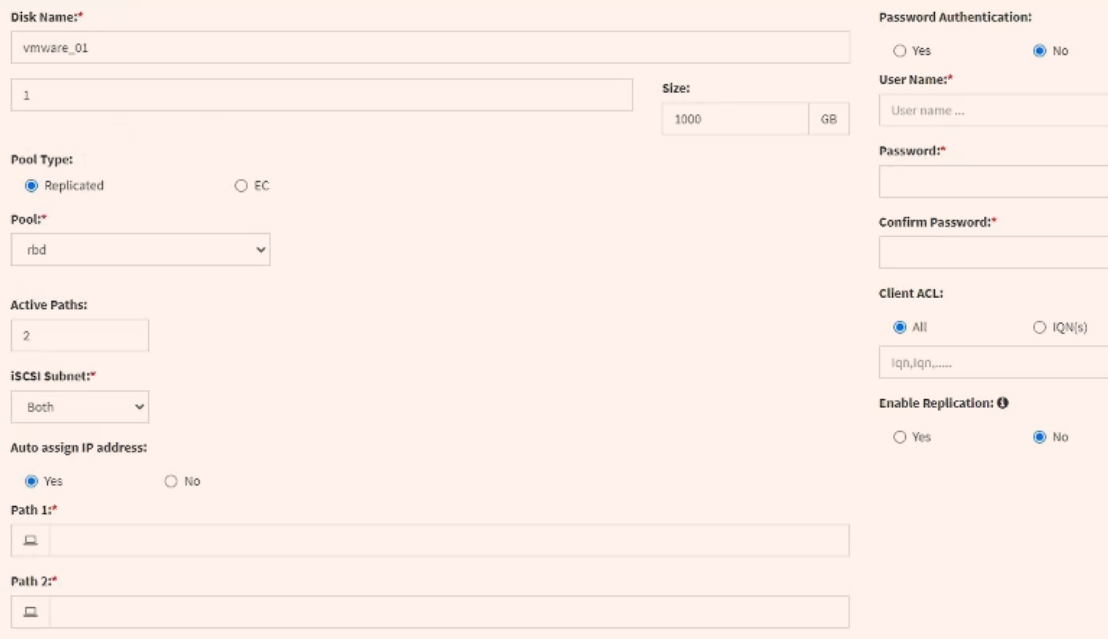 If you have a dedicated data pool for erasure coding, you can select EC and the second pool will become available in the drop down list. You can have up to 4 paths per lun, 2 on each subnet. You also can decide whether you want to assign the IPs or just let PetaSAN do it. The replication is for disaster recovery, if you have a second cluster you can replicate block devices to that second cluster. When you’re finished, make sure to click Save. It will take a few moments, but the iSCSI DIsk will start up automatically.
- Once the iSCSI Disk is started, we'll head over to the Path Assignment
- Once in here, you will see the IP address for each of the nodes which we enabled the iSCSI Target Service on.
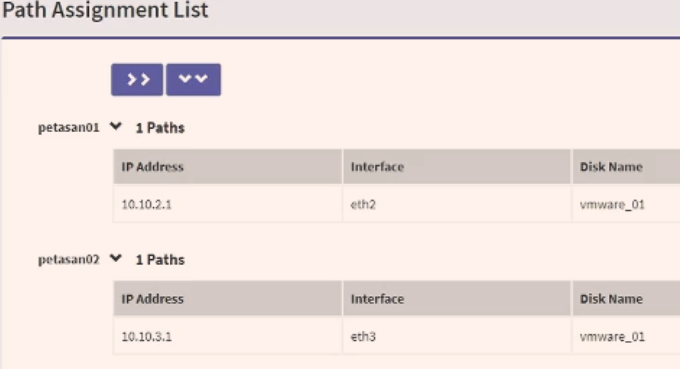 Now as long as VMware is correctly configured, you will now be able to set up iSCSI multipathing with round-robin. This will allow similar performance to LACP, where VMware will be able to pull from all paths.