KB450190 - Mounting IPMI virtual media
Posted on December 13, 2019 by Rob MacQueen

| 45Drives Knowledge Base |
KB450190 - Mounting IPMI virtual media https://knowledgebase.45drives.com/kb/kb450190-mounting-ipmi-virtual-media/ |
This article details the process of mounting virtual media within the IPMI UI.
IPMI Access to the Server
Latest Version of Oracle Java or openjdk package installed on your system before attempting to open the IPMI KVM.
To mount virtual media, connect to the IPMI web interface of the system by entering its IP address into the web browser on a client system.
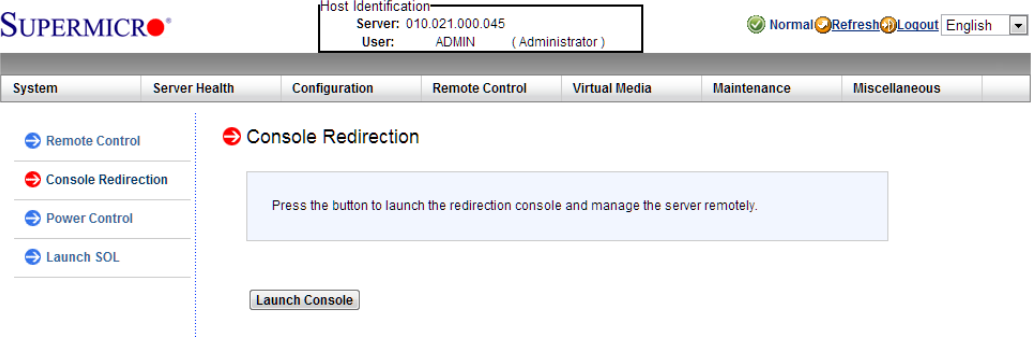
 Navigate to Remote Control > Console Redirection, then click on Launch Console. Depending on your browser and BMC hardware, this will either launch the console immediately, or it will download a file called “launch.jnlp”. Open the launch.jnlp file after it downloads to your system.
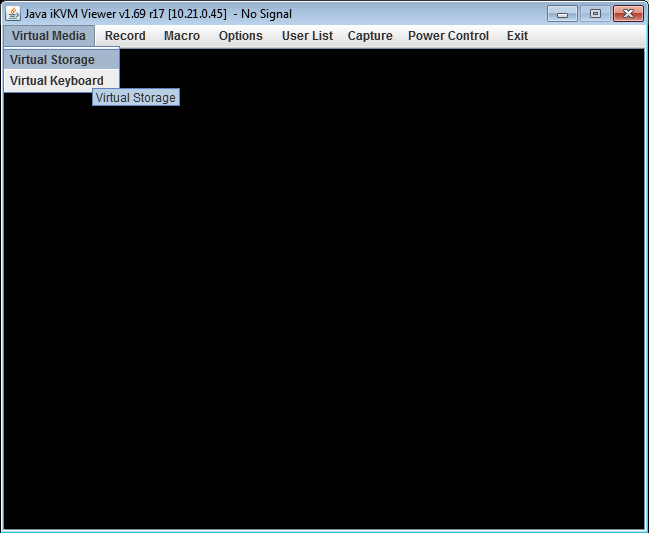
 Once the console redirection window is open, select the Virtual Media menu option in the upper left of the window, then select Virtual Storage.
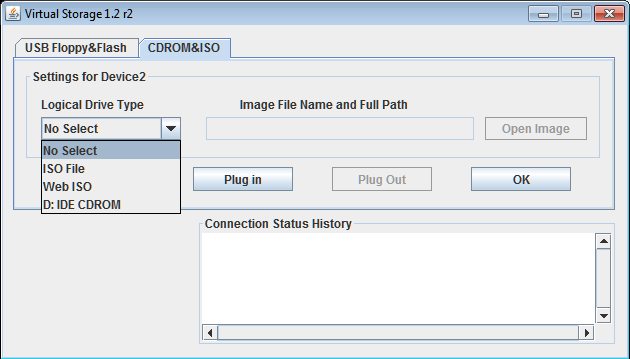
 Click on the CDROM/ISO tab, then select ISO File from the Logical Drive Type from the drop-down list.
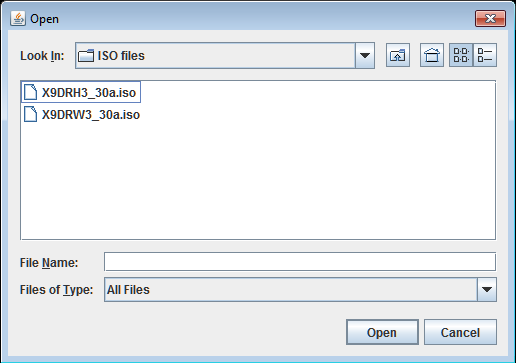
 Click on the Open Image button to the right to browse local folders on your client system for the .iso file. Select an .iso and click on Open.
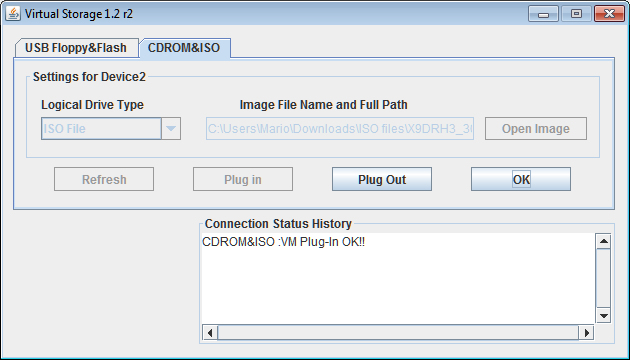
After selecting the .iso file, click on the Plug In button below to ensure that the file is now mounted as a virtual CDROM device. Click on OK to close the Virtual Storage window.
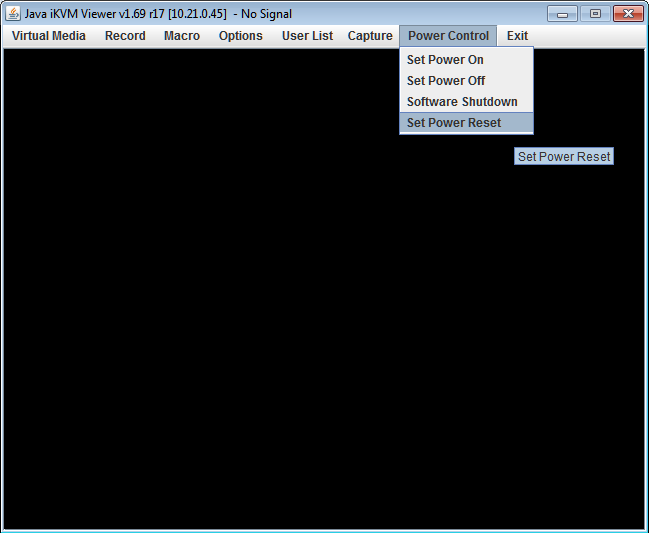
Use the remote console to reboot the system. This can be done with the Power Control menu item to send a physical chassis power reset, or by a soft reboot from the operating system.
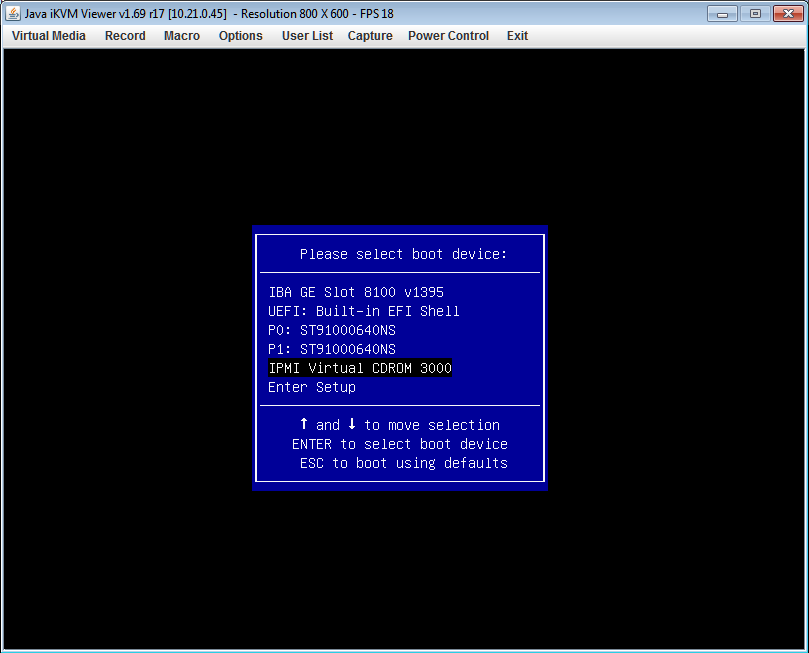
 Hit <F11> during POST to open a one-time boot menu. Navigate with the arrow keys and highlight IPMI Virtual CDROM from the list, then hit <Enter> to accept and boot from the virtual media.